
Note. The manufacturer recommends checking the belt tension and controlling it during adjustment using a special strain gauge tester. In this regard, there are no data on the magnitude of the force when the belt branch is deflected by a certain size in the technical documentation. In practice, you can initially approximately estimate the correct belt tension according to «rule of thumb»: press on the belt branch with your thumb and determine the deflection with a ruler. According to this universal rule, if the distance between the centers of the pulleys is between 180 and 280 mm, the deflection should be approximately 6 mm.
There is another way to pre-check the belt tension by twisting its leading branch along the axis. If the branch can be twisted more than 90°by hand, the belt is loose.
These methods can only diagnose excessive belt loosening, so contact the service to accurately check and adjust the tension.
Replace the timing belt if, upon inspection, you find:
- traces of oil on any surface of the belt;
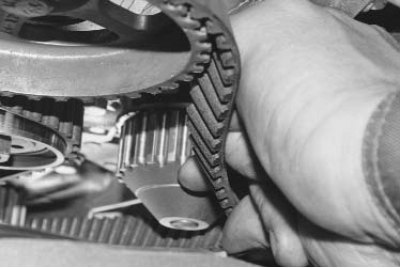
- signs of wear of the toothed surface, cracks, undercuts, folds and delamination of the fabric from the rubber;
- cracks, folds, depressions or bulges on the outer surface of the belt;
- fraying or delamination on the end surfaces of the belt.
Attention! Be sure to replace a belt with traces of engine oil on any of its surfaces, as oil quickly destroys rubber. Cause of oil on the belt (usually this is a violation of the tightness of the seals of the crankshaft and camshaft) eliminate immediately.
Note. Carry out work on a viewing ditch, overpass or, if possible, on a lift.
You will need: All tools needed to remove the accessory drive pulley and both timing belt covers, plus a wrench «on 10» and a special key for turning the tension roller or round-nose pliers with bent jaws.
1. Set the piston of the 1st cylinder to the TDC position of the compression stroke and remove the accessory drive pulley and the lower cover of the timing belt (see «Setting the piston of the first cylinder to the TDC position of the compression stroke»).
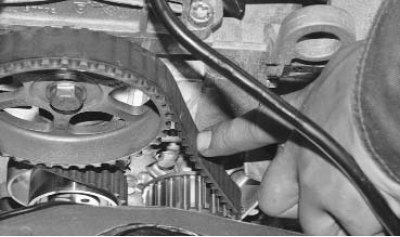
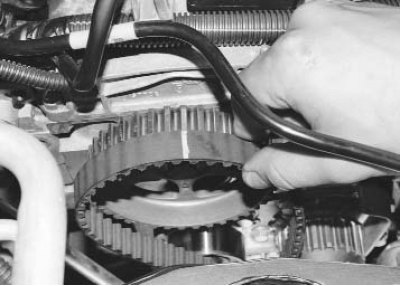
2. Remember or mark in any way the position of the tension roller relative to the axis, loosen the roller fastening nut...
3.... and turn the roller clockwise, thereby loosening the tension of the timing belt.
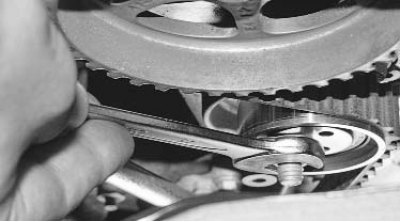
4. Having removed the belt from the toothed pulleys of the water pump...
5....camshaft...

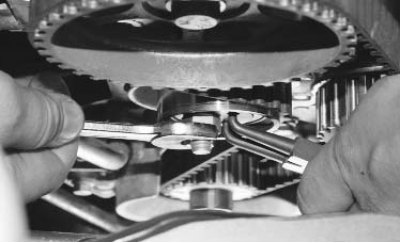
6.... crankshaft and tension roller...
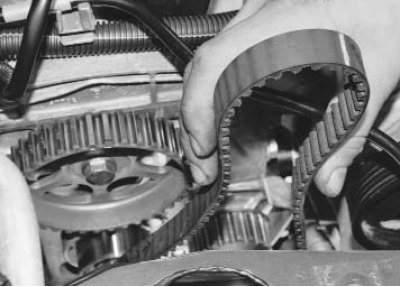
7.... remove the belt from the car.
Note. The original belt must be marked with arrows indicating the direction of its movement when the engine is running. If there are no such arrows, and the belt is not removed for replacement, apply them in any way possible (for example, a marker), to return the belt to its original position.
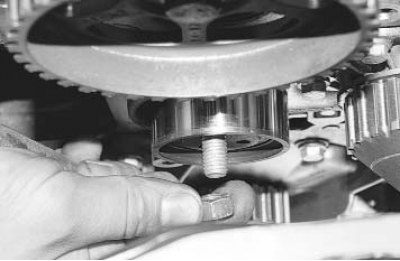
8. To replace the tension roller, finally unscrew the nut of its fastening...
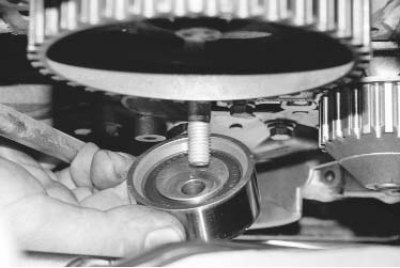
9.... and remove the video.
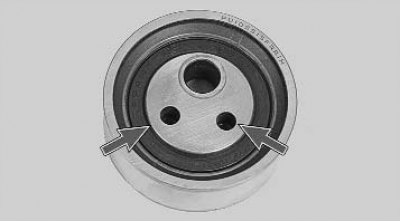
10. Install a new tension roller in the reverse order of removal. In this case, the holes for a special key should be directed outward.
Note. The replacement of the tension roller is shown in the process of replacing the timing belt. However, if necessary, you can replace the roller without removing the belt.
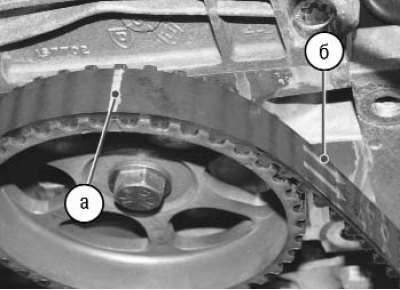
11. Install the belt first on the camshaft pulley, orienting it with arrows b (or self-drawn arrows) in the direction of travel when the engine is running, as well as aligning the mark a with the alignment mark on the pulley, and then, pulling the leading branch onto the water pump pulley...
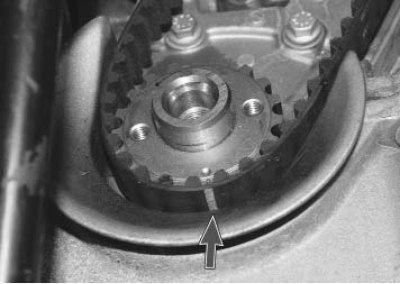
12.... and on the crankshaft pulley, also aligning the risk on the belt with the alignment mark on the pulley. Then install the belt on the tension roller.
13. Tension the belt by turning the tension roller counterclockwise until the marks made earlier coincide, and tighten the roller fastening nut.
14. Install the auxiliary drive pulley on the crankshaft and rotate the crankshaft for the pulley mounting bolt two turns. Check the matching of the alignment marks on the pulleys of the camshaft and crankshaft (see «Setting the piston of the first cylinder to the TDC position of the compression stroke») and belt tension (see at the beginning of this subsection).
15. After checking the coincidence of the alignment marks and the belt tension, remove the accessory drive pulley, and then install all the removed components and parts in the reverse order of their removal before replacing the belt.
16. Adjust the tension of the accessory drive belt (see «Checking the tension of the accessory drive belt»).