



A sign that the front crankshaft oil seal needs to be replaced is oil leaking from its edge. The oil is splashed by the rotating crankshaft pulley, causing the entire front of the engine and the timing belt to become oily.
The reason for the clutch discs becoming oily may be a leak in the primary shaft seal of the gearbox or the rear seal of the crankshaft.
Motor and transmission oils have different smells, so with a certain amount of skill you can determine by smell which of the seals is defective.
Note: There is another way to determine the type of oil. Drop the oil into water poured into a vessel in a thin layer (you can fall into a puddle). The transmission oil will spread across the entire surface of the water in the form of a rainbow film, while the motor oil will remain in the form of a drop, similar to a grain of lentil.
You will need: all the tools needed to remove the timing belt (see "Replacing and adjusting the belt tension, replacing the timing drive tension roller"), gearboxes (see "Removal and installation of the gearbox"), clutches (see "Removing and installing the clutch"), flywheel (see "Removal, installation and defect detection of the flywheel"), as well as a screwdriver and a hammer.
To replace the front crankshaft oil seal, follow these steps:.
1. Disconnect the wire from the negative terminal of the battery.
2. Remove the timing belt (see "Replacing and adjusting the belt tension, replacing the timing drive tension roller").
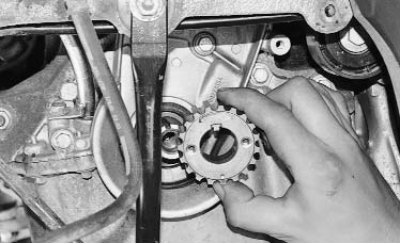
3. Remove the crankshaft timing pulley.
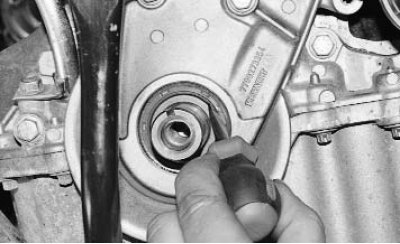
4. Using a screwdriver, remove the seal from the holder.
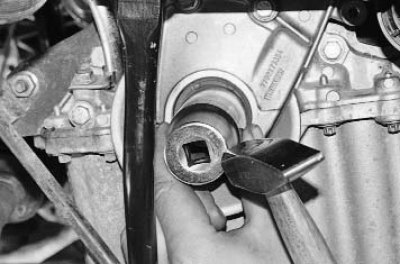
5. Lubricate the working edge of the new oil seal with engine oil, install it in the holder, orienting the working edge inside the engine, and press the oil seal into the holder until it stops using a mandrel. You can use a suitable-sized head from a tool kit or an old oil seal as a mandrel.
6. Install all removed parts and assemblies of the timing mechanism in the reverse order of removal.
Note: Pre-tighten the accessory drive pulley mounting bolt to 20 N·m (2.0 kgf·m) and then tighten it further by 68° ±6°.
7. Adjust the timing belt tension (see "Replacing and adjusting the belt tension, replacing the timing drive tension roller") and the accessory drive belt (see "Checking the tension of the auxiliary drive belt").
To replace the rear crankshaft oil seal, perform the following operations.
1. Remove the gearbox (see "Removal and installation of the gearbox").
2. Remove the clutch (see "Removing and installing the clutch").
3. Remove the flywheel (see "Removal, installation and defect detection of the flywheel").
4. Inspect the seal. If it has lost its tightness, oil will be visible at the bottom.
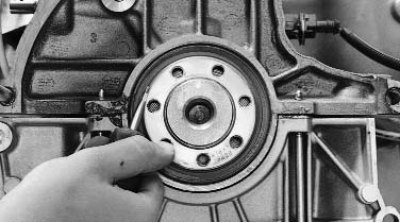
5. Using a screwdriver, remove the seal.
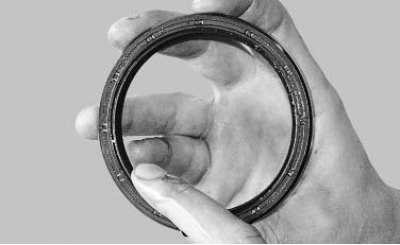
6. Lubricate the working lip of the new oil seal with engine oil...
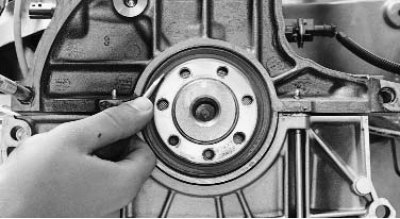
7. ...install it into the cylinder block socket, orienting the working edge inside the engine, and carefully tuck the working edge onto the crankshaft journal.
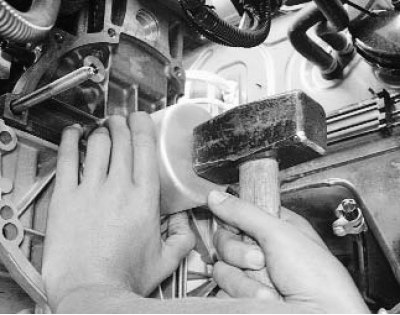
8. Press the seal into the socket until it stops using a mandrel of a suitable diameter.
Note: An old oil seal can be used as a mandrel.
9. Install the removed components in the reverse order of removal.
Text of the original source on this website www.RENAULTBOOK.ru
Attention! Be sure to replace the flywheel mounting bolts with new ones. Reusing them is not allowed.
Note: When installing the flywheel, lubricate the threaded portion of the flywheel mounting bolts with Loctite Frenetanch or similar thread locking compound. The tightening torque of the flywheel mounting bolts is 50–55 N·m (5.0–5.5 kgf·m).