
Disassembly
1. Drain the coolant from the engine cooling system.
2. Remove the air filter unit.
3. Remove the attachment drive belt.
4. Remove the crankshaft pulley.
5. Remove the timing belt.
6. Remove ignition coils.
7. Remove rocker cover.
8. Remove the cylinder head.
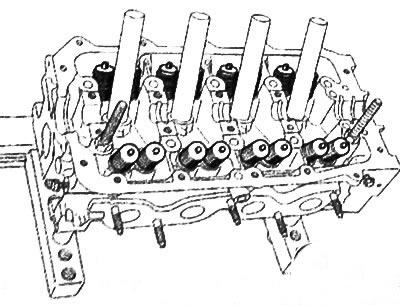
9. Install the cylinder head on a special stand (Mot. 1573).
10. Remove the exhaust manifold.
11. Loosen the bolt (2) camshaft sprocket using the sprocket lock (Mot. 799-01).
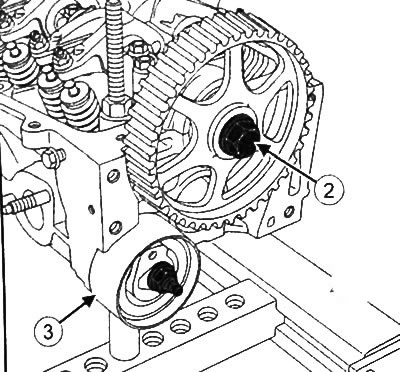
12. Remove the camshaft sprocket.
13. Loosen the toothed belt tensioner nut.
14. Remove the tension roller (3) toothed belt.
15. Remove the camshaft seal from the timing drive side.
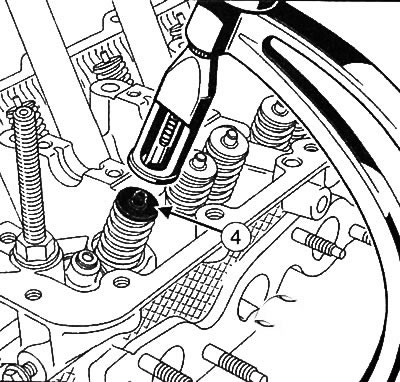
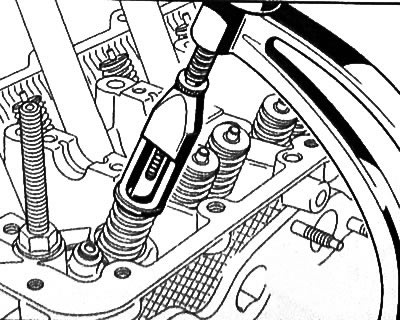
16. Loosen the bolts (4) lifting eye.
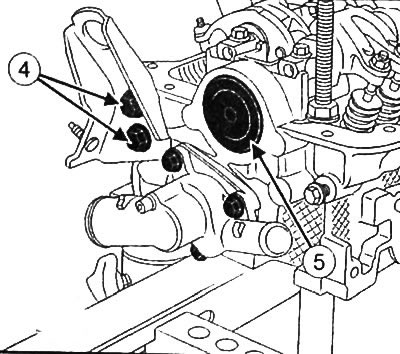
17. Remove the lifting eye from the cylinder head.
18. Remove the cooling chamber from the cylinder head.
19. If equipped, remove plug (5) distributor end.
20. Remove the spark plugs.
21. Remove camshafts (see related section below).
22. Mark the location of all valves relative to the cylinder head.
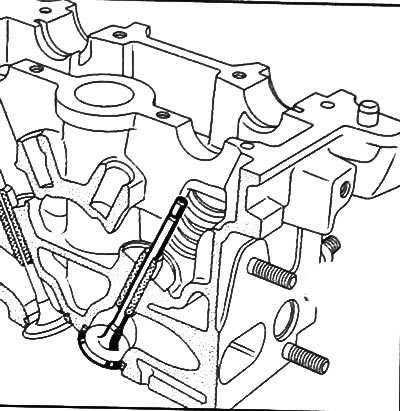
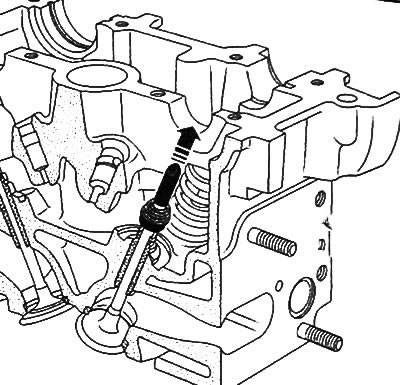
23. Remove the valves from the cylinder head:
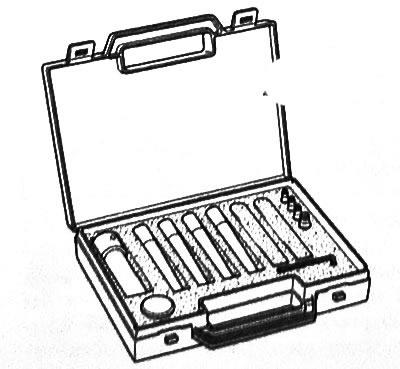
Note: Use a special tool to compress the valve springs (Mot. 1502).
For proper valve spring compression, it is very important that the piston (2) fixtures (Mot. 1502) was centered on the valve stem (4).

The valve disc must fit into the body (1) nests (3) valve spring compressors (Mot. 1502).
tweezers (5) extract crackers.

Remove the valve disc, valve spring and valve itself.
Note:
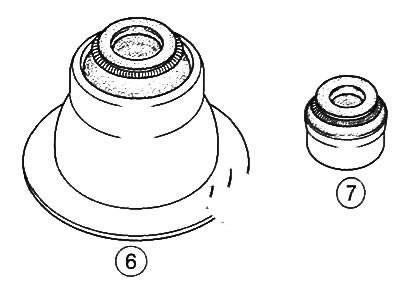
There are two types of oil seals:
- oil seal with lower spring retaining washer (6),
- slinger cap without lower spring retaining washer (7).
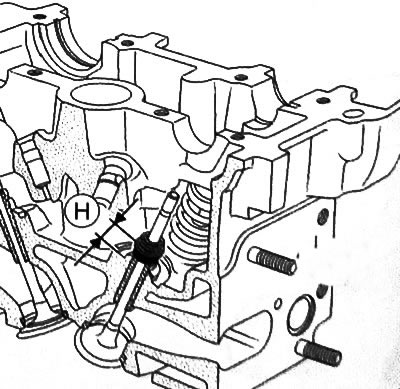
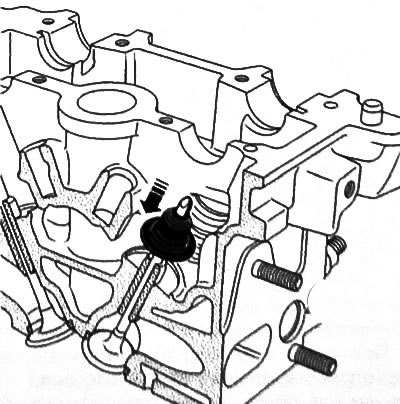
24. Only slinger caps without lower spring retaining washer:
Note: Before removing the valve stem seal, it is important to note the size (H) old valve stem seals on the intake and exhaust sides (the installation size of the caps for inlet and outlet may differ).
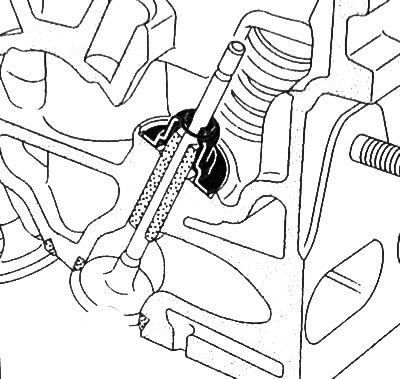
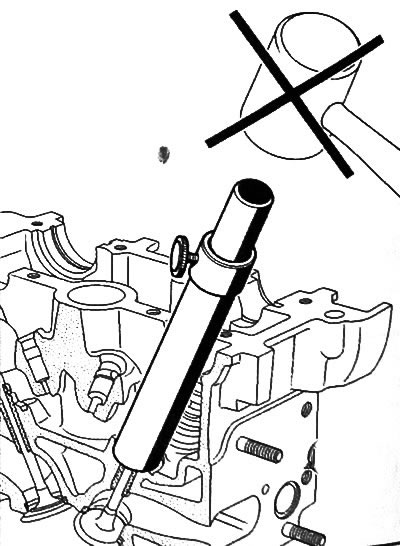
- Install the valve to mark the installation dimension (H) old slinger cap with lower locking washer are screwed in using a tool for installing slinger caps (Mot. 1759) or a kit for installing oil seals.
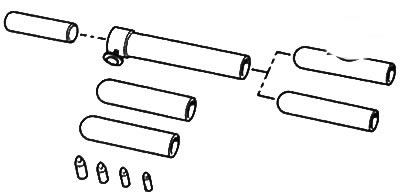
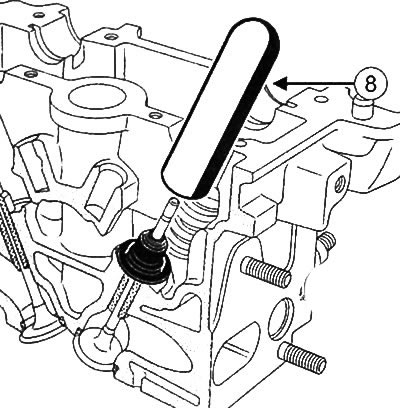
- Install mandrel (8) tools for pressing oil seals (Mot. 1759) on the oil cap.
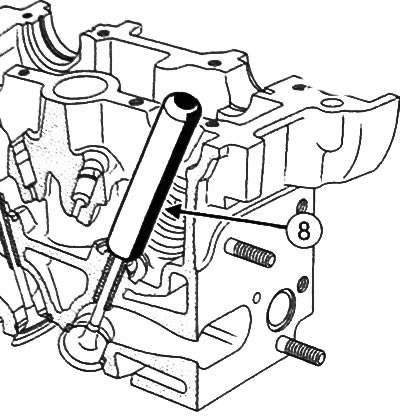
Note: The inner diameter of the mandrel must be identical to the diameter of the valve so that the bottom of the mandrel covers the metal upper section of the valve stem seal.
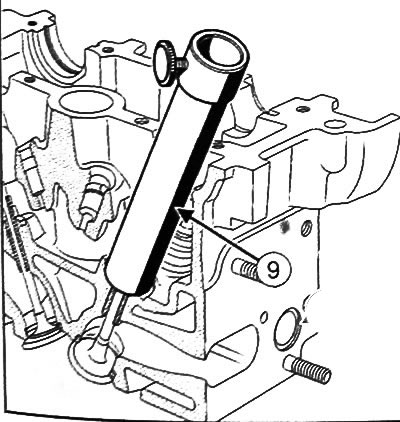
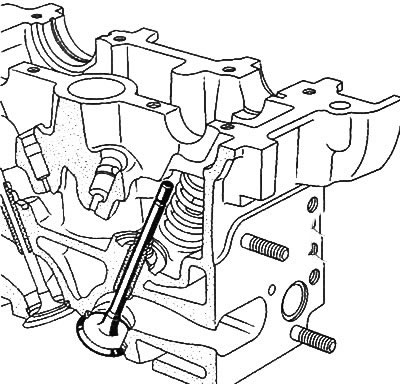
- Install guide tube (9) above the mandrel so that the tube touches the cylinder head.
- Insert sleeve (10) into the guide tube until it contacts the mandrel.
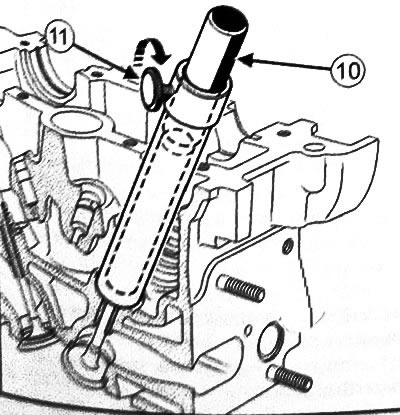
- Fix the sleeve with a fixing fin (11).
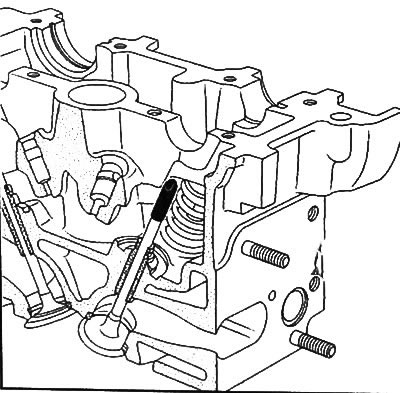
- Remove the guide tube and bushing assembly, being careful not to loosen the set screw.
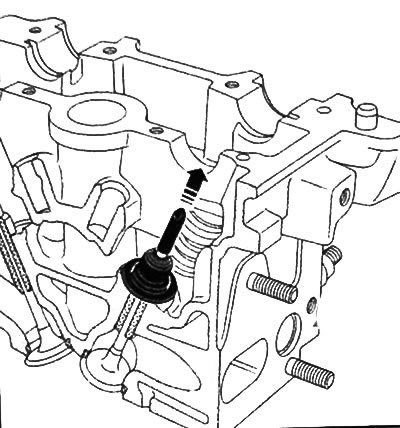
- Remove valve.
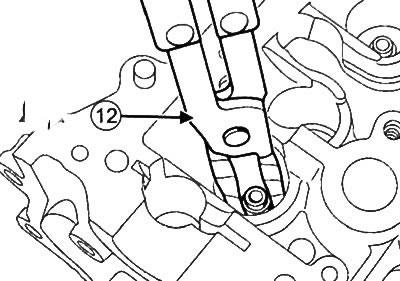
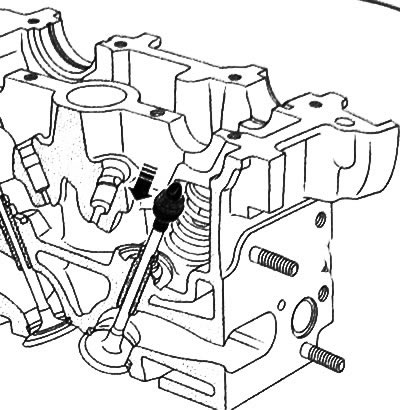
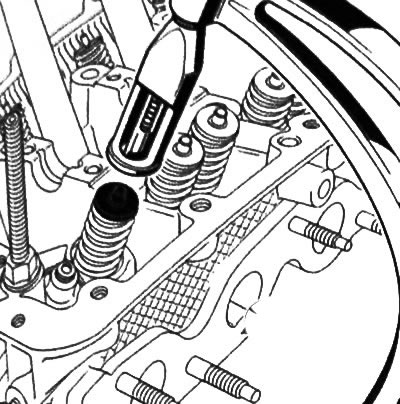
25. Remove valve stem seals using special pliers (Mot. 1335) (12).
Assembly
1. Clean the cylinder head, valves, valve springs, valve plates, crackers and valve guides.
Attention: Be sure to replace the valve stem seals with new ones after each removal.
2. Install valve stem seals:
Attention:
- Make sure the valves are properly seated in their seats.
- Apply engine oil to the inside of the valve guides.
Note: It is very important to use the valve stem seal tool to install the valve stem seals (Mot. 1759) or a kit for installing oil seals.
Valve stem seals with lower spring retaining washer:
- Insert the valve into the cylinder head.
- Install protective device (Mot. 1511) on the valve stem.
Note: The inside diameter of the guard must match the diameter of the valve stem.
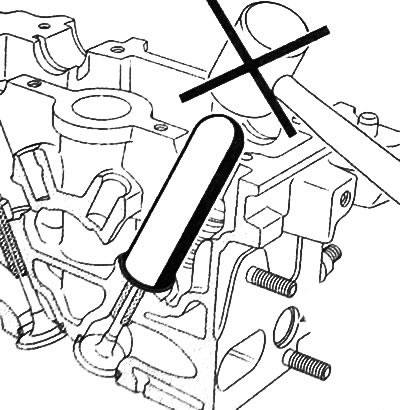
Attention: Do not lubricate oil seals.
- While holding the valve against the seat, install the flinger cap onto the guard on the valve stem, and then push the flinger cap through the guard.
- Remove the guard from the valve stem.
- Install mandrel (8) through the valve stem.
Note: The inside diameter of the mandrel must match the diameter of the valve stem. Also, the base of the mandrel should be pressed against the part of the slinger cap that acts as the thrust washer of the valve spring.
- Press on the valve stem seal by gently tapping the mandrel with the palm of your hand until the valve stem seals against the cylinder head.
- Repeat the procedure for installing the valve stem seals for the remaining valves.
Valve stem seals without lower spring retainer:
- Insert the valve into the cylinder head.
- Install protective device (Mot. 1759) on the valve stem.
Note: The inside diameter of the guard must match the diameter of the valve stem.
Attention: Do not lubricate oil seals.
- While holding the valve against the seat, install the slinger cap onto the guard on the valve stem, and then push the slinger cap through the guard
- Remove the guard from the valve stem.
- Install the guide tube with bushing assembly on the oil seal.
- Press on the valve stem seal by gently tapping the sleeve with the palm of your hand until the guide tube rests against the cylinder head.
- Repeat the procedure for installing the valve stem seals for the remaining valves.
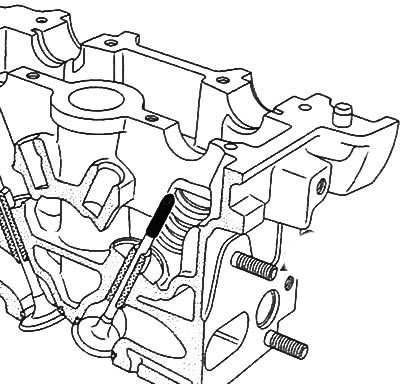
3. Install valve springs and valve plates.
4. Compress the valve spring with a special tool (Mot. 1502). as well as when removing the valve.
5. Insert crackers with tweezers.

6. Install the other valve cotters in the same way.
7. Install camshafts (see related section below).
8. Install spark plugs.
9. Install the camshaft end caps.
10. Install the cooling chamber on the cylinder head.
11. Install the lifting eye and tighten the bolts of its fastening to 22 Nm.
12. Install the camshaft seals.
13. Install the toothed belt tensioner and tighten its fastening nut.
14. Install the camshaft sprocket with a new mounting bolt.
15.Install the exhaust manifold.
16. Remove the cylinder head from the stand.
17. Install the cylinder head to the engine.
18.Install the cylinder head cover.
19.Install the ignition coils.
20. Install the timing belt
21. Install the crankshaft pulley.
22. Install the attachment drive belt.
23. Install the air filter unit
24. Fill and bleed the engine cooling system.