
K7M engine (8 valves)
Removing
1. Place the vehicle on a two post lift.
2. Disconnect the battery.
3. Disconnect:
- right front wheel
- right pendulum suspension support,
- accessory drive belt,
- timing belt.
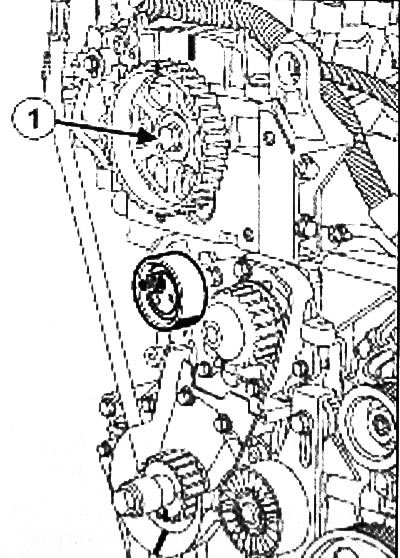
4. Remove (1) crankshaft pulley bolt with tool (Mot 799-01).
Note: The camshaft oil seal is removed using a tool (Mot. 1577).
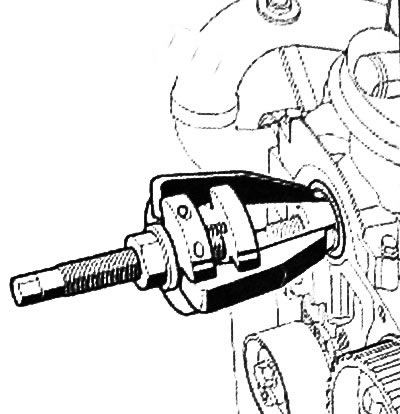
5. Install fixture grips (Mot. 1577) to the camshaft.
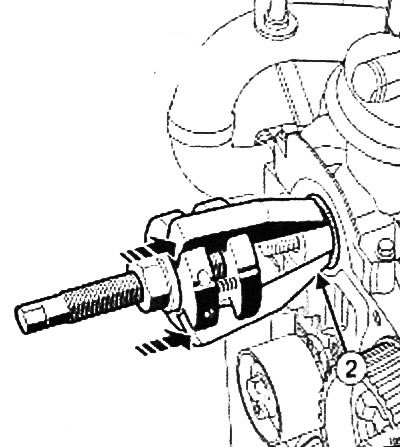
6. Click on fixture (Mot. 1577) until the bumps meet (2) grips with the camshaft seal.
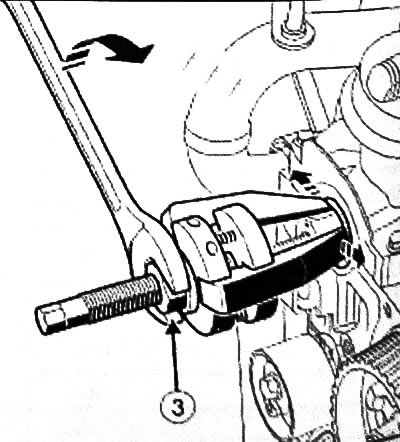
7. Extend the grips of the fixture by tightening the nut (3) flat wrench
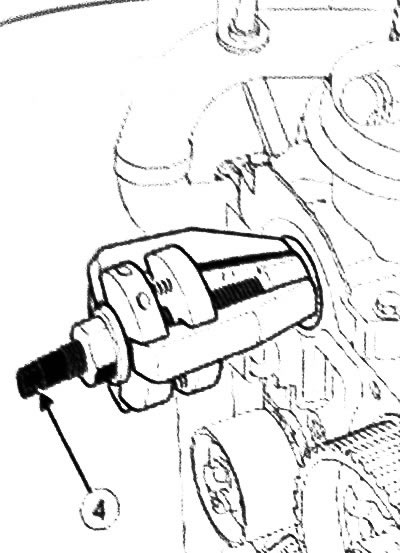
8. Remove the camshaft oil seal by tightening the screw (4).
Installation
Note: Before installation, it is strictly forbidden to lubricate the outer diameter of the oil seal with oil
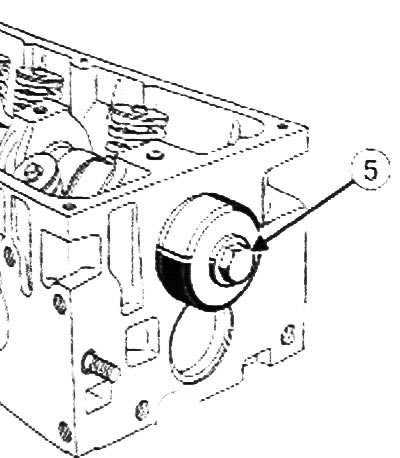
9. Install a new oil seal using the tool (Mot. 1127-01) (5).
Note: Apply oil to the threads and underside of the head of the new camshaft sprocket bolt.
10. Install the camshaft sprocket.
11. Torque tighten the camshaft sprocket bolt (45 Nm) using a device (Mot. 799-01).
12. Install:
- timing belt,
- accessory drive belt,
- right pendulum suspension support,
- right front wheel.
13. Connect the battery.
K4M engine (16 valves)
Removing
1. Place the vehicle on a two post lift.
2. Disconnect the battery.
3. Disconnect:
- right front wheel.
- air filter housing.
- throttle block.
- intake manifold.
- the right support of the pendulum suspension.
- accessory drive belt.
- timing belt.
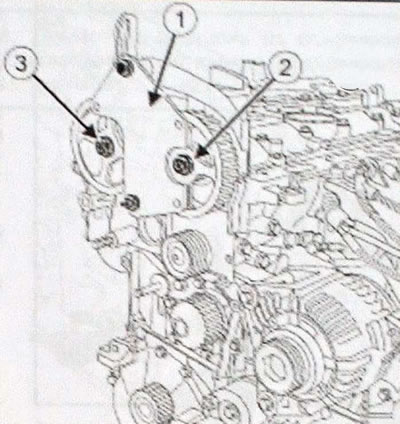
4. Install the locking device (Mot. 1490-01) (1) on the camshaft pulleys.
5. Disconnect:
- fastening nut (2) intake camshaft sprocket,
- fastening nut (3) exhaust camshaft sprocket,
- adaptation (Mot. 1490-01),
- intake camshaft sprocket,
- exhaust camshaft sprocket.
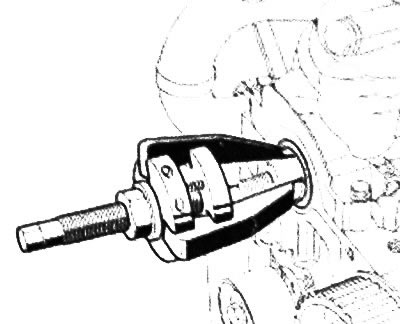
Note: The intake and exhaust camshaft seals are removed using the tool (Mot. 1577).
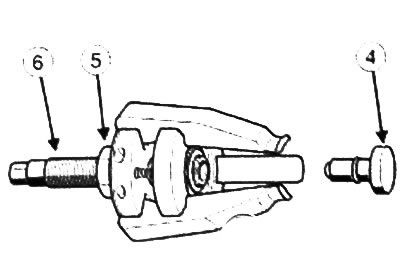
6. Remove the camshaft seal, (4) (Mot. 1577) be sure to remove the nozzle of the device.
7. Turn the pints out as far as possible (5) And (6) fixtures (Mot
8. Install fixture grips (Mot. 1577) on the camshaft
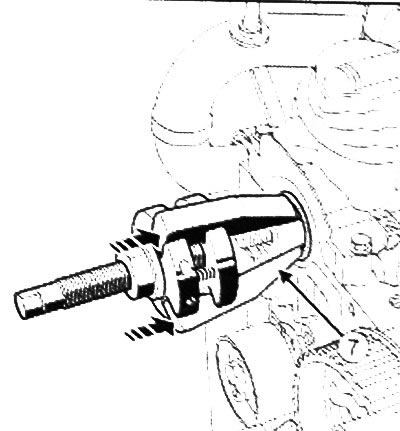
9. Click on fixture (Mot. 1577) until the bumps meet (7) grips with the camshaft seal.
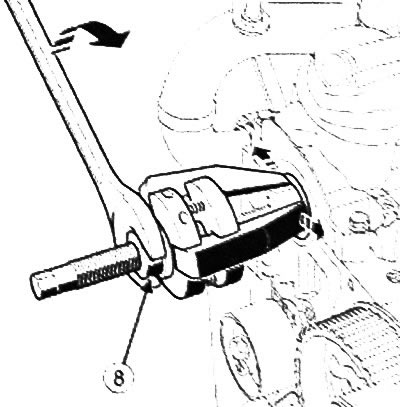
10.Spread the grips of the tool by tightening the nut (8) flat wrench.
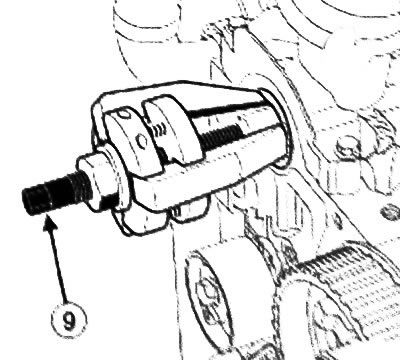
11. Remove the camshaft oil seal by turning the screw (9).
12. Repeat the above operations with the other camshaft oil seal.
Installation
Note: Before installation, it is strictly forbidden to lubricate the oil seal along the outer diameter.
1) Installing camshaft seals
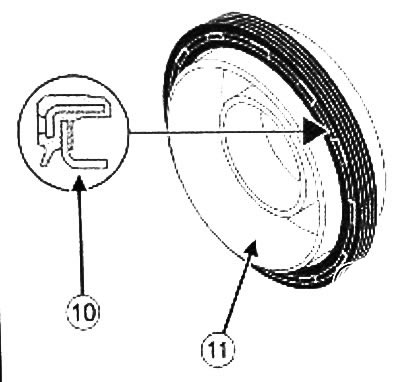
Note: The elastomer seal on these engines has a flat sealing lip (10) (11) and protective sleeve (also used to install the oil seal on the engine).
2) Installing the camshaft oil seal
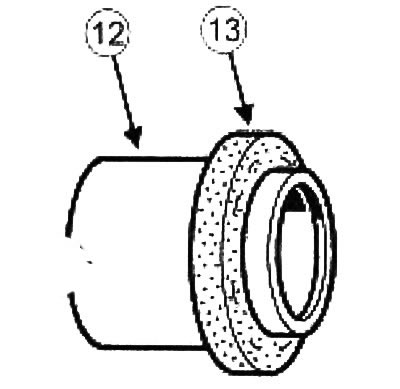
Note: This type of seals ARE EASILY DAMAGED. When working with them, it is imperative to use a protective sleeve (12). It is strictly forbidden to touch the gland (13) hands to prevent oil leakage after installing the oil seal on the engine.
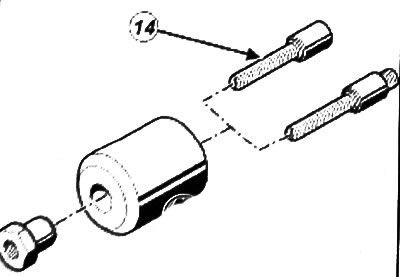
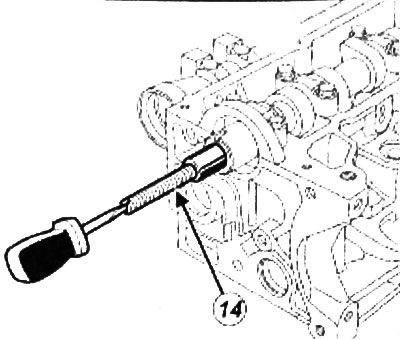
1. Screw on the stud (14) fixtures (Mot. 1632) on the camshaft stud.
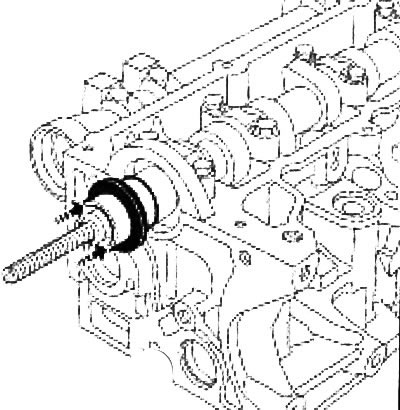
2. Install a safety sleeve with an oil seal on the camshaft, being careful not to touch the oil seal.
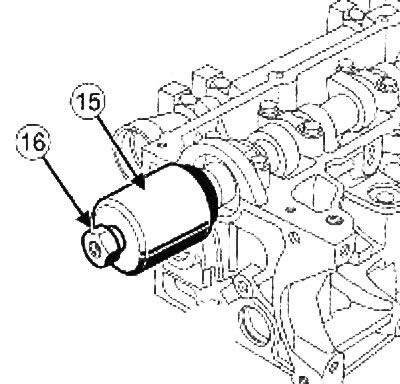
3. Install the cap (15) and collar nut (16) fixtures (Mot.1632)
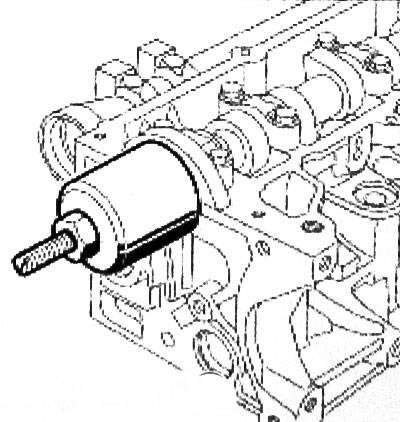
4. Tighten the collar nut until the cap contacts the cylinder head.
5. Remove the nut, pressure cap and stud.
6. Install:
- intake camshaft sprocket with new fastening nut,
- exhaust camshaft sprocket with new fastening nut.
7. Install the locking device (Mot. 1490-01) on the camshaft pulleys.
8. Torque tighten:
- intake camshaft pulley hub nut (30 Nm + 84°± 4°),
- exhaust camshaft pulley hub nut (30 Nm + 84°± 4°).
9. Remove the locking device (Mot. 1490-01).
10. Install:
- timing belt,
- accessory drive belt,
- right pendulum suspension support,
- intake manifold,
- throttle block,
- air filter housing,
- right front wheel.
11. Connect the battery.