

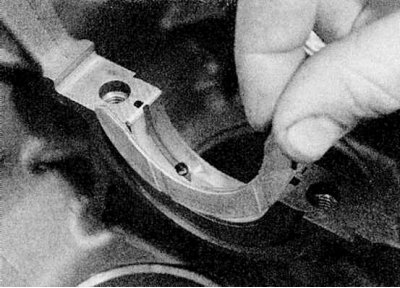
2. Unscrew the lower inner toothed belt cover (where available), then unscrew the fastening nuts / bolts and remove the oil seal housing and the crankshaft oil seal itself from the side of the drive belt (refer to accompanying illustration).
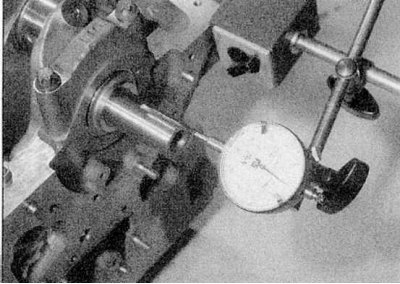
3. Before removing the crankshaft, check its axial clearance with a micrometer (refer to accompanying illustration). Push the crankshaft all the way to one side, and then set the micrometer to zero. Extend the crankshaft completely to the other side and check the end play. The result can be compared with that specified in the Specifications and determine if new thrust washers are required.
4. If there is no micrometer, feelers can be used. First push the crankshaft toward the flywheel/drive plate, then insert a feeler gauge between the #2 crankshaft journal counterweight and the center main bearing thrust washer (E7J and K7M engines), or between crankshaft journal #1 counterweight and main bearing thrust washer #2 (all other engines).
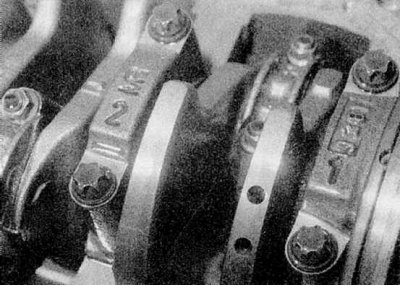
5. Numbers must be marked on the base of the main bearing caps. If this is not the case, number the cap and crankcase using a punch, as was done for the connecting rods and their caps (refer to accompanying illustration).
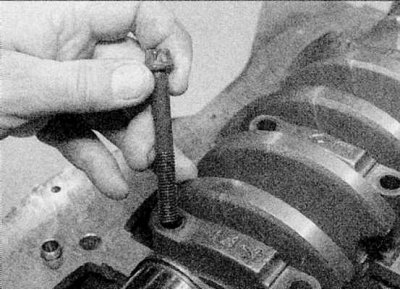
6. Turn away bolts of fastening of covers of radical bearings and remove covers together with loose leaves (refer to accompanying illustration). Note that on all engines except the E7J and K7M, the No. 1 main bearing cap is bolted with internal slots and is seated with sealant.
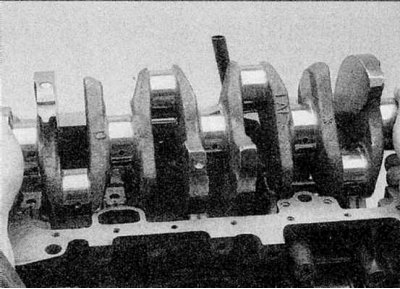
7. Carefully lift the crankshaft out of the crankcase (refer to accompanying illustration).
8. Remove the thrust washers from each side of the center main bearing (E7J and K7M engines) or main bearing No. 2 (all other engines), then remove the upper halves of the liners from the crankcase (refer to accompanying illustration).
9. Remove the crankshaft oil seal from the flywheel/drive plate side.