
2. Remove the wheels, jack up the rear of the vehicle and place it on axle stands.
3. Disconnect the brake cable.
4. Remove spring clip (1) (see illustration) and knock out one of the guide pins (2) small punch. Then knock out the second guide pin. bolts (3) do not turn out.
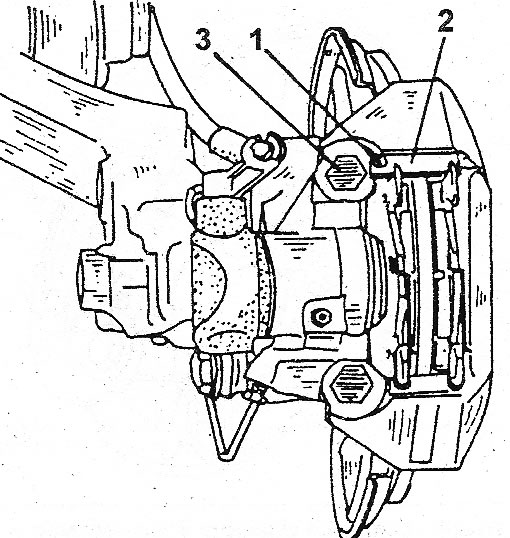
13.4 Removing and installing rear disc brakes 1. Spring clip.; 2. Guide pin; 3. Mounting bolt
5. Remove the brake pads. Do not press the brake pedal any more, otherwise the pistons can be squeezed out of the channels. If the brake pads are to be installed again, apply alignment marks on them on the left and right, as well as on the inside and outside. Each brake shoe has a support pin that always protrudes upwards. Check the condition of the protective boot and both O-rings. If they need to be replaced, clean the end of the piston and both pins with brake fluid and lubricate with special grease. Install new rubber parts.
6. Install as follows:
7. Insert the piston into the cylinder channel. To do this, insert a screwdriver into the slot (see illustration) and screw the piston in until it stops. From this position, begin to turn out until the mark on the piston is in line with the bleeder plug.
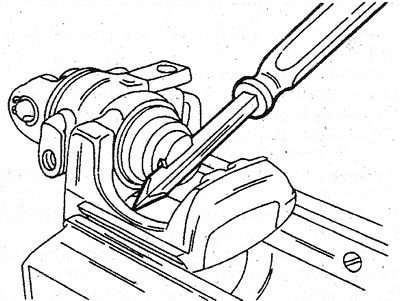
13.7 Screw the piston into the disc brake caliper cylinder. The line marked on the surface of the piston must be exactly above the bleeder plug
8. Attach both springs to the new brake pads, then place the brake pads on the brake disc (see illustration).
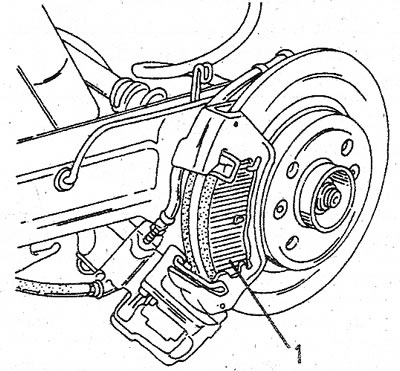
13.8 Support pin (1) of each brake pad must be on the bottom surface
9. Install the caliper and hammer in the first guide pin (2) (see illustration 13.4). Secure your finger with a spring clip (1). The bracket is installed on the inside of the caliper near the mounting bolt (3). Then slide the caliper up and hammer in the second guide, the pin.
10. After installation, press the brake pedal several times so that the brake pads are pressed against the disc.