
2. Remove the dust ring.
3. Rotate the piston until it turns freely (see illustration 13.7).
4. Place a piece of wood between the piston and caliper and blow out the piston with compressed air (see illustration 7.2 from this section). Do not disassemble the piston.
5. Remove the O-ring from the inside of the channel using a blunt object. A flat feeler gauge can be used for this purpose.
6. Treat all parts with alcohol, check the cylinder and piston for wear, deformation or surface corrosion. If these damages are present, the components must be replaced.
7. Install a new sealing ring in the groove of the cylinder bore, lubricate the piston and ring with clean brake fluid.
8. Push the piston in until it stops and tighten with a screwdriver as shown in illustrations 13.7, until the mark (1) (see illustration) will not fit exactly over the bleed screw (2). This ensures the prescribed bleeding of the caliper and the correct installation of the brake pads.
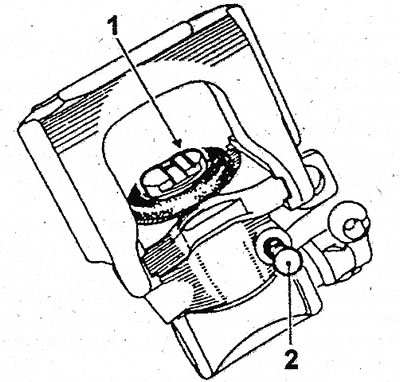
15.8 Risk (1) on the end surface of the cylinder should be parallel to the bleeder plug (2)
9. Install the dust ring.