Share with friends:

Electrical Equipment and Appliances Renault Espace 3

Electrical equipment — general information
The consumers are connected to the positive power source by a wire, and to the negative power source - through the car body («mass»). The electrical system is 12 volt negative ground and consists of a battery....
The consumers are connected to the positive power source by a wire, and to the negative power source - through the car body («mass»). The electrical system is 12 volt negative ground and consists of a battery....

Electrical equipment — technical data
Accumulator battery The battery is located on the left side of the engine compartment. Voltage, V - 12 Capacity, Ah - 60/70 Generator Three-phase alternating current generator with fan and built-in electronic voltage...
Accumulator battery The battery is located on the left side of the engine compartment. Voltage, V - 12 Capacity, Ah - 60/70 Generator Three-phase alternating current generator with fan and built-in electronic voltage...

Instrument cluster
Pic. 15.20. Removing the instrument cluster: 1 - clamps for fastening the trim of the instrument cluster; 2 - rear mounting screws; 3 - side mounting screws Pic. 15.21. Instrument cluster: 1 - instrument cluster; 2 -...
Pic. 15.20. Removing the instrument cluster: 1 - clamps for fastening the trim of the instrument cluster; 2 - rear mounting screws; 3 - side mounting screws Pic. 15.21. Instrument cluster: 1 - instrument cluster; 2 -...
Headlights — removal, installation
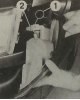
Removal Disconnect the cable from the negative terminal of the battery. Disconnect the electrical connectors from the headlight. Pull the ring to release the front turn signal spring (pic. 15.22). Pull the turn signal...
Removal Disconnect the cable from the negative terminal of the battery. Disconnect the electrical connectors from the headlight. Pull the ring to release the front turn signal spring (pic. 15.22). Pull the turn signal...

Adjusting the headlights
Precise adjustment is only possible using a special device. When you adjust the headlights, the fog lights are also adjusted. To adjust the headlights, screws located on the back of the headlight are used (pic. 15.25)....
Precise adjustment is only possible using a special device. When you adjust the headlights, the fog lights are also adjusted. To adjust the headlights, screws located on the back of the headlight are used (pic. 15.25)....

Headlights with xenon lamps
General information The ESPACE can be equipped with xenon headlights for low beam headlights. In accordance with European standards, these cars are required to be equipped with a system for automatically adjusting the...
General information The ESPACE can be equipped with xenon headlights for low beam headlights. In accordance with European standards, these cars are required to be equipped with a system for automatically adjusting the...
Replacing high beam lamps for headlights and side lights
Disconnect the cable from the negative terminal of the battery. Remove the cover from the back of the headlight ( 11, fig. 15.27 ) and replace the high beam headlight and side light bulbs.
Disconnect the cable from the negative terminal of the battery. Remove the cover from the back of the headlight ( 11, fig. 15.27 ) and replace the high beam headlight and side light bulbs.

Replacing low beam headlight discharge lamps
To remove the ballast, be sure to turn off the headlight. Pic. 15.32. Screw location (N) electronic unit mounting (D) It is forbidden to turn on a xenon lamp that is not installed in the headlight, as it is dangerous...
To remove the ballast, be sure to turn off the headlight. Pic. 15.32. Screw location (N) electronic unit mounting (D) It is forbidden to turn on a xenon lamp that is not installed in the headlight, as it is dangerous...
The electronic unit
To access the electronic unit ( E, fig. 15.28 ) Unscrew the panel near the feet. After replacing the unit, it is necessary to initialize the system and adjust the headlights.
To access the electronic unit ( E, fig. 15.28 ) Unscrew the panel near the feet. After replacing the unit, it is necessary to initialize the system and adjust the headlights.

Front right body height sensor
Disconnect the cable from the negative terminal of the battery. Disconnect the electrical connector from the body height sensor ( F, fig. 15.29 ). Unscrew the nut at the end of the rod. Remove the two bolts and the...
Disconnect the cable from the negative terminal of the battery. Disconnect the electrical connector from the body height sensor ( F, fig. 15.29 ). Unscrew the nut at the end of the rod. Remove the two bolts and the...
Right rear body height sensor
Disconnect the cable from the negative terminal of the battery. Disconnect the electrical connector from the body height sensor ( F, fig. 15.30 ). Unscrew the nut at the end of the rod. Remove the two bolts and the...
Disconnect the cable from the negative terminal of the battery. Disconnect the electrical connector from the body height sensor ( F, fig. 15.30 ). Unscrew the nut at the end of the rod. Remove the two bolts and the...

Drive devices
Pic. 15.36. The location of the headlight adjustment screws in the vertical (1) and horizontal (2) planes Turn the headlight adjustment screw in a vertical plane (1. Fig 15.36) maximum 10 turns Rotate the drive unit...
Pic. 15.36. The location of the headlight adjustment screws in the vertical (1) and horizontal (2) planes Turn the headlight adjustment screw in a vertical plane (1. Fig 15.36) maximum 10 turns Rotate the drive unit...
Initializing the system and adjusting the headlights
Place the vehicle on a flat, horizontal surface. Make sure. that the vehicle is not loaded and fuel is filled in the fuel tank. Do not get into a vehicle while working. Check the tire pressure and open the hood. Connect...
Place the vehicle on a flat, horizontal surface. Make sure. that the vehicle is not loaded and fuel is filled in the fuel tank. Do not get into a vehicle while working. Check the tire pressure and open the hood. Connect...

Windscreen wiper
Pic. 15.37. Windshield and rear window wipers: AV windshield wiper; AR - rear window wiper; 1 - left windshield wiper arm; 2 - right windshield wiper arm; 3 - brush; 4 - windshield wiper mechanism; 5 - electric motor; 6...
Pic. 15.37. Windshield and rear window wipers: AV windshield wiper; AR - rear window wiper; 1 - left windshield wiper arm; 2 - right windshield wiper arm; 3 - brush; 4 - windshield wiper mechanism; 5 - electric motor; 6...
Rear window wiper
Removal Make sure the windshield wiper blades are stopped in their original position. Disconnect the cable from the negative terminal of the battery. Remove the windshield wiper arm. Disconnect the fluid supply pipe to...
Removal Make sure the windshield wiper blades are stopped in their original position. Disconnect the cable from the negative terminal of the battery. Remove the windshield wiper arm. Disconnect the fluid supply pipe to...
This section is available on: russian, bulgarian, belarusian, ukrainian, serbian, croatian, romanian, polish, slovak, hungarian
Other sections on other Renault models
➽ Electrical equipment: Equipment and devices Renault Duster 1 (2009-2017)
➽ Electrical equipment: Equipment and devices Renault Fluence 1 (2009-2020, petrol)
➽ Electrical equipment: Equipment and devices Renault Kangoo 1 (1997-2007)
➽ Electrical equipment: Equipment and devices Renault Laguna 2 (2001-2007)
➽ Electrical equipment: Equipment and devices Renault Logan 2 (2012-2020)
➽ Electrical equipment: Equipment and devices Renault Megane 1 (1995-2002)
➽ Electrical equipment: Equipment and devices Renault Scenic 1 (1996-2003)
➽ Electrical equipment: Equipment and devices Renault Symbol 2 (2008-2013, petrol)
Link to this section in different formats
TEXTHTMLBB Code
- General information
- Maintenance
- Power unit
- Engine repair
- Exhaust system
- Cooling system
- Supply system
- Single-point injection
- Multi-point injection
- Diesel injection system
- Transmission
- Clutch
- Car gearbox
- Chassis, running gear
- Car suspension
- Steering
- Brake system
- Wheels and tires
- Body and interior
- Exterior (external elements)
- Interior (internal elements)
- Heating and ventilation
- Electrical equipment
- Equipment and devices
- Headlights and lighting
- Ignition system
- Power devices
- Electrical circuits
- General information
- Introduction to the guide
- Troubleshooting
- Power unit
- Engine repair
- Cooling system
- Carburetor fuel system
- Injection fuel system
- Diesel fuel system
- Ignition system
- Transmission
- Clutch
- Car gearbox
- Drive shafts
- Chassis, running gear
- Brake system
- Steering
- Front suspension
- Rear suspension
- Body and interior
- Exterior (external elements)
- Interior (internal elements)
- Doors, locks and windows
- Electrical equipment
- Equipment and devices
- Electrical circuits
- General information
- Introduction to the manual
- User manual
- Power unit
- Petrol engines F3R
- Petrol engines Z7X
- Diesel engines G8T
- Diesel engines G9T
- Transmission
- Clutch
- Mechanical gearbox
- Automatic gearbox
- Drive shafts
- Chassis, running gear
- Steering
- Front suspension
- Rear suspension
- Brake system
- Body and interior
- Exterior (external elements)
- Interior (internal elements)
- Doors, locks and windows
- Heating and ventilation
- Electrical equipment
- Equipment and instruments
- Power devices
- Electrical circuits
RenaultBook.ru © 2018–2024 | Mobile version | News and articles | Sitemap: EN BG BY UA RS HR RO PL SK HU | Administration | Site search | Bookmark
Duster 1 (2009-2017) | Fluence 1 (2009-2020, petrol) | Kangoo 1 (1997-2007) | Laguna 2 (2001-2007) | Logan 1 (2004-2012, petrol) | Logan 2 (2012-2020) | Megane 1 (1995-2002) | Megan 2 (2002-2009, petrol) | Scenic 1 (1996-2003) | Symbol 1 (1999-2008, petrol) | Symbol 2 (2008-2013, petrol) | Renault 19 (1988-1996) | Espace I and II (1984-1996) | Espace III (1996-2002) |