
- To remove the ballast, be sure to turn off the headlight.
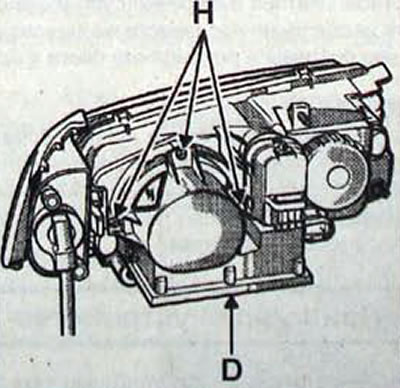
Pic. 15.32. Screw location (N) electronic unit mounting (D)
- It is forbidden to turn on a xenon lamp that is not installed in the headlight, as it is dangerous for the eyes.
Notes:
- When replacing low-beam headlight discharge lamps, use only Renault-certified D2S xenon lamps.
- These lamps do not have filaments, so it is impossible to check their resistance with an ohmmeter.
Removal
- Disconnect the cable from the negative terminal of the battery.
- Disconnect the connectors on the headlight and turn indicators.
- Remove the headlight.
- Remove three screws (N, fig. 13.32) electronic unit mounting (ballast).
Note. The electronic unit (ballast) does not separate from the headlight unit.
- Move the electronic unit away from the headlight like this. as shown in Figure 15.33.
- Turn the lamp connector (I) one eighth of a turn (counterclock-wise) and disconnect it.
- Remove the lamp by first disconnecting its connecting bracket.
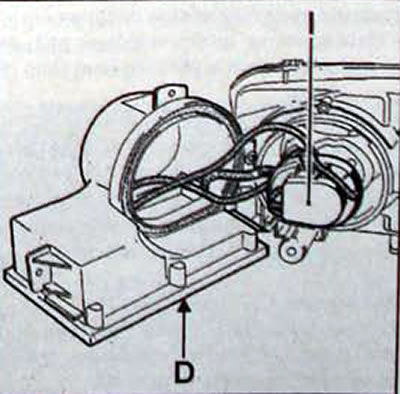
Pic. 15.33. Electronic unit deviation (D) from the headlamp and location of the lamp connector (I)
Attention. The lamp must not be subjected to any direct shock as the outer conductor (J, fig. 15.34) very fragile and should not be deformed.
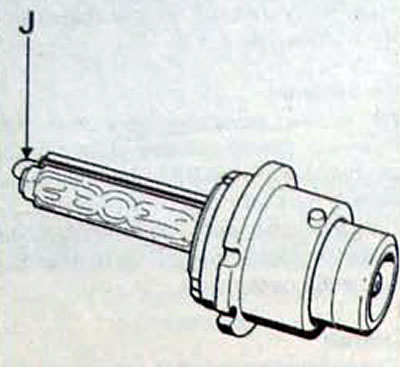
Pic. 15.34. Outer conductor location (J) gas discharge lamp
- Take the lamp by the base, but do not touch the bulb with your fingers; otherwise, clean it with a soft, lint-free cloth moistened with alcohol.
- Place the lamp in place by aligning its groove against the pin located at the top of the holder.
- After you insert the lamp connection bracket, install the connector (I) turning one eighth of a turn clockwise like this. so that the connecting wires to the electronic unit are at the top for the left headlight or at the bottom for the right headlight.
- Install the electronic unit (D) onto the headlight unit, and carefully tighten the three special bolts with a tightening torque of 0.8 Nm.
- After installing the headlights, it is necessary to initialize the system and adjust them.