
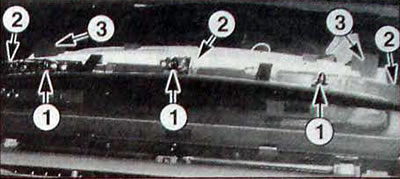
Pic. 15.20. Removing the instrument cluster: 1 - clamps for fastening the trim of the instrument cluster; 2 - rear mounting screws; 3 - side mounting screws
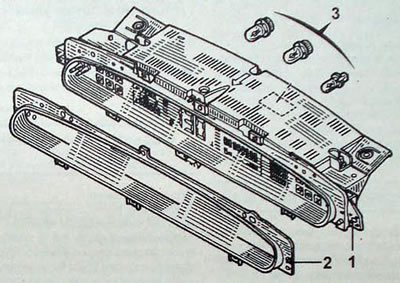
Pic. 15.21. Instrument cluster: 1 - instrument cluster; 2 - trim of the instrument cluster; 3 - lamps
Removal
- Disconnect the cable from the negative terminal of the battery.
- On both sides of the instrument panel, remove the mesh covering the speakers.
- Remove three bolts securing the speaker brackets.
- Disconnect the electrical connectors from the speakers.
- Starting from a corner, lift the upper trim of the instrument cluster vertically to release the three upper latches.
- Remove the screws (2. fig. 15.20) rear mounting of the instrument cluster.
- Unscrew the vertical fasteners located under the buffers in the sound-absorbing foam.
- Pull the instrument cluster forward.
- Disconnect the electrical connectors from the instrument cluster and remove it.
Installation
- Installation is carried out in the reverse order of removal.
- Check the operation of the instrument cluster.