
Removing
All models except Scenic
1. Block the front wheels, then jack up the rear of the vehicle and place it on axle stands. Remove the rear wheel.
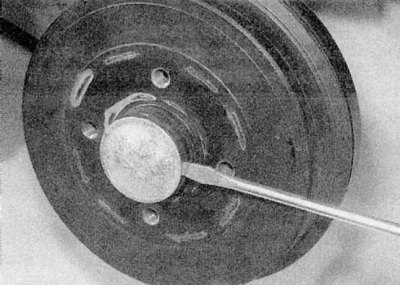
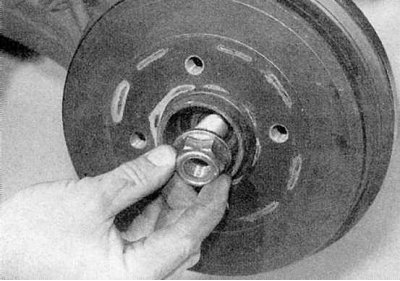
2. Using a hammer and a large flathead screwdriver, carefully pry out the cap located in the center of the brake drum (refer to accompanying illustration).
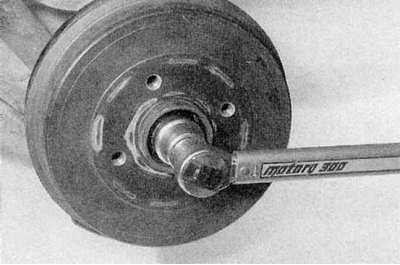
3. Using a socket and a long rod, loosen and remove the rear wheel hub nut. Discard the nut - it must be replaced.
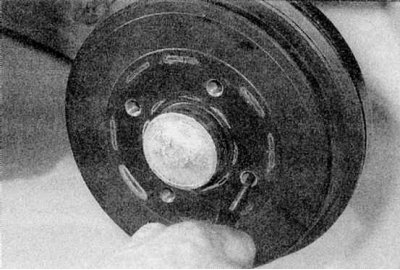
4. Remove the brake drum and hub bearing assembly from the stub axle by hand. If this fails, either the bearings sit tight on the pivot pin, or the drum is braked by the brake shoes. In the first case, tap on the periphery of the drum with a mallet or use a universal puller, attaching it to the drum with wheel bolts. In the second case, proceed as follows.
5. First make sure the handbrake is fully released. Working under the vehicle, lock the hand brake actuating link, loosen the cable adjuster jam nut, and remove the equalizer adjusting nut (contact the head Maintenance). Note that on some models, in order to gain access to the adjusting nut, you must first unscrew the fixing nuts and lower the exhaust system heat shield.
6a. Insert a screwdriver through one of the wheel bolt holes in the brake drum to reach the operating handbrake lever on the driven brake shoe (refer to illustrations).
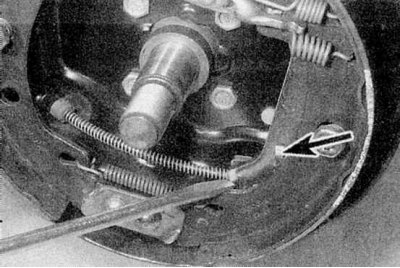
6b. Push the lever so that the pads are as far away from the drum as possible.
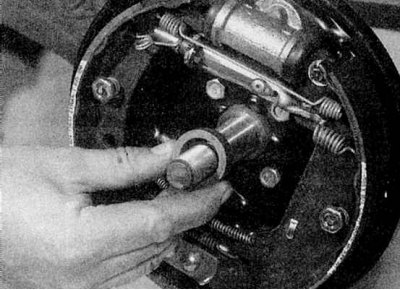
6c. Remove the drum and pull the spacer from the stub axle.
Scenic Models
1. The rear brake drum is removed independently of the rear wheel hub.
2. Block the front wheels, then jack up the rear of the vehicle and place it on axle stands. Remove the rear wheel.
3. Remove the two screws securing the drum to the rear wheel hub and remove the drum. If this fails due to brake pad dragging, follow the procedure described in paragraphs 5 and 6 above.
Inspection
1. Gently remove the dust from the pad wear from the drum, taking care not to inhale it, as this is harmful to health.
2. Clean the outside of the drum and inspect it for damage and signs of wear; replace drum if necessary.
3. Carefully inspect the inside of the drum. The presence of shallow scratches on the rubbing surface is quite acceptable, but if deep grooves are found, replace the drum. Usually, a ridge will form on the inner edge of the drum, consisting of a mixture of rust and dust formed as a result of pad wear. This growth must be scraped off and the exposed surface sanded with fine sandpaper. If the difference in thickness is formed due to wear of the rubbing surface, regrind the drum, taking into account the indicated in Specifications thickness limit, or change it.
4. If you suspect that the drum is excessively worn or has become oval, measure the inside diameter of the drum in several places using an inside micrometer. Measurements must be made on axes perpendicular to each other to determine the ovality of the drums. Minor ovality can be corrected by regrinding, if ovality is excessive, replace drum.
Installation
All models except Scenic
1. If a new brake drum is being installed, use a suitable solvent to remove the protective coating from the inside of the drum.
2. Make sure the handbrake lever stop is against the edge of the brake shoe. Apply a small amount of machine oil to the stub axle and install the spacer and drum on it, being careful not to stain the pads or the friction surface of the drum with oil. Depress the brake pedal several times to activate the self-adjusting lash adjuster.
3. Repeat the above procedure on the second rear brake assembly.
4. Remove the brake drum and adjust the hand brake as described in Section Handbrake adjustment.
5a. Place the drum in working position, then install the washer (where applicable) and a new hub nut.
5b. Tighten the nut to Specifications force, and install the hub cap.
6. Finally, install the wheel, lower the vehicle to the ground and tighten the wheel bolts to Specifications effort.
Scenic Models
1. If a new brake drum is being installed, use a suitable solvent to remove the protective coating from the inside of the drum.
2. Make sure the handbrake lever stop is against the edge of the brake shoe. Install the brake drum and secure it with two screws. Depress the brake pedal several times to activate the self-adjusting lash adjuster.
3. Repeat the above procedure on the second rear brake assembly.
4. Remove the brake drum and adjust the hand brake as described in Section Handbrake adjustment.
5. Place the drum in working position, then install the wheel, lower the vehicle to the ground and tighten the wheel bolts to Specifications effort.