
Removing
Models with manual transmission
1. Remove the clutch pedal as described in Chapter Clutch.
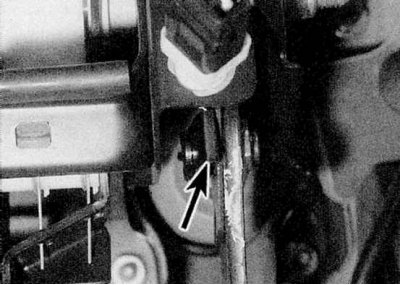
2. Pull out the mounting bracket and remove the pusher fork pin that secures the vacuum booster unit pushrod to the pedal (refer to illustration).
3. Pull the pedal pivot out of its working position and remove the brake pedal from under the dashboard along with the mounting bushings and spacer.
4. Inspect the pedal for damage and signs of wear, paying particular attention to the pivot bushings, and replace any worn components.
Models with automatic transmission
1. Working in the cabin, remove the bottom cover of the dashboard (where available), to access the clutch pedal assembly. Loosen the pedal pivot nut, then remove the pedal as described in paragraphs 2-4 above.
Installation
Models with manual transmission
1. Apply some multipurpose grease to the pedal, spacer, and bushing surfaces. Insert the spacer into the pedal and install the bushings with the flanges closer to the outer edge. Also apply grease to the booster pushrod fork and its pin.
2. Bring the pedal assembly into position under the panel by connecting it to the amplifier pusher, then push the pedal axle into place.
3. Align the pedal with the push rod and insert the push rod pin. Attach the pin with a bracket.
4. Check up action of a pedal of a brake, then establish a clutch pedal as it is described in the Head Clutch.
Models with automatic transmission
1. Install the pedal as described above, then securely tighten the pivot shaft nut. Test the brake pedal action by driving the vehicle for a short time.