



Contents: Removal 🠛 Installation 🠛
Removal
Removal and installation of the power unit is carried out on a two- or four-post lift without removing:
- front subframe;
- bumpers;
- front body panel;
- set of cooling system elements.
Place the vehicle on a two-post lift equipped with wheel chocks.
Disconnect the wires from the battery terminals and remove the battery.
Disconnect the engine compartment wiring harness connectors and remove fuse 30A.
Be sure to install a self-made protective screen on the cooling system radiator (Fig. 1.53).
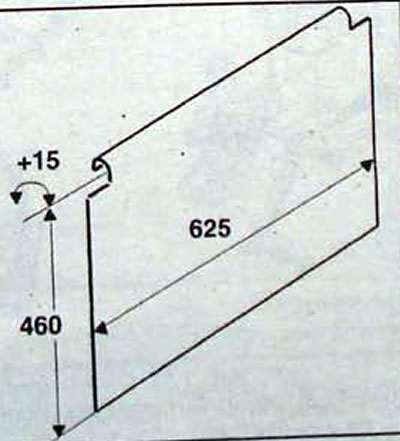
Fig. 1.53. Dimensions of the protective screen of the cooling system radiator
Screen manufacturing specification: aluminum or steel sheet with a bend for hanging on the top of the radiator.
Remove:
- protective covers under the engine;
- front wheels;
- front right and left wheel arch guards;
- protective mudguards;
- front right and left wheel arches.
Use the charging station to discharge the refrigerant from the air conditioning system circuit.
Drain the fluid from the power steering system
- through the low pressure pipe on the heat exchanger;
- through the high pressure hose on the power steering pump (then plug the hole in the pump).
Remove the power steering line clamps from the engine.
Drain the engine cooling system:
- through the lower radiator hose (water pump inlet hose);
- move the hose away from the radiator and secure it to ensure free compression of the power unit:
- through the upper radiator hose (coolant supply hose from cylinder head).
Remove the injection system control unit from the side member and disconnect the connector from it.
Disconnect the air conditioning system pipe fastening from the right pendulum suspension.
Remove (without breaking) the plastic cable ties securing the wiring harness on the right fender.
Disconnect the air conditioning system component connectors from the front panel.
Disconnect the wiring harness and secure it to the engine.
Remove the air filter and disconnect the vacuum hose from the brake booster.
Remove the intake noise muffler in front of the air filter (Fig. 1.54).
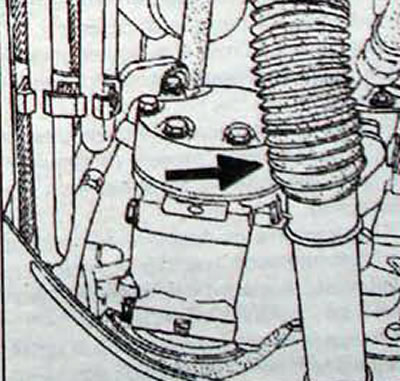
Fig. 1.54. Location of the intake noise muffler in front of the air filter
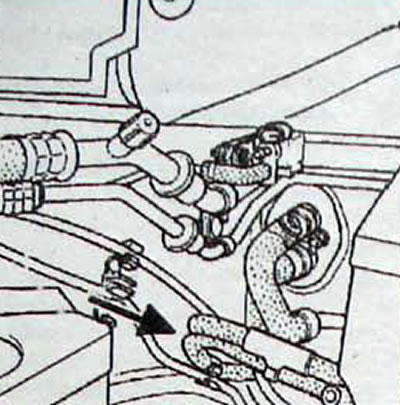
Fig. 1.55. Location of fuel line disconnection
Remove 2 bolts and disconnect the air conditioning system pipes from the compressor. Seal the holes tightly.
Loosen the bolts securing the ground bus to the gearbox.
Disconnect:
- fuel pipelines;
- ignition system power module connectors;
- the tube and connector of the absolute pressure sensor;
- accelerator cable;
- clutch cable with fork.
Raise the car.
Drain the oil from the gearbox.
Remove:
- jet thrust;
- flange of the inlet pipe from the manifold;
- gear shift control rod (move the corrugated cover);
- right drive shaft mounting pin.
Disconnect the connector from the oxygen sensor.
Remove the drive shafts as follows.
On the right side of the car:
- remove the floating brake caliper bracket and secure it to the suspension spring (if necessary, disconnect the brake hose from the shock absorber);
- unscrew the bolts securing the protective corrugated cover of the drive shaft;
- unscrew the lower shock absorber strut mounting bolts (mark their installation position in advance).
Disconnect the lower ball joint from the steering knuckle (using an impact puller) and the steering rod end (tav. 476 puller).
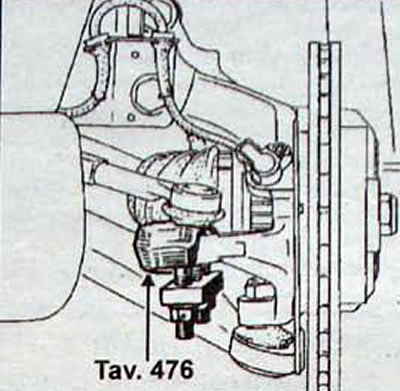
Fig. 1.56. Using the Tav. 476 puller to disconnect the tie rod end from the steering knuckle
Move the steering knuckle to the side, remove the right drive shaft, having first removed the pin in the connection between the drive shaft and the differential output shaft.
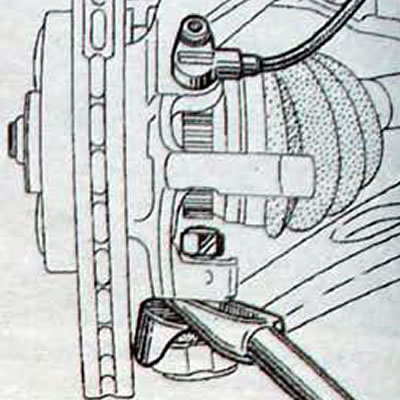
Fig. 1.57. Disconnecting the lower arm ball joint from the steering knuckle
On the left side of the car:
- remove the floating brake caliper and secure it to the suspension spring;
- unscrew the lower shock absorber strut mounting bolts (mark their installation position in advance).
Disconnect the lower ball joint from the steering knuckle (using an impact puller) and the steering rod end (tav. 476 puller).
Move the steering knuckle to the side, remove the left drive shaft, having first unscrewed the 3 bolts securing the corrugated protective cover of the drive shaft to the differential flange.
Caution: Do not damage the corrugated protective covers
Remove the intake pipe of the exhaust system (pipe between the exhaust manifold and the catalytic converter).
Disconnect the oxygen sensor.
Lower the car.
Disconnect the lower hose from the engine cooling system radiator, bend it upward and attach it to the engine.
Disconnect:
- radiator hoses of the interior heating system from the engine,
- 2 hoses from the expansion tank of the engine cooling system.
Disconnect the high pressure hose (lower hose) power steering from the steering gear housing (device Dir. 1282-01).
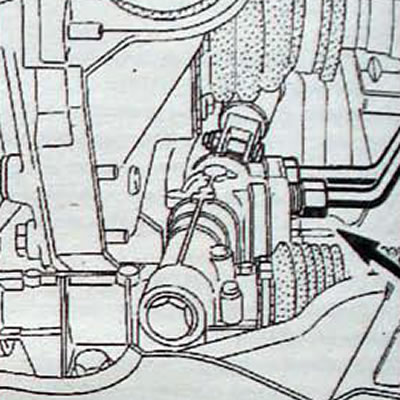
Fig. 1.58. Location of disconnection of high pressure hose of power steering from steering gear housing
To facilitate removal of the power unit, disconnect the two power steering line mounting brackets on the transmission and on the front of the engine and secure them to the top of the engine.
Disconnect the engine compartment wiring harness from the engine compartment junction box.
Place an adjustable support under the engine and carefully lower the vehicle until the engine is free (perform the operation together).
Loosen the bolts securing the right engine pendulum mount bracket.
Loosen the three gearbox support mounting bolts, without touching the elastic pad of the gearbox pendulum suspension.
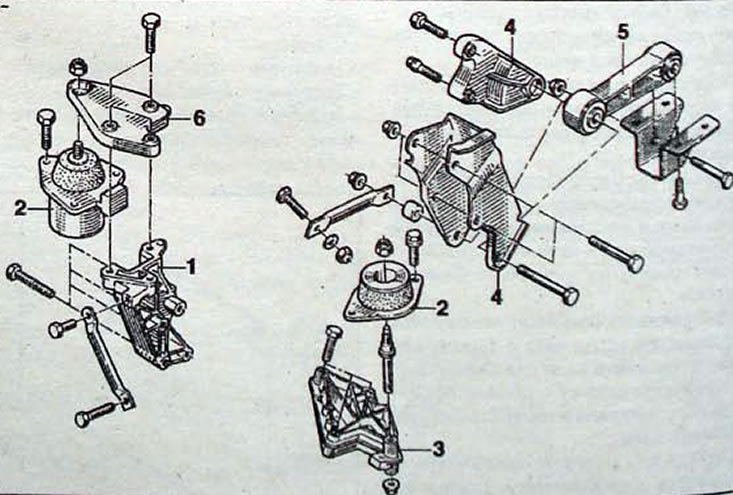
Fig. 1.59. Engine and gearbox mounts: 1 - right engine support bracket; 2 - elastic pillow; 3 - left engine support bracket; 4 - bracket; 5 - jet thrust; 6 - gearbox pendulum suspension bracket
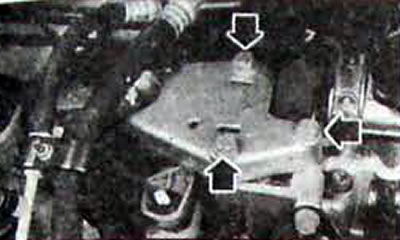
Fig. 1.60. Location of bolts for fastening the right engine support bracket
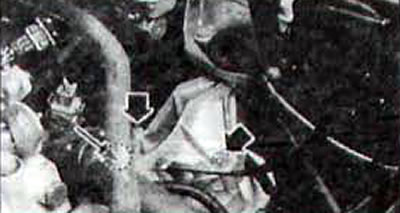
Fig. 1.61. Location of gearbox support mounting bolts
Carefully lower the power unit (perform the operation together).
Installation
Place the power unit in the engine compartment.
Install the gearbox pendulum mount, secure it to the gearbox and to the elastic cushion.
Fit the engine pendulum mount bracket and use tool Mot. 1289-02 to centre the suspension travel limiter.
Tighten all bolts and nuts to the recommended torque values.
Further installation is carried out in the reverse order of removal.
Press the brake pedal several times until the pistons of the wheel brake cylinders come into contact with the brake pads.
Apply Rhodorseal 5661 grease to the drive shaft pin holes.
Adjust the accelerator cable.
Install the speedometer drive cable.
Perform:
- pouring oil into the gearbox;
- filling and bleeding the engine cooling system;
- filling and bleeding the power steering system.
Reset all systems that are blocked when the wires are disconnected from the battery terminals.
If the vehicle is equipped with an air conditioning system, use a filling station to fill the air conditioning system with refrigerant.