
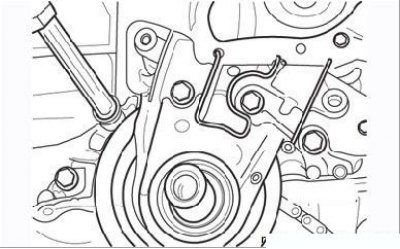
Figure 3.65. Removal of the case of a forward epiploon of a cranked shaft
Loosen the bolts securing the crankshaft front oil seal housing and remove it (Figure 3.65). Remove both crankshaft seals.
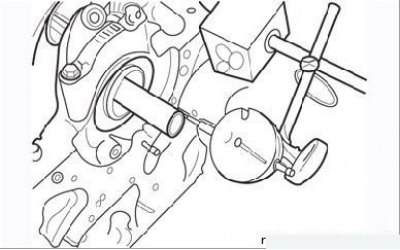
Figure 3.66. Measurement of crankshaft end play
Before removing the crankshaft, check its axial clearance. To perform the measurement, a dial indicator is used, the leg of which rests against the toe of the crankshaft (Figure 3.66). Move the shaft to the stop along its axis, set the indicator arrow to zero and move the shaft to the stop in the opposite direction. Record the reading of the indicator and compare it with that given in tab. 3.3.
If you don't have a dial indicator, use a set of flat feeler gauges. To do this, shift the crankshaft towards the flywheel, and then use feeler gauges to measure the gap between the side surface of the second connecting rod journal and the semi-ring in the central bearing of the crankshaft.
Removing
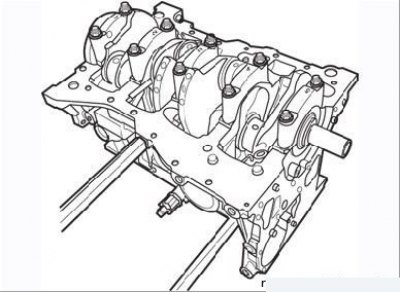
Figure 3.67. Marking of covers of main bearings of a cranked shaft
- make sure there are legible markings on the main bearing caps. The number indicates the position of the bearing in the crankcase, counted from the flywheel side (Figure 3.67);
- Carefully loosen the main bearing cap bolts half a turn per pass until they can be removed by hand. Turn out bolts, then separate covers from a crankcase. Remove the lower main bearing shells and store for later inspection;
- remove the crankshaft from the engine block, being careful not to drop the upper main bearing shells, which may be on the crankshaft. Then remove the remaining upper main bearing shells from the journals on the cylinder block and store for later inspection;
- remove the thrust washers on either side of the third main journal.