
Operating procedure:
- Clean the surface of the connecting rod bearings with a lint-free cloth. If new liners are installed, wash them with kerosene and wipe dry;
- lay the liners in the connecting rod caps according to the previously made marks;
- lay the liners in the lower heads of the connecting rods according to the previously made marks;
- Lubricate the engine cylinder head, pistons and piston rings with clean engine oil. Lay each piston-rod assembly in order on a work surface. Put short lengths of plastic hose on the bolt threads or wrap them with electrical tape to protect the engine cylinder mirror during assembly;
- install the rings so that the locks are offset by 120°relative to each other, then compress the piston of the first cylinder in the mandrel for installation in the cylinder block;
- label «V» on the bottom of the piston should be directed towards the flywheel;
- install the crankshaft so that the connecting rod journal of the first cylinder is at BDC;
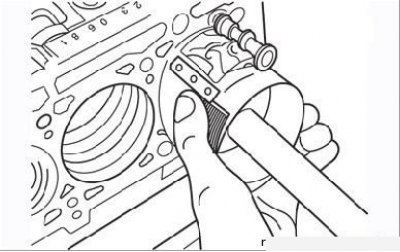
Figure 3.78. Moving a piston into a cylinder with a wooden rod
- carefully insert the piston into the cylinder, using a wooden rod to help guide the bottom end of the connecting rod against the crankshaft journal (Figure 3.78);
- use the Plastigage kit to measure the connecting rod bearing clearances as described above for the main bearings. After checking the gaps, decide whether to use old or install new liners. The latter will entail a corresponding regrinding of the connecting rod journals of the shaft;
- check the clearances in the crankshaft bearings and, after making the necessary adjustments, remove the remnants of Plastigage from the journals and liners;
- lubricate the necks and installed bearings liberally with clean engine oil. Install covers in order.
Tighten the cap bolts to the specified torque, turning the crankshaft each time to make sure it rotates freely before moving on to the next cap.
Finally install the oil pump, sump and cylinder head as described above.