Share with friends:

Brake system of the car Renault Symbol 1
Girlig brakes are installed on cars.

General information about the brake system
The service brake system is hydraulically actuated, consisting of two independent circuits divided diagonally. The pressure of the working fluid in both circuits is created by the force of the driver's foot, which is...
The service brake system is hydraulically actuated, consisting of two independent circuits divided diagonally. The pressure of the working fluid in both circuits is created by the force of the driver's foot, which is...

Replacing the front brake pads
Attention! Replace brake pads only in pairs at the same time on both wheels with pads of the specified brands. New brake pads are run in after 180–230 km, at which time the efficiency of the brakes is somewhat reduced....
Attention! Replace brake pads only in pairs at the same time on both wheels with pads of the specified brands. New brake pads are run in after 180–230 km, at which time the efficiency of the brakes is somewhat reduced....

Removal, installation and repair of the front brake caliper
Operating procedure: raise the front of the car and place supports under the body; remove the wheel from the desired side; with the help of a plastic film placed under the cover of the compensation tank, reduce the loss...
Operating procedure: raise the front of the car and place supports under the body; remove the wheel from the desired side; with the help of a plastic film placed under the cover of the compensation tank, reduce the loss...

Removal, check and installation of a forward brake disk
To maintain uniformity and braking efficiency, it is recommended to replace both discs if at least one needs to be replaced. At the same time, the brake pads are replaced with new ones. Operating procedure: raise the...
To maintain uniformity and braking efficiency, it is recommended to replace both discs if at least one needs to be replaced. At the same time, the brake pads are replaced with new ones. Operating procedure: raise the...

Removal and installation of the front pressure regulator
The pressure regulator distributes the brake fluid along the circuits (diagonals) and reduces the pressure in the hydraulic drive of the rear wheels to prevent them from locking up during hard braking. To check the...
The pressure regulator distributes the brake fluid along the circuits (diagonals) and reduces the pressure in the hydraulic drive of the rear wheels to prevent them from locking up during hard braking. To check the...

Removal and installation of back brake drums
Withdrawal procedure: raise the rear of the car and place supports under the body; remove the wheel from the desired side; Pic. 7.12. Removing the hub cap Using a puller, remove the hub cap from the center of the wheel....
Withdrawal procedure: raise the rear of the car and place supports under the body; remove the wheel from the desired side; Pic. 7.12. Removing the hub cap Using a puller, remove the hub cap from the center of the wheel....

Removing, checking and installing rear brake pads
Attention! Replacement of brake pads is carried out only with a set of four pads per rear axle in order to avoid uneven braking of the wheels and the possibility of skidding the car. Pic. 7.16. Drum brake parts: 1 -...
Attention! Replacement of brake pads is carried out only with a set of four pads per rear axle in order to avoid uneven braking of the wheels and the possibility of skidding the car. Pic. 7.16. Drum brake parts: 1 -...

Removal and installation of the brake cylinder of back wheels
Withdrawal procedure: remove the brake drum as described above; unhook the upper coupling spring with pliers and remove it from the pads; push the pads apart and move their upper ends away from the pistons of the brake...
Withdrawal procedure: remove the brake drum as described above; unhook the upper coupling spring with pliers and remove it from the pads; push the pads apart and move their upper ends away from the pistons of the brake...

Removal and installation of the main brake cylinder
Withdrawal procedure: disconnect the wire from the negative terminal of the battery; disconnect the contact connector of the brake fluid level sensor in the compensation tank; with a large syringe or rubber bulb, remove...
Withdrawal procedure: disconnect the wire from the negative terminal of the battery; disconnect the contact connector of the brake fluid level sensor in the compensation tank; with a large syringe or rubber bulb, remove...

Removal, installation and check of the vacuum amplifier of brakes
Withdrawal procedure: disconnect the wires from the battery terminals and remove it; remove the master brake cylinder as described above; remove four bolts and one nut securing the battery heat shield; disconnect the...
Withdrawal procedure: disconnect the wires from the battery terminals and remove it; remove the master brake cylinder as described above; remove four bolts and one nut securing the battery heat shield; disconnect the...
Checking the vacuum brake booster
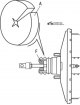
Without starting the engine, press the brake pedal several times to remove the vacuum in the booster chamber and, holding the pedal fully depressed, start the engine. While the engine is running, the brake pedal should...
Without starting the engine, press the brake pedal several times to remove the vacuum in the booster chamber and, holding the pedal fully depressed, start the engine. While the engine is running, the brake pedal should...

Replacement of brake hoses
Pic. 7.25. Brake hose: A - the conical surface of the tip; B - tip nut; C - slotted part Hoses without copper sealing washers are installed on the car. Tightness is achieved by contact of conical surfaces A (pic. 7.25)...
Pic. 7.25. Brake hose: A - the conical surface of the tip; B - tip nut; C - slotted part Hoses without copper sealing washers are installed on the car. Tightness is achieved by contact of conical surfaces A (pic. 7.25)...

Removal and installation of the parking brake lever
Withdrawal procedure: place the car on a lift or raise the rear of the car and place supports under the body; turn off the parking brake (push the lever down); Pic. 7.28. Brake Lever: 1 – lining of the lever; 2 – a...
Withdrawal procedure: place the car on a lift or raise the rear of the car and place supports under the body; turn off the parking brake (push the lever down); Pic. 7.28. Brake Lever: 1 – lining of the lever; 2 – a...

Removal, installation and adjustment of the brake light switch
The brake light switch is mounted on the brake pedal bracket. Pic. 7.33. Removing the brake light switch To remove the switch, disconnect the contact connector from it and unscrew it from the mounting bracket (pic....
The brake light switch is mounted on the brake pedal bracket. Pic. 7.33. Removing the brake light switch To remove the switch, disconnect the contact connector from it and unscrew it from the mounting bracket (pic....
Removal of air from the hydraulic drive of the brake system
Removal of air from the hydraulic actuator (pumping) of the brake system is carried out every time after the depressurization of the system during the repair or replacement of individual components, as well as when...
Removal of air from the hydraulic actuator (pumping) of the brake system is carried out every time after the depressurization of the system during the repair or replacement of individual components, as well as when...
The principle of operation of the ABS system
Anti-Lock Braking System (ABS) developed by Bosch and designed to prevent the wheels from locking during heavy braking, which increases the active safety of the car. The system starts at a speed of about 7 km/h and...
Anti-Lock Braking System (ABS) developed by Bosch and designed to prevent the wheels from locking during heavy braking, which increases the active safety of the car. The system starts at a speed of about 7 km/h and...

Operation of the anti-lock braking system ABS
The ABS system consists of an electronic control unit (ECU), valve body with hydraulic solenoid valves, electrically driven return pump and speed sensors mounted on each wheel. The solenoid valves are controlled by...
The ABS system consists of an electronic control unit (ECU), valve body with hydraulic solenoid valves, electrically driven return pump and speed sensors mounted on each wheel. The solenoid valves are controlled by...

Removal and installation of ABS valve body
Withdrawal procedure: place the car on a lift or raise the front of the car and place supports under the body; disconnect the wire from the negative terminal of the battery; remove the right front wheel; take measures...
Withdrawal procedure: place the car on a lift or raise the front of the car and place supports under the body; disconnect the wire from the negative terminal of the battery; remove the right front wheel; take measures...

Removal and installation of the sensor of speed of a forward wheel
Withdrawal procedure: lift the wheel from the desired side and remove it; in the engine compartment, disconnect the sensor wiring from the mount mounted on the shock absorber strut; disconnect the connector and remove...
Withdrawal procedure: lift the wheel from the desired side and remove it; in the engine compartment, disconnect the sensor wiring from the mount mounted on the shock absorber strut; disconnect the connector and remove...

Removal and installation of the rear wheel speed sensor
Withdrawal procedure: lift the wheel from the desired side and remove it; trace the wiring from the sensor to the connector and release it from the common harness; disconnect the connectors on the sensor wiring; Pic....
Withdrawal procedure: lift the wheel from the desired side and remove it; trace the wiring from the sensor to the connector and release it from the common harness; disconnect the connectors on the sensor wiring; Pic....
Removal and installation of a gear ring of a forward wheel
Attention! Purchase a new toothed ring before removal. The toothed ring is installed with a press fit on the outer CV joint. The ring is replaced if its teeth are chipped. Withdrawal procedure: remove the drive shaft of...
Attention! Purchase a new toothed ring before removal. The toothed ring is installed with a press fit on the outer CV joint. The ring is replaced if its teeth are chipped. Withdrawal procedure: remove the drive shaft of...
Rear wheel gear
The gear ring is made in one piece with the wheel hub. If the ring teeth are chipped, replace the hub as described in section « Chassis ».
The gear ring is made in one piece with the wheel hub. If the ring teeth are chipped, replace the hub as described in section « Chassis ».
This section is available on: russian, bulgarian, belarusian, ukrainian, serbian, croatian, romanian, polish, slovak, hungarian
Other sections on other Renault models
➽ Chassis, running gear: Brake system Renault Fluence 1 (2009-2020, petrol)
➽ Chassis, running gear: Brake system Renault Kangoo 1 (1997-2007)
➽ Chassis, running gear: Brake system Renault Laguna 2 (2001-2007)
➽ Chassis, running gear: Brake system Renault Logan 2 (2012-2020)
➽ Chassis, running gear: Brake system Renault Megane 1 (1995-2002)
➽ Chassis, running gear: Brake system Renault Scenic 1 (1996-2003)
➽ Chassis, running gear: Brake system Renault 19 (1988-1996)
Link to this section in different formats
TEXTHTMLBB Code
- General information
- User manual
- Maintenance
- Power unit
- Engine repair
- Cooling system
- Fuel system
- Exhaust system
- Ignition system
- Transmission
- Clutch
- Mechanical gearbox
- Automatic gearbox
- Drive shafts
- Chassis, running gear
- Front suspension
- Rear suspension
- Steering
- Brake system
- Body and interior
- Exterior (external elements)
- Interior (internal elements)
- Doors, locks and windows
- Heating and ventilation
- Electrical equipment
- Equipment and devices
- Headlights and lighting
- Power devices
- Electrical circuits
- General information
- User manual
- Car care
- Maintenance
- Power unit
- Engine repair
- Cooling and lubrication system
- Supply system
- Exhaust system
- Ignition system
- Transmission
- Clutch
- Mechanical gearbox
- Automatic gearbox
- Drive shafts
- Chassis, running gear
- Car suspension
- Steering
- Brake system
- Body and interior
- Exterior (external elements)
- Interior (internal elements)
- Doors, locks and windows
- Restoration and repair
- Electrical equipment
- Equipment and devices
- Headlights and lighting
- Power devices
- Heating and ventilation
- Electrical circuits
RenaultBook.ru © 2018–2024 | Mobile version | News and articles | Sitemap: EN BG BY UA RS HR RO PL SK HU | Administration | Site search | Bookmark
Duster 1 (2009-2017) | Fluence 1 (2009-2020, petrol) | Kangoo 1 (1997-2007) | Laguna 2 (2001-2007) | Logan 1 (2004-2012, petrol) | Logan 2 (2012-2020) | Megane 1 (1995-2002) | Megan 2 (2002-2009, petrol) | Scenic 1 (1996-2003) | Symbol 1 (1999-2008, petrol) | Symbol 2 (2008-2013, petrol) | Renault 19 (1988-1996) | Espace I and II (1984-1996) | Espace III (1996-2002) |