
- place the car on a lift or raise the rear of the car and place supports under the body;
- turn off the parking brake (push the lever down);
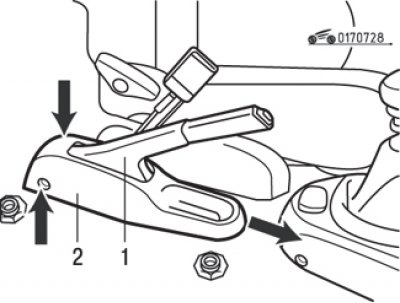
Pic. 7.28. Brake Lever: 1 – lining of the lever; 2 – a plastic overlay of the lever; the arrows show the mounting bolts of the lining
- unscrew the two screws securing the plastic cover of the lever (pic. 7.28);

Pic. 7.29. Parking brake adjusting nut: X=20.0 mm
- unscrew the nut (pic. 7.29) adjusting the parking brake, having previously measured the dimension X (should be about 20 mm), to loosen the cable tension;
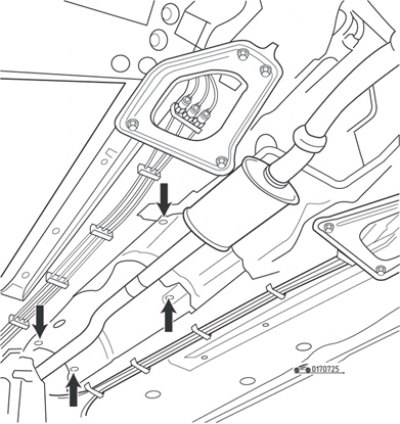
Pic. 7.30. Bolts of fastening of a heat-insulating shield
- remove the heat shield under the car by unscrewing the four bolts (pic. 7.30);

Pic. 7.31. Parking brake cable equalizer (arrow)
- release both cables in the equalizer area (pic. 7.31);

Pic. 7.32. nuts (1) fastening of the lever of a drive of a parking brake (the arrow shows the contact connector of the control lamp for turning on the parking brake)
- in the passenger compartment, unscrew the two nuts securing the parking brake lever and disconnect the connector of the parking brake warning lamp switch (pic. 7.32);
- Remove the parking brake lever.
Installation is carried out in the reverse order of removal. Don't forget to connect the parking brake indicator switch connector. Screw on the parking brake adjustment nut, keeping dimension X measured during removal (approx. 20 mm). Adjust lever travel if necessary (see subsection «Removing, checking and installing brake pads»).