
Note. Renault does not make any specific recommendations regarding the interval for changing spark plugs. Renault mechanics connect special diagnostic equipment to the car. It checks the system and reads all registered trouble codes.
Replacing spark plugs
All engines
1. The correct operation and performance of the engine depends on the correct functioning of the spark plugs. It is essential that the installed spark plugs match the engine (the appropriate type is defined at the beginning of this Chapter). If this type is used and the engine is in good condition, the spark plugs should not need attention between scheduled replacements. Spark plug cleaning is rarely necessary and should not be attempted unless special equipment is available, as the spark plug can be easily damaged.
2a. On engines 1.6 l (K7M) disconnect and remove the plastic cover.
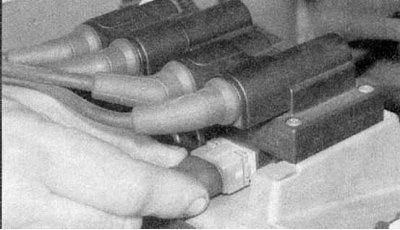
2b. Unhook the BB wires of the spark plugs from their retainer, unscrew the screws securing the retainer to the ignition coil assembly.
2c. Move the latch to the side (refer to illustrations). On 16-valve 2.0 l engines (F7R) remove the ignition coil explosives, as described in Chapter Engine electrical equipment.
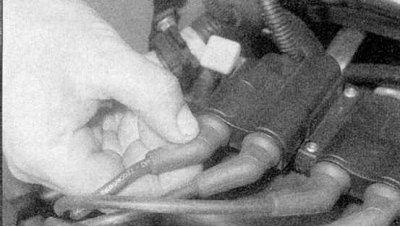
3. Disconnect the BB wires from the spark plugs (except models with F7R engine).
4. It is advisable to clean the dirt from the spark plugs using a clean brush, electric vacuum cleaner or compressed air to prevent dirt from entering the cylinders.
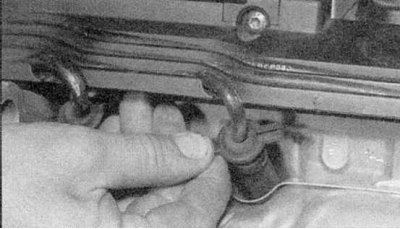
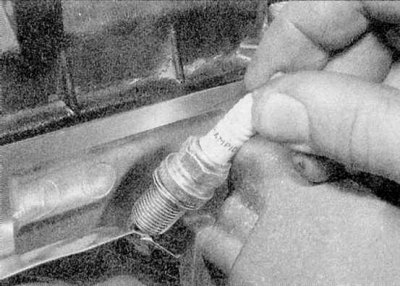
5a. Loosen the spark plugs with a spark plug wrench or a suitable ring wrench (refer to illustrations).
5b. Check their status as follows.
6. The condition of the spark plugs can determine the condition of the engine. If the nose of the spark plug insulator is clean and white with no carbon deposits, this indicates a weak mixture or a spark plug that is too hot.
7. If the tip and nose of the insulator are covered with hard black soot, this indicates that the mixture is too rich. If the spark plug is black and oily, the engine is probably worn out.
8. If the nose of the insulator has a slight brown coating, the mixture is correct and the engine is probably in good condition.
9. The electrode gap of the spark plug is important. If it is too large or too small, the ignition spark size and performance will be seriously impaired. The clearance must match the value given in the Specifications at the beginning of this Chapter.
Adjustment
Note. Some engines are equipped with spark plugs with two or three electrodes. The gaps are not adjustable. If there is any doubt as to their condition, replace all four spark plugs as a set.
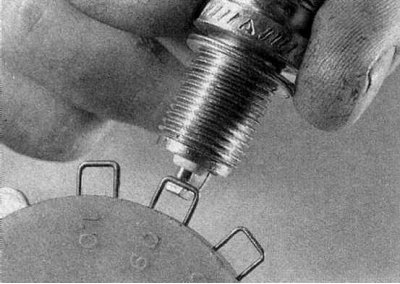
1. To set the gap, measure it with a feeler gauge, then bend the open or closed outer electrode until you get the correct gap. The gap is considered correct if the appropriately sized feeler gauge is held firmly and slides freely (refer to illustrations).
2. A special tool for adjusting the gap between the electrodes of the spark plugs is available from spare parts stores.
All engines
Installation
1. Before installing spark plugs, check that the outer surface of the spark plug and the threads are clean. Apply a small amount of anti-seize compound to the threads of each spark plug.
2. Screw in the spark plugs by hand where possible, then tighten them to the specified torque.
3. Connect the high voltage wires in the correct order.
Checking the ignition system
Warning! The voltage produced by a non-contact ignition system is significantly higher than in conventional ignition systems. Be extremely careful when operating the system with the ignition on.
Models with 1.4L engine (e7j)
1. Whenever changing spark plugs, check for high voltage wires.
2. If necessary, mark high voltage wires from 1 to 4 (1 cylinder closest to the engine timing belt). When removing wires, pull on the ferrule, not on the wire itself.
3. Check the inner tip for signs of corrosion, which will look like a hard white powder. Make sure that the tip sits tightly on the candle.
4. Using a clean rag, rub the wires along their entire length to remove any accumulated dirt and grease. Check them for burnt spots, cracks and other damage.
5. Disconnect a wire from a cover of the distributor. Check it for signs of corrosion. If an ohmmeter is available, check the resistance of the wire by connecting a meter between the wire that goes to the spark plugs and the contact inside the distributor cap. Finally, install the wire securely.
6. Check the remaining wires in the same way.
7. Remove the air filter pipe system from the left hand side of the engine, as described in Chapter Power systems, release, then unscrew the fastening screws and remove the distributor cover. Wipe the cover with a clean rag and inspect it for cracks, burnt indentations, burned or loose contacts; make sure that the carbon brush is not worn, moves freely under the action of the spring and makes good contact with the distributor runner. Also inspect the cover seal for signs of wear or damage and replace it if necessary. Remove the distributor slider from the end of the camshaft and inspect it. When replacing spark plugs, it is recommended to also replace the distributor cap and slider. When connecting the high voltage wires to the new cover, do not mix up the wires.
All other models
Check the condition of the high voltage wires as described above.