
- candle key;
- set of new spark plugs;
- set of probes for measuring spark plug gap;
- clean rag.
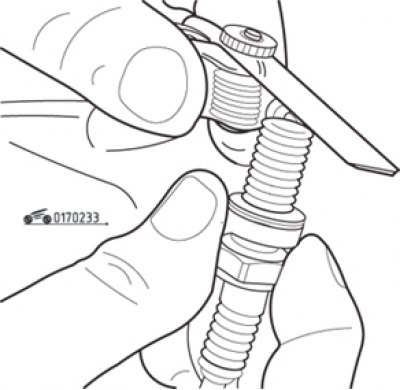
Pic. 2.33. Changing the gap between the spark plug electrode
Stop the engine and let it cool down to ambient temperature. Check the condition of the set of new spark plugs and their electrode spacing (pic. 2.33). The gap can only be corrected by bending the base of the side electrode. Check the condition of the porcelain insulator for cracks.
Sequential replacement of spark plugs is recommended.
Blow out spark plug holes with compressed air (you can use a regular bicycle pump). Disconnect the ignition coils from the spark plugs. Unscrew the spark plug with a special spark plug wrench by turning the wrench counterclockwise. Compare the condition of the removed spark plug with standard options to assess the condition of the engine:
- the gray color of the electrodes and the insulator of medium density indicates the normal operation of the candles and the air-fuel mixture preparation system;
- the black color of the electrodes and insulator indicates that the mixture is too rich;
- the light gray color of the electrodes and insulator indicates that the mixture is too lean;
- oiling of the electrodes and insulator indicates that the candles are intermittent, or that the engine piston rings are worn out.
Check the spark plug insulator for traces of leakage currents, which are visible as thin random marks on the surface of the insulator. The reason for their appearance is poor contact in the plug connector. Replace this connector.
Apply a thin layer of non-stick paste to the threads of new spark plugs.
Install the spark plug into the holes in the cylinder head and screw it in by hand until it stops.
Using a spark plug socket and torque wrench, tighten the spark plug to 25 Nm.
Replace the remaining spark plugs as described above.
Note. When operating the vehicle in a highly dusty environment, replace the replacement element more often.