
Note. Checking the transmission fluid level is a very complicated procedure, so it is better to entrust the work to a Renault workshop.
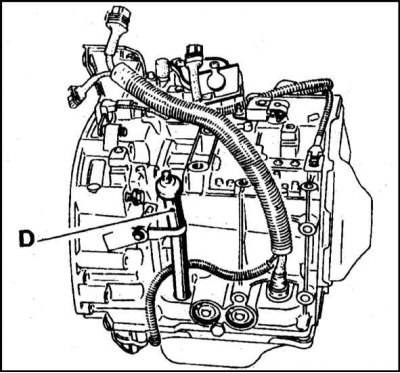
1. Remove the plug from the top of the filler neck (D) (refer to accompanying illustration). Add 0.5L of Specified Fluid to the transmission using a clean filtered flare, then install the plug.
2. Drive the car into the inspection hole. If necessary, loosen the mounting screws and remove the protective plastic engine/transmission cover.
3. Connect the Renault XR25 test meter to the diagnostic coupling and enter the code "D04", then number "04". Set the gear selector to position "Park", start the engine and wait until the fluid temperature reaches 60°C.
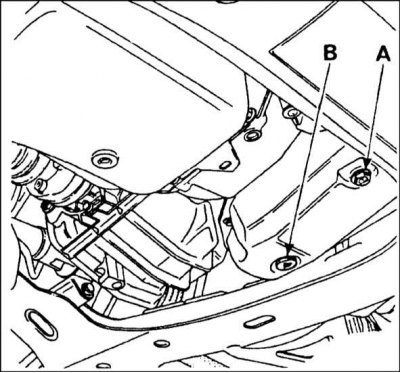
4. With the engine running, remove the transmission level plug (A) (refer to accompanying illustration). Allow excess liquid to pour into the container for 20 seconds, then install the stopper. The amount of liquid must be more than 0.1 l; if not, the transmission fluid level is incorrect.
5. If the level is incorrect, add 1 liter of the fluid specified in the Specifications.
Wait for the transmission to cool down, then repeat the test procedure again as described in the previous paragraphs. After setting the correct level, tighten the plug securely. Where necessary, install motor protection.
Final drive oil
6. The level check procedure is not included in the maintenance plan, but if there were oil leaks, proceed as follows.
7. Drive the car into a viewing hole.
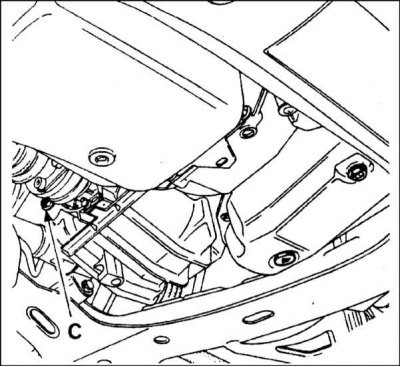
8. Turn away a stopper of a bulk/control opening of the main transfer (C), mounted behind the right drive shaft (refer to accompanying illustration).
9. Make sure the oil level reaches the bottom of the plug hole. If this is not the case, fill in the oil of the grade specified in the Specifications in the hole under the plug.
10. Wipe the plug, then install and tighten it.