
English Русский
Български
Беларускі
Український
Српски
Hrvatski
Română
Polski
Slovenský
Magyar
Bookmark Contacts Articles Sitemap
Company vehicles Peugeot Company vehicles Opel Company vehicles Skoda Company vehicles Land Rover Company vehicles Mitsubishi Company vehicles Volkswagen Company vehicles Honda
RenaultBook.ru


Duster   Fluence   Kangoo   Laguna   Logan   Megane   Sandero   Scenic   Symbol   Clio   Other
Megane 1 (1995-2002) Megan 2 (2002-2009, petrol)

Engine oil and filter change (Renault Megane 1)

  • Main
  • Megane
  • Megane 1 (1995-2002)
  • General information
  • Maintenance
  • Engine oil and filter change
0
Frequent oil and filter changes are the most important preventative maintenance an owner can perform. As engine oil is used, it becomes contaminated and less viscous, leading to premature engine wear.

Frequent oil and filter changes are the most important preventative maintenance an owner can…


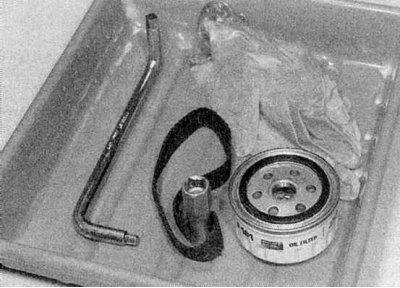
1. Before you begin this procedure, prepare all the necessary tools and materials, as well as rags and old newspapers to wipe up spills. It is better for the engine oil to be warm, this will allow it to drain faster and remove more sediment with the oil. When working under the car, do not touch hot engine parts. To protect yourself from possible oil contact with your skin, work in gloves (refer to the accompanying illustration).

2. Set the handbrake, then jack up the front of the car and place it on axle stands. Loosen the mounting screws and remove the plastic protective cover from underneath the engine.

3. Remove the oil filler cap.
3. Remove the oil filler cap.


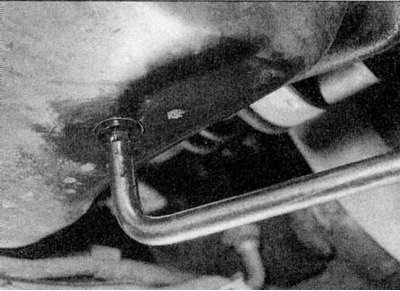
4. Using a wrench, loosen the drain plug approximately half a turn. Place a drain container under the drain plug and unscrew it completely (refer to the accompanying illustration). Remove the sealing washer.


5. Allow the oil to drain. Note that you may need to move the container when the oil drains into a thin stream.

6. After the oil has drained, wipe the drain plug and sealing gasket with a clean cloth. Inspect the sealing gasket and replace it if it is damaged or worn. Clean the area around the drain hole and install the plug and gasket. Tighten the plug securely.

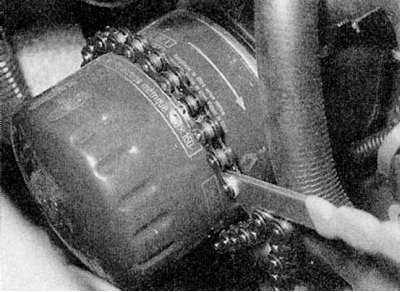
7. Move the container under the oil filter, which is located on the front of the cylinder block.
7. Move the container under the oil filter, which is located on the front of the cylinder block.


8. Use a special tool (refer to the illustrations), to loosen the filter, then unscrew it by hand. Drain the oil from the filter into a container.

9. Use a clean cloth to remove any oil and dirt that has settled around the area where the filter attaches to the engine. If the rubber sealing ring of the filter remains on the engine, carefully remove it.
9. Use a clean cloth to remove any oil and dirt that has settled around the area where the filter…


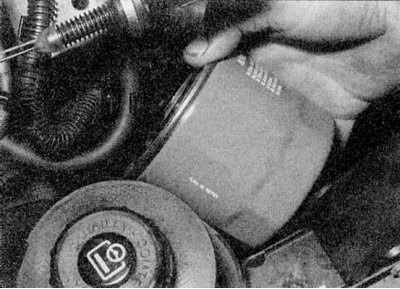
10. Take a new filter, lubricate its sealing ring with clean oil and install the filter on the engine. Tighten the filter by hand - do not use any tools (refer to the accompanying illustration).


11. Install the protective cover and tighten the mounting screws securely. Remove the drained oil and all tools from under the car, then lower the car to the ground.

12. Fill the engine with the correct grade and type of oil through the filler hole in the camshaft cover. First, pour in half the required volume of oil and wait a few minutes to allow the oil to drain into the pan. Add oil in small portions until its level reaches the lower mark on the dipstick, then add approximately 1 more liter so that the level rises to the upper mark on the dipstick.

13. Start the engine, let it run for a few minutes and check for leaks around the oil filter seal and the oil pan drain plug. Note that the low oil pressure warning light may take a few seconds to go out to allow the oil to fill all the passages and the new oil filter.

14. On diesel models with a turbocharger, before starting the engine, perform the following procedures:
  • a) Disconnect the electrical wiring from the fuel shut-off valve on the fuel pump and insulate the connector.
  • b) Test the engine with the starter until the oil pressure warning lamp goes out (this may take a few seconds).
  • c) Connect the wiring to the fuel cut-off valve, then start the engine.
  • d) With the engine idling, check the turbocharger oil and coolant connections for leaks.

15. Turn off the engine and wait a few minutes for the oil to drain into the pan. Recheck the level and add oil as needed.
This article is available on: russian, bulgarian, belarusian, ukrainian, serbian, croatian, romanian, polish, slovak, hungarian
Article has been reviewed by editor: Fedoseev Denis
Share with friends:
Previous
Megane 1: Maintenance
Next

Checking lamps and fuses
Checking the battery status and charge level
Checking the windshield wipers
Checking the condition and pressure of tires
Checking fluid levels
Removal water from a diesel engine fuel filter
Checking the front brake pads and discs
Checking the exhaust system
Checking the suspension and steering
Checking the protective covers of the drive shaft and CV joints
Other articles on other Renault models

➽ Every 10,000 km or 6 months — Change engine oil and filter Renault Clio 1 (1990-1998)
➽ Engine oil change Renault Duster 1 (2009-2017)
➽ Engine oil change Renault Kangoo 1 (1997-2007)
➽ Removal and installation the air filter housing (K4M engine) Renault Laguna 2 (2001-2007)
➽ Changing engine oil and oil filter Renault Logan 1 (2004-2012, petrol)
Link to this article in different formats
Reviews and comments of visitors
No comments yet


Add two numbers 14 + 35


Megan 2 (2002-2009, petrol) 
  • User manual
  • Introduction to manual
  • Controls and instruments
  • Salon equipment
  • Operation and driving
  • Maintenance and care
  • Power unit
  • Engine repair
  • Fuel system
  • Injection system
  • Intake and exhaust system
  • Starting and charging system
  • Cooling system
  • Decreased toxicity
  • Transmission
  • Clutch
  • Mechanical gearbox
  • Automatic gearbox
  • Wheel drive mechanism
  • Chassis, running gear
  • Suspension and wheels
  • Steering
  • Brake system
  • Body and interior
  • Exterior (external elements)
  • Interior (internal elements)
  • Doors, locks and windows
  • Heating and air conditioning
  • Electrical equipment
  • Equipment and devices
  • Headlights and lighting
  • Electrical circuits
Megane 1 (1995-2002) 
  • General information
  • User manual
  • Maintenance
  • Power unit
  • Petrol engines 1.4/1.6 l
  • Petrol engines 2.0 l
  • Diesel engines 1.9 l
  • Overhaul of engines
  • Cooling system
  • Fuel system (petrol)
  • Fuel system (diesel)
  • Decreased toxicity
  • Charge and launch systems
  • Ignition system (petrol)
  • Preheat system (diesel)
  • Transmission
  • Clutch
  • Mechanical gearbox
  • Automatic gearbox
  • Drive shafts
  • Chassis, running gear
  • Brake system
  • Car suspension
  • Steering
  • Body and interior
  • Exterior (external elements)
  • Interior (internal elements)
  • Doors, locks and windows
  • Electrical equipment
  • Equipment and devices
  • Electrical circuits
RenaultBook.ru © 2018–2026 | Mobile version | News and articles | Sitemap: EN BG BY UA RS HR RO PL SK HU | Administration | Site search | Bookmark
Duster 1 (2009-2017) | Fluence 1 (2009-2020, petrol) | Kangoo 1 (1997-2007) | Laguna 2 (2001-2007) | Logan 1 (2004-2012, petrol) | Logan 2 (2012-2020) | Megane 1 (1995-2002) | Megan 2 (2002-2009, petrol) | Sandero 1 (2007-2012, petrol) | Scenic 1 (1996-2003) | Symbol 1 (1999-2008, petrol) | Symbol 2 (2008-2013, petrol) | Renault 19 (1988-1996) | Espace I and II (1984-1996) | Espace III (1996-2002) | Clio 1 (1990-1998) |
We want your visit to be comfortable 😌 and use cookies 🍪 to do so.