English Русский
Български
Беларускі
Український
Српски
Hrvatski
Română
Polski
Slovenský
Magyar
Bookmark Contacts Articles Sitemap
Company vehicles Peugeot Company vehicles Opel Company vehicles Skoda Company vehicles Land Rover Company vehicles Mitsubishi Company vehicles Volkswagen Company vehicles Honda
RenaultBook.ru


Duster   Fluence   Kangoo   Laguna   Logan   Megane   Sandero   Scenic   Symbol   Clio   Other
Logan 1 (2004-2012, petrol) Logan 2 (2012-2020)

Changing engine oil and oil filter (Renault Logan 1)

  • Main
  • Logan
  • Logan 1 (2004-2012, petrol)
  • General information
  • First maintenance
  • Changing engine oil and oil filter
0
According to the manufacturer's recommendation, engine oil should be replaced after 12 months of operation or after 15 thousand km of mileage, whichever comes first.

Note: Under severe operating conditions in a large city or very dusty areas, change the oil and filter every 7-8 thousand km.


You will need: a 10 mm spanner, engine oil, an oil filter, a clean rag, a container for draining the oil with a capacity of at least 5 liters, a special key for unscrewing the drain plug, a flat-blade screwdriver, and a hammer.

Note: Approximately 3.35 liters of oil are required for replacement.


Recommendations: Use motor oil that meets the European ACEA A2 or A3 standard or the API SJ standard, viscosity grade 15W40, 10W40, 5W40, 15W50 or 5W50 (depending on climatic conditions).


Note: Drain the oil after driving while the engine is still hot. If the engine is cold, start it and warm it up to operating temperature.
Fill with the same brand of oil as the oil that was in the engine. If you still decide to change the brand of oil, flush the lubrication system with flushing oil or oil of the brand that will be used. To do this, after draining the old oil, fill with new oil up to the lower mark on the dipstick. Start the engine and let it idle for 10 minutes. Drain the oil and only then replace the oil filter. Now you can fill with new oil up to the required level (to the upper mark on the dipstick).


Caution: Do not pour used oil onto the ground.

Caution: Do not pour used oil onto the ground.


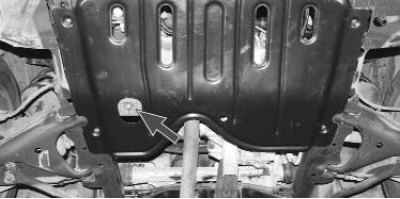
1. Clean the drain plug on the oil pan with a wire brush and then with a rag.


1. Clean the drain plug on the oil pan with a wire brush and then with a rag.


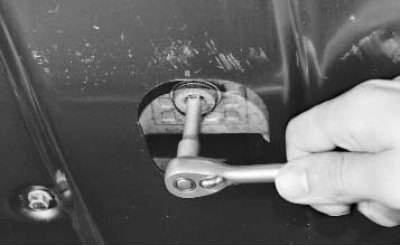
2. Unscrew the drain plug, having first placed a container underneath to collect the drained oil, and drain the oil.

Warning! Be careful: the oil is hot.


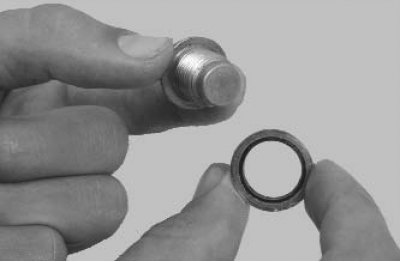
3. Screw the cap back on.
3. Screw the cap back on.


Note: The plug is sealed with a copper washer. If the washer is too tight, be sure to replace it with a new one.
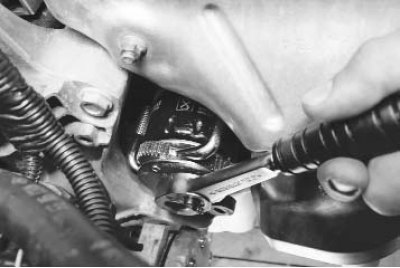

Note: The plug is sealed with a copper washer. If the washer is too tight, be sure to replace it…


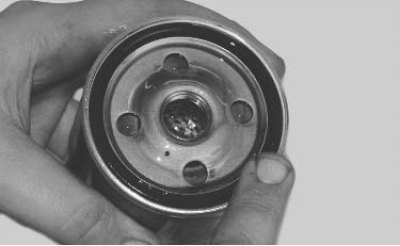
4. Use a special key to loosen the oil filter and unscrew it by hand.


Note: If you do not have a special key, you can unscrew the filter in the order described below.
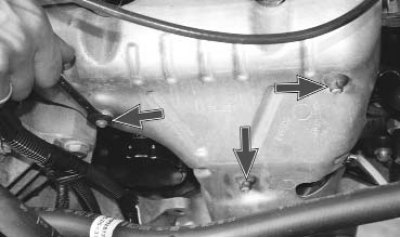

Note: If you do not have a special key, you can unscrew the filter in the order described below.


Unscrew the three nuts securing the exhaust manifold heat shield...
Unscrew the three nuts securing the exhaust manifold heat shield...


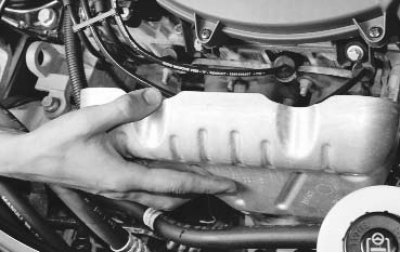
...and take it off.
...and take it off.


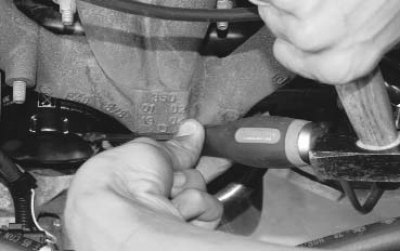
Punch the oil filter housing with a screwdriver and use it as a lever to remove the filter. Punch the filter housing as close to its bottom as possible so as not to damage the nipple in the cylinder block.
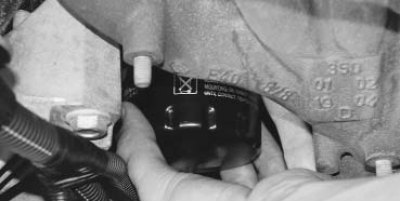


Punch the oil filter housing with a screwdriver and use it as a lever to remove the filter. Punch…


Unscrew the filter and remove it.

Unscrew the filter and remove it.


5. If the new filter's O-ring is not coated with grease or talc by the manufacturer, lubricate it with clean engine oil and screw the filter into place (by hand without using tools) 3/4 of a turn from the moment the ring contacts the cylinder block flange.
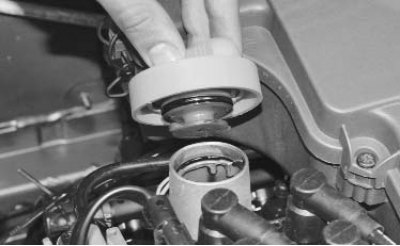
5. If the new filter's O-ring is not coated with grease or talc by the manufacturer, lubricate it…


6. Turn counterclockwise and remove the oil filler cap...
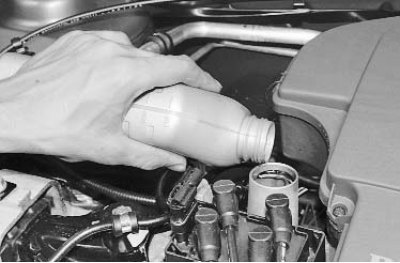


6. Turn counterclockwise and remove the oil filler cap...


7. ...then fill with clean oil (see "Checking the level and adding oil to the lubrication system"). Replace the oil filler cap.

8. Start the engine and let it idle for a few minutes (the low oil pressure warning light should go out 2–3 seconds after starting the engine). While the engine is running, check for oil leaks from the drain plug and oil filter. Stop the engine, check the oil level, add oil if necessary, tighten the plug and filter.
This article is available on: russian, bulgarian, belarusian, ukrainian, serbian, croatian, romanian, polish, slovak, hungarian
Article has been reviewed by editor: Podkrepilov Maxim
Share with friends:
 
Logan 1: First maintenance
Next

 
Cleaning the crankcase ventilation system
Checking the tension of the auxiliary drive belt
Checking the exhaust system
Checking the cooling system hoses and connections
Checking the air filter element
Other articles on other Renault models

➽ Changing engine oil and oil filter Renault Sandero 1 (2007-2012, petrol)
➽ Removal and installation the air filter housing (K4M engine) Renault Laguna 2 (2001-2007)
➽ Engine oil and filter change Renault Megane 1 (1995-2002)
➽ Replacement of the replaceable element of the engine air filter… Renault Symbol 1 (1999-2008, petrol)
➽ Diesel engine fuel filter Renault Espace I and II (1984-1996)
Link to this article in different formats
Reviews and comments of visitors
No comments yet


Add two numbers 11 + 28


Logan 2 (2012-2020) 
  • General information
  • Faults en route
  • Daily checks
  • Governing bodies
  • Maintenance
  • Power unit
  • Petrol engines 1.2 l
  • Petrol engines 1.6 l
  • Diesel engines 1.5 l
  • Cooling system
  • Lubrication system
  • Power and control system
  • Intake and exhaust system
  • Engine electrical equipment
  • Transmission
  • Clutch
  • Car gearbox
  • Drive shafts
  • Chassis, running gear
  • Suspension and wheels
  • Brake system
  • Steering
  • Body and interior
  • Exterior (external elements)
  • Interior (internal elements)
  • Safety system
  • Heating and air conditioning
  • Electrical equipment
  • Equipment and devices
  • Wiring diagrams (sedan)
  • Wiring diagrams (wagon)
Logan 1 (2004-2012, petrol) 
  • General information
  • Vehicle device
  • User manual
  • Faults en route
  • Daily maintenance
  • First maintenance
  • Second maintenance
  • Driver tips
  • Power unit
  • Engine repair
  • Lubrication system
  • Cooling system
  • Power and exhaust system
  • Transmission
  • Clutch
  • Car gearbox
  • Drive shafts
  • Chassis, running gear
  • Front suspension
  • Rear suspension
  • Steering
  • Brake system
  • Wheels and tires
  • Body and interior
  • Exterior (external elements)
  • Interior (internal elements)
  • Doors, locks and windows
  • Body Care
  • Electrical equipment
  • Equipment and devices
  • Headlights and lighting
  • Power devices
  • Electrical circuits
RenaultBook.ru © 2018–2026 | Mobile version | News and articles | Sitemap: EN BG BY UA RS HR RO PL SK HU | Administration | Site search | Bookmark
Duster 1 (2009-2017) | Fluence 1 (2009-2020, petrol) | Kangoo 1 (1997-2007) | Laguna 2 (2001-2007) | Logan 1 (2004-2012, petrol) | Logan 2 (2012-2020) | Megane 1 (1995-2002) | Megan 2 (2002-2009, petrol) | Sandero 1 (2007-2012, petrol) | Scenic 1 (1996-2003) | Symbol 1 (1999-2008, petrol) | Symbol 2 (2008-2013, petrol) | Renault 19 (1988-1996) | Espace I and II (1984-1996) | Espace III (1996-2002) | Clio 1 (1990-1998) |
We want your visit to be comfortable 😌 and use cookies 🍪 to do so.