
Caution: Use leak-resistant nitrile gloves for handling.
Note: The engine oil pan is sealed with silicone during manufacture. When removing the oil pan in the workshop, a sealant must be used, which can be ordered from the spare parts catalog.
D4F engine (1.2 l)
Removing the oil pan
1. Place the vehicle on a two post lift.
2. Unscrew the fastening bolts and remove the engine protective tray.
3. Drain engine oil.
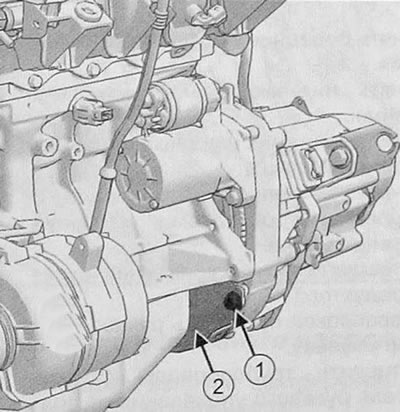
4. Loosen the bolt (1) and remove the flywheel cover (2).
5. To turn away bolts of the pallet of the engine.
6. Cutting the silicone sealant with a special cutter (Mot. 1716), gradually disconnect the sump from the engine.
7. Remove the engine oil pan.
Oil pan installation
1. Apply cleaner to the contact surfaces of the cylinder block and oil pan.
2. Wait about 10 minutes.
3. Remove sealant residue from surfaces with a wooden spatula.
4. Clean the contact surfaces with fine sandpaper.
5. Degrease the contact surfaces of the cylinder block and oil pan with a cleaning agent.
Caution: The contact surfaces must be clean, dry and free from grease (prevent fingerprints).
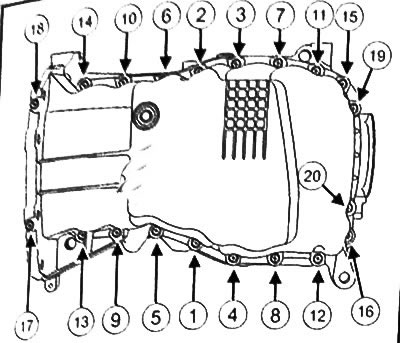
6. Install the engine tray with a new seal and tighten the mounting bolts in the sequence shown in the figure to a torque of 10 Nm.
7. Remove possible traces of oil from the engine sump.
8. Fill the engine with engine oil.
9. Check the tightness of the oil pan.
10. Further installation is carried out in the reverse order of removal.
Removing the oil pan
1. Place the vehicle on a two post lift.
2. Unscrew the fastening bolts and remove the engine protective tray.
3. Remove the bolts securing the bumper under the subframe.
4. Drain engine oil.
5. Remove the front wheels from the vehicle.
6. Remove the front fenders from the car.
7. Remove the lower jet thrust of the engine.
8. Remove the lower ball joints from the steering knuckles.
9. Remove the exhaust pipe with flange gaskets by unscrewing the fixing bolts.
10. To turn away bolts of fastening of a steering reducer.
11. Tie the steering gear to the body with wire.
12. Detach the power steering lines from the subframe.
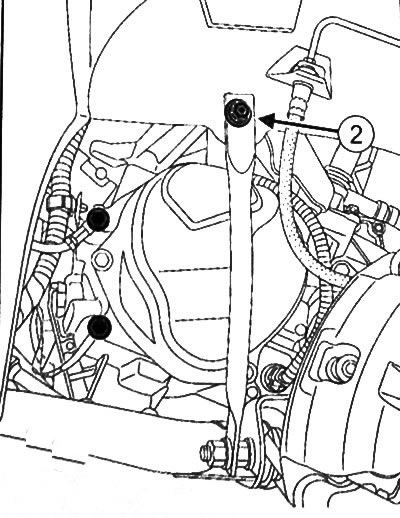
13. Remove the top bolts (2) front subframe struts.
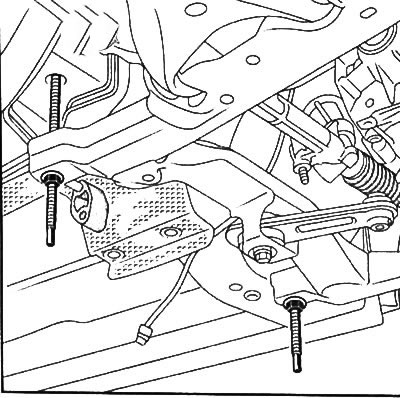
14. Loosen the bolts of the front subframe one by one (6), replacing them with threaded studs (Tav. 1747).
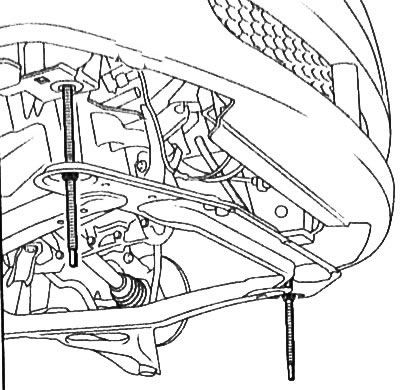
Attention: Make sure that the grub screws (Tav. 1747) are properly screwed into the threaded holes, and their nuts rest against the subframe.
15. Lower the subframe by about 120 mm, gradually unscrewing the nuts of the grub screws (Tav. 1747).
16. Unscrew the connecting bolts (7) gearbox/engine.
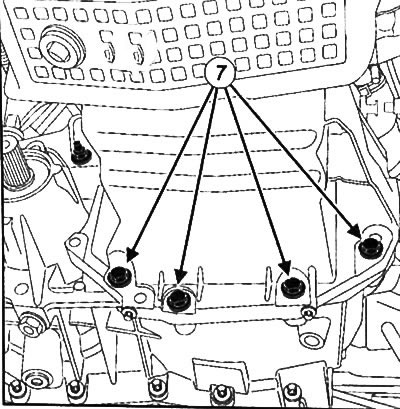
17. To turn away bolts of fastening of the oil pallet to the block of cylinders of the engine.
18. Remove the engine oil pan.
Oil pan installation
Attention: Be sure to replace the front subframe bolts with new ones.
1. Clean and degrease the contact surfaces of the oil pan with a cleaning agent (if it is reused) and engine block.
Attention:
- Do not scratch the connecting aluminum surfaces, any damage to the contact surfaces may cause leakage.
- Contact surfaces must be clean, dry and free of grease (prevent fingerprints).
2. Apply four beads with a diameter of 5 mm (8) and two drops with a diameter of 7 mm (9) silicone sealant at the junction of the cylinder block and the crankshaft thrust panel.
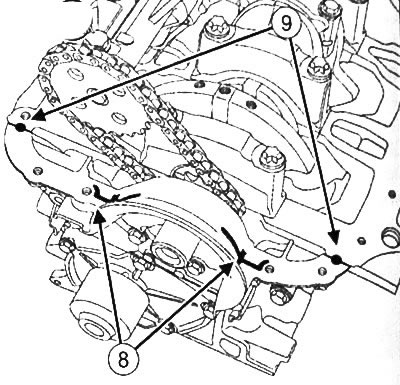
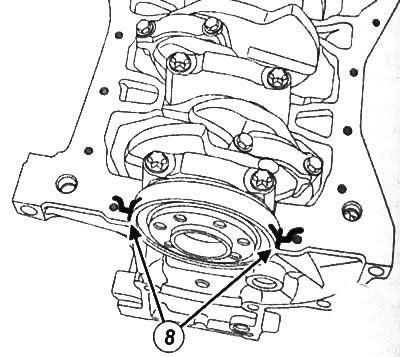
Caution: Excess applied sealant may be squeezed out when tightening threaded connections. Sealant entering the coolant may cause damage to some components (engine, radiator, etc.).
3. Install the engine oil pan with a new gasket.
4. Fasten, without tightening, the oil pan bolts.
5. Fit, without tightening, the gearbox/engine connecting bolts.
6. Tighten the fastening bolts in the sequence shown in the figure with the specified tightening torques:
- engine oil pan bolts: 44 Nm
- engine gearbox connecting bolts: 44 Nm.
7. Further installation is carried out in the reverse order of removal.
8. Fill the engine with engine oil.