
Removal and installation of a final collector
Attention:
- Wear cut-resistant protective gloves when carrying out work.
- Prepare a suitable drip tray for collecting liquids and take measures to protect surrounding components from spilling liquids.
Removing the exhaust manifold
1. Place the vehicle on a two post lift.
2. Disconnect the negative battery terminal.
3. Remove the air filter unit (see above in this chapter).
4. Unscrew the fastening bolts and remove the engine protective tray.
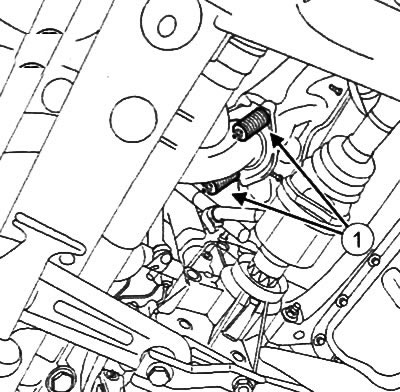
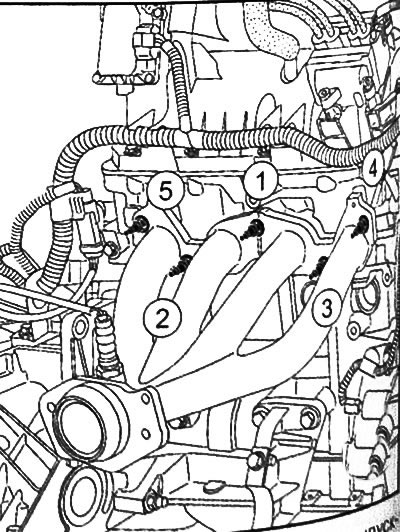
5. Loosen the bolts (1) catalytic converter and remove the terminal clamp.
6. Disconnect the oil vapor vent (2).
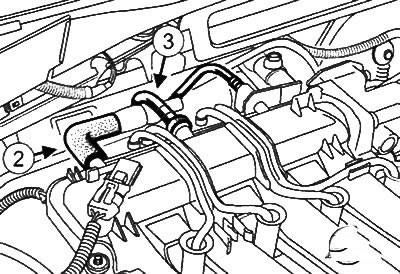
7. Disconnect the brake booster vacuum line (3).
8. Move the disconnected tubes to the side.
9. Disconnect the oxygen sensor wires from the cylinder head.
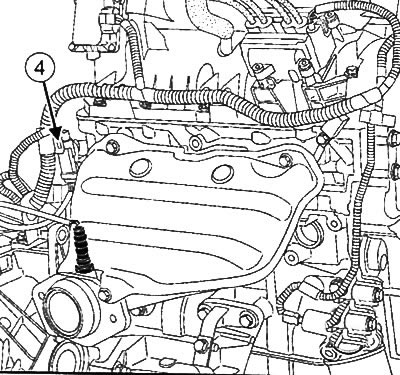
10. Disconnect the oxygen sensor connector (4).
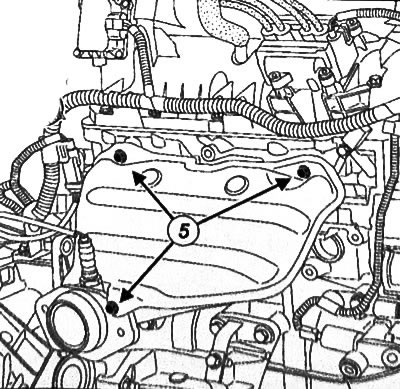
11. Loosen the bolts (5) and remove the heat shield.
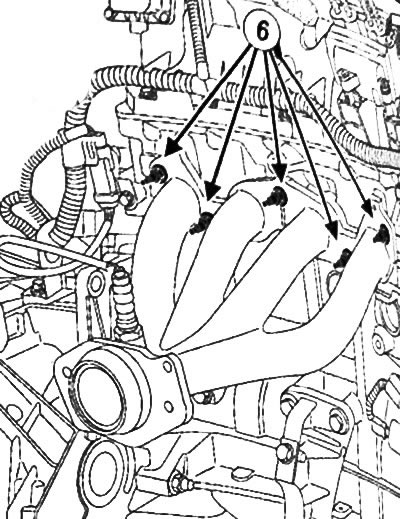
12. Loosen the fixing nuts (6) and remove the exhaust manifold with gaskets.
Installing the exhaust manifold
Note: Be sure to replace the new gasket and exhaust manifold outlet clamp.
1. Using fine sandpaper, clean the contact surfaces on the cylinder head and exhaust manifold (if it is reused).
2. Use a cleaning agent to clean and degrease the contact surfaces on the cylinder head and exhaust manifold (if it is reused).
3. First, tighten the exhaust manifold mounting nuts in the sequence shown in the figure with a torque of 10 Nm.
4. Tighten the exhaust manifold mounting nuts in the sequence shown in the figure to a torque of 25 Nm.
5. Further installation is carried out in the reverse order of removal
6. Check the tightness of the exhaust system.
7. Make sure that the exhaust pipe does not touch the bottom of the vehicle.