
Removal and installation of a final air duct of an intercooler
Removing the intercooler outlet duct
1. Place the vehicle on a two post lift.
2. Unscrew the fastening bolts and remove the engine protective tray.
3. Disconnect the pipe (8).
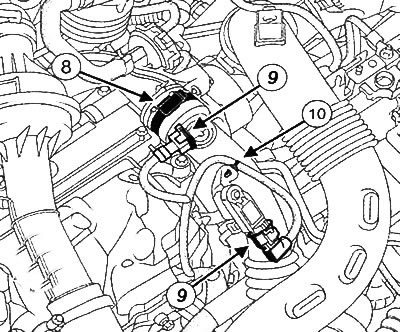
4. Disconnect connectors (9).
5. Disconnect the wiring from the holder (10).
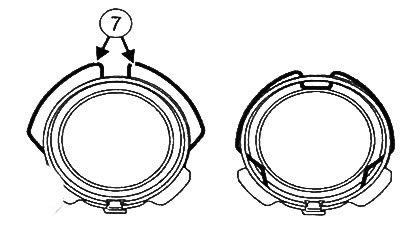
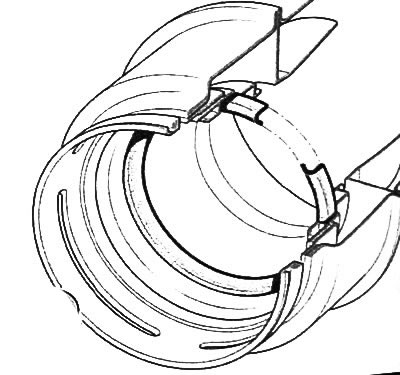
6. Unlock the intercooler outlet duct clamp by prying on the tabs with a flathead screwdriver (7).
7. Disconnect the intercooler outlet duct from the damper valve.
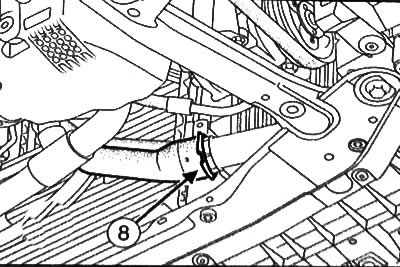
8. Unhook the clip (8) the intercooler outlet duct by prying it out with a flathead screwdriver.
9. Disconnect the intercooler outlet duct.
10. Remove the intercooler outlet duct
Installing the intercooler outlet duct
Note: Be sure to replace the intercooler outlet duct seal with a new one
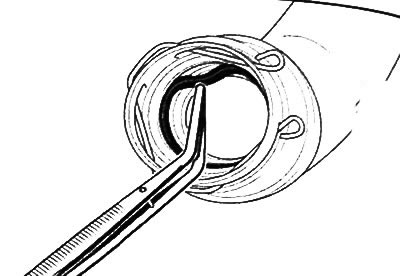
1. Use tweezers to remove the seal from the aftercooler outlet duct.
2. Install a new seal in the intercooler outlet duct and check that the seal is evenly seated.
3. Further installation is carried out in the reverse order of removal.
Note: Make sure the clamp on the intercooler outlet duct is properly secured before attaching it to the turbocharger or intercooler. When installing the air duct, it should lock into place with an audible click. After that, you need to shake the air duct to make sure it is securely fixed.