
Vehicles without power steering and without air conditioning
Perform the following operations.
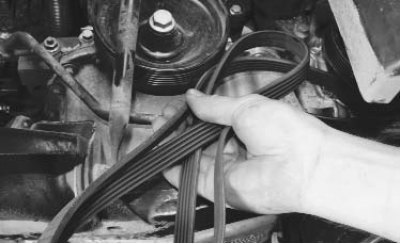
1. Check the belt tension by pressing your finger on it between the pulleys of the generator and the crankshaft. When pressed with a force of 100 N (10 kgf) belt deflection should be 8–12 mm.
Note. To check the tension, you can use a steelyard scale by pulling a branch of the belt with a hook.
2. To adjust the belt tension, loosen the bolt securing the generator to the tension bar.
3. Loosen the bolt securing the generator to the bracket.
4. Adjust the belt tension and tighten the bolt securing the generator to the tension bar to 21 Nm.
5. Tighten a bolt of fastening of the generator to an arm the moment of 44 Нм.
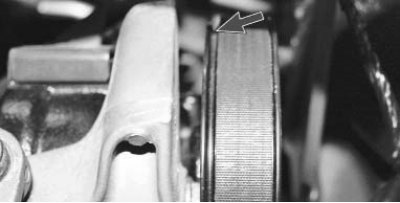
6. To replace the belt, loosen its tension (see above) and remove the belt from the drive pulleys.
7. Install a new belt and adjust its tension.
Vehicles equipped with air conditioning
On Renault Logan vehicles equipped with an air conditioning system, two options for the layout of auxiliary units are possible: the air conditioning compressor and generator can be installed on different sides of the engine or on the same side. In the first case, two drive belts are used on the car: one to drive the generator, the second to drive the air conditioning compressor. In the second case, one drive belt is used, the tension of which is regulated by a tension roller.
On vehicles where the alternator and air conditioning compressor are located on opposite sides of the engine, replace the drive belts in the following order.
1. Remove the A/C compressor drive belt by cutting it.
2. Replace alternator drive belt (see above).
3. Install the belt holder (included with the A/C compressor drive belt) at the bottom of the crankshaft pulley.
4. Put the belt on the air conditioning compressor pulley and put it behind the holder, which was installed on the crankshaft pulley.
5. Slide the belt holder with the belt attached to it along the crankshaft pulley clockwise as far as manual effort allows.
6. Install a special hook (included with the A/C compressor drive belt): with one side it clings to the compressor mounting bracket, and the other (more bent) - for the belt. The hook is installed so that the upper branch of the belt does not come off the air conditioning compressor pulley.
7. Turn the crankshaft so that the belt is put on its pulley.
8. Remove the belt holder and hook. These devices are disposable and can be thrown away after use.
9. Turn the crankshaft two turns so that the A/C compressor drive belt is in the correct position on the pulleys.
On vehicles where the alternator and A/C compressor are located on the same side of the engine
On vehicles where the alternator and air conditioning compressor are located on the same side of the engine, replace the drive belts in the following order.
1. Open the hood and slightly turn out the adjusting bolt of the belt tensioner.
2. Remove the right front wheel and engine mudguards from the right side (see «Removal and installation of mudguards and engine crankcase protection»).
3. Turn out two bolts of fastening of a tension roller and remove it.
Note. Replace the tension roller every time the belt is replaced.
4. Install a new tension roller without fully tightening the bolts of its fastening.
5. Install a new drive belt.
Attention! Lay the belt over the pulleys so that the outer groove of the pulleys remains free.
6. Adjust the drive belt tension with the adjusting bolt.
Note. The manufacturer recommends checking the belt tension and controlling it during adjustment using a special strain gauge tester. In this regard, there are no data on the magnitude of the force when the belt branch is deflected by a certain size in the technical documentation. In practice, you can initially approximately estimate the correct belt tension according to «rule of thumb»: by pressing on the belt branch with your thumb and determining the deflection with a ruler. According to this universal rule, if the distance between the centers of the pulleys is between 180 and 280 mm, the deflection should be approximately 6 mm. This method can only diagnose excessive belt loosening, therefore, for an accurate check and adjustment of the tension, contact the service.
7. Tighten the tension roller mounting bolts to 21 Nm.
8. Rotate the crankshaft three full turns to get the belt in the correct position on the pulleys.
9. Recheck belt tension and adjust if necessary.
10. Install the parts in the reverse order of removal.
Vehicles equipped with air conditioning and power steering
You will need a key «at 13».
1. Remove the right front wheel.
2. Remove the engine mudguards on the right side (see «Removal and installation of mudguards and engine crankcase protection»).

3. Turn the tensioner roller clockwise with a wrench and lock the tensioner in this position with a pin with a diameter of 6 mm (e.g. hex wrench).
4. Remove the accessory drive belt.
5. Install a new drive belt.
Attention! Lay the belt over the pulleys so that the inner groove of the pulleys remains free.
6. Remove the pin that secured the tensioner.
7. Rotate the crankshaft three full turns to get the accessory drive belt in the correct position on the pulleys.
8. Install the parts in the reverse order of removal.