
Attachment drive belt
Attachment Drive Belt Replacement
Attention:
- Wear protective gloves when performing work.
- To avoid damage to the crankshaft pulley, do not start the engine with the attachment drive belts removed.
Removing the Attachment Drive Belt
1. Place the vehicle on a two post lift.
2. Remove the front right wheel.
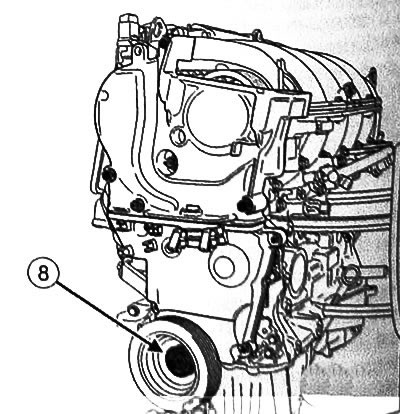
3. Unscrew the fastening bolts and remove the engine protective tray.
4. Remove the front right fender liner.
5. With a wrench (1) turn the tensioner clockwise to loosen the belt.
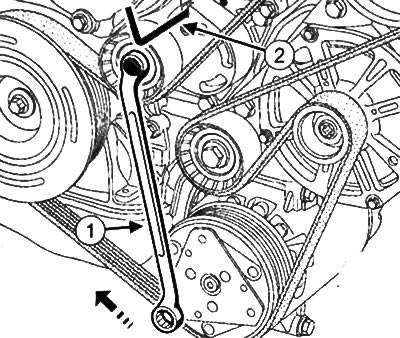
K7M engine (8 valves)
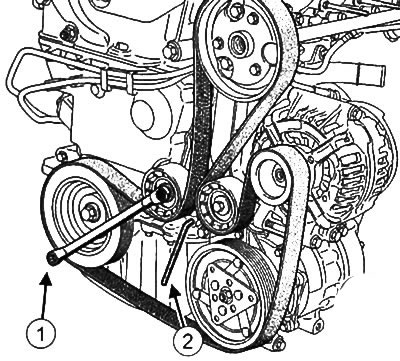
K4M engine (16 valves)
6. Fix the tension roller with a 6 mm Allen key (hex key) (2).
7. Remove the attachment drive belt.
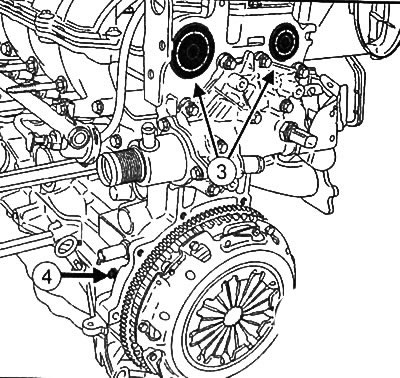
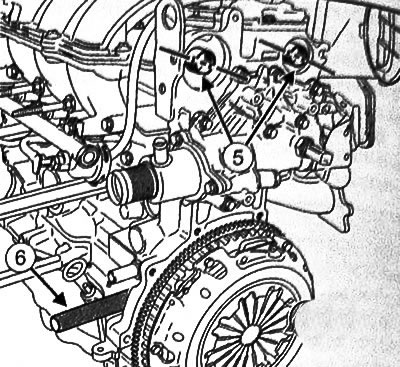
8. Remove the automatic fastening bolts and remove the automatic drive belt tensioner.
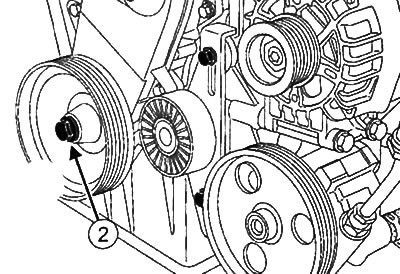
9. Loosen the bolt and remove the fixed drive belt pulley.
Removing the crankshaft pulley, K7M engine (8 valves)
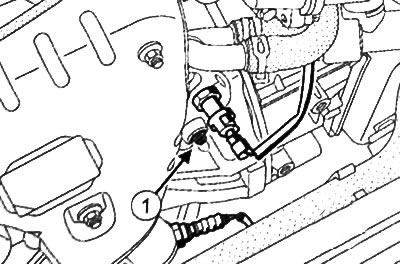
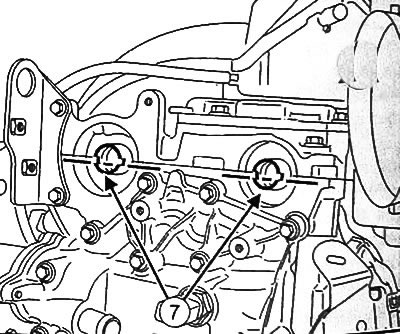
1. Remove plug (1) holes for the TDC locating pin.
2. Insert TDC locating pin (Mot. 1983).
3. Using the locating pin, place the crankshaft at the top dead center position of the piston of the first cylinder.
4. Insert TDC locating pin (Mot. 1489).
Note: The following operation requires two people.
5. Loosen the bolt (2) crankshaft pulley by fixing the flywheel with a large screwdriver (3), and remove the crankshaft pulley.

Removing the crankshaft pulley, K4M engine (16 valves)
1. Remove the air intake and air resonator.
2. Use a flathead screwdriver to pry off the plugs (3) from the end of the camshafts.
3. Remove plug (4) holes for the TDC locating pin.
4. Place the grooves of the camshafts (5) to an almost horizontal position with a downward displacement, rotating the crankshaft in the working direction (clockwise from the timing side).
5. Screw in the TDC locating pin (Mot. 1489) (6).
6. Turn the crankshaft in the working direction (clockwise from the timing side), so that it rests on the TDC locating pin (Mot. 1489).
7. Camshaft grooves (7) must be installed horizontally with a downward offset from the shaft axes.
8. Remove TDC locating pin (Mot. 1489).
9. Block the flywheel with a screwdriver
10. Loosen the crankshaft pulley bolt (8).
Installing the crankshaft pulley, K7M engine (in valves)
Attention:
- Be sure to replace the pulley bolts with new ones.
- Make sure the seals between the radiator and the two supports are properly positioned to avoid leaks.
Note: If the crankshaft pulley is being reused, clean the grooves of the new crankshaft pulley with a brush to remove any deposits.
1. Make sure that the crankshaft rests on the TDC locating pin (Mot. 1983).
2. Make sure that the crankshaft rests against the TDC locating pin (Mot. 1489).
3. Install the crankshaft pulley with a new bolt.
4. Hand-tighten the crankshaft pulley bolt.
5. Tighten the crankshaft pulley bolt to 30 Nm, then tighten another 100±5'.
6. Remove TDC locating pin (Mot. 1983).
7. Apply a drop of silicone sealant to the TDC dowel pin hole plug and install the plug.
8. Tighten the hole plug for the TDC locating pin to 20 Nm.
Installing the crankshaft pulley, K4M engine (16 valves)
Attention:
- Be sure to replace the crankshaft pulley bolt with a new one.
- Degrease the end of the crankshaft, as well as the mounting surface of the crankshaft pulley to prevent slippage of the drive belt.
1. Place the TDC template (Mot. 1489) on the ends of the camshafts.
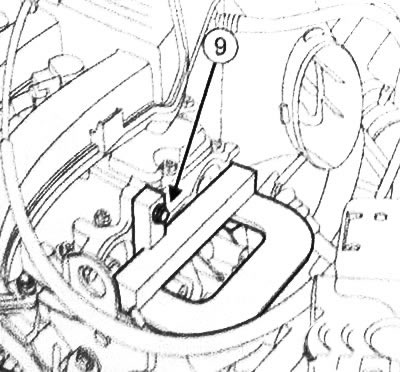
2. Fix the pattern (Mot. 1489) with M6 bolt (9)
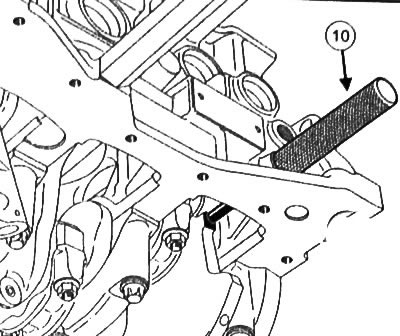
3. Screw in the TDC locating pin (Mot. 1489) (10)
4. Make sure that the crankshaft rests against the TDC locating pin (Mot. 1489).
Note: The crankshaft groove must be on top.
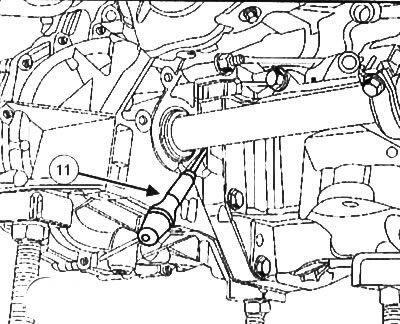
5. If the crankshaft does not rest against the dowel pin, move the crankshaft back by turning the flywheel with a screwdriver (11).
6. Install the crankshaft pulley.
7. Tighten the crankshaft pulley bolt to 40 Nm, then tighten another 145°±15°.
Attachment Drive Belt Installation
Attention: Be sure to replace the attachment drive belt, tensioner and fixed rollers of the drive belt with new ones.
8. Rotate the crankshaft two turns clockwise to properly install the attachment drive belt.
9. Further installation is carried out in the reverse order of removal.
Checking Attachment Belt Tension
See chapter "The mechanical part of the gasoline engine 1.2 l".