



Attention:
- Use protective gloves during work.
- Do not turn the engine crankshaft against the normal direction of engine rotation.
- Do not start the engine without the accessory drive belt installed to avoid damaging the crankshaft pulley.
1. Place the vehicle on a two-post lift.
2. Disconnect the negative battery terminal.
3. Remove the right engine mount:
- Remove the air intake and air filter unit.
- Disconnect the fuel line connectors (7) and unhook the fuel lines (8).
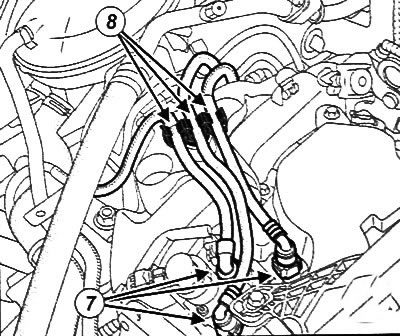
- Move the expansion tank of the cooling system to the side.
- Install the engine support beam with multiple adjustments and rigging (Mot. 1453) by attaching the engine rigging eye to the timing drive side.
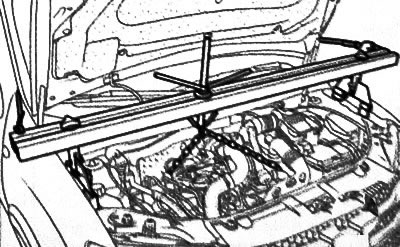
Note:
- Some vehicles are not equipped with engine rigging eyes on the timing side.
- Rigging eyes can be purchased separately by placing an appropriate order from the spare parts catalog.
- Always use new bolts to attach rigging eyes
- Mark the position of the right engine mounting support on the body.
- Loosen the bolts securing the right mounting support to the engine.
- Loosen the bolts securing the right engine mounting support to the body.
- Disconnect the fuel line connectors (7) and unhook the fuel lines (8).
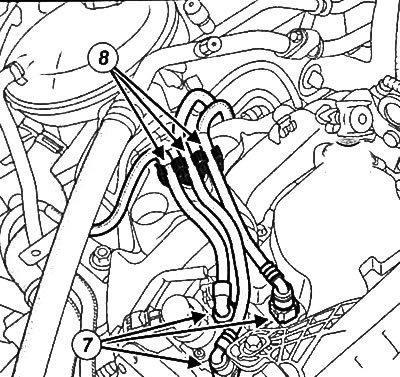
- Move the expansion tank of the cooling system to the side.
- Mark the position of the right engine mounting support on the body.
- Loosen the bolts securing the right mounting support to the engine.
- Loosen the bolts securing the right engine mounting support to the body.
- Remove the right engine mounting support.
4. Remove the front right wheel from the vehicle.
5. Remove the front right fender liner.
6. Loosen the mounting bolts and remove the engine protective pan.
7. Remove the accessory drive belt (see the relevant section above).
8. Remove the crankshaft pulley.
9. Loosen the bolt (2) of the upper timing drive cover.
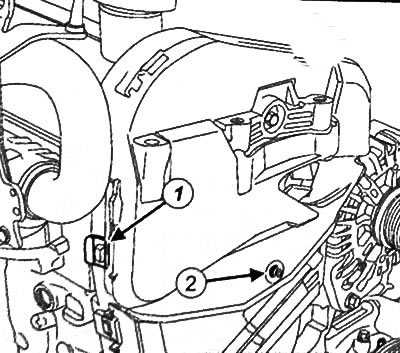
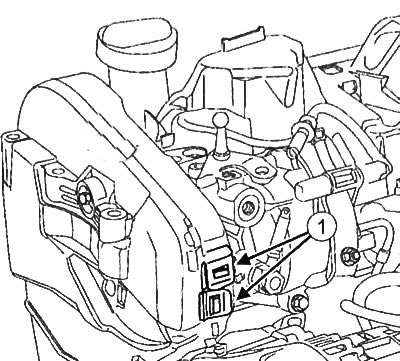
10. Remove the upper timing drive cover by unhooking the three strips (1).
11. Unhook the three strips (3).
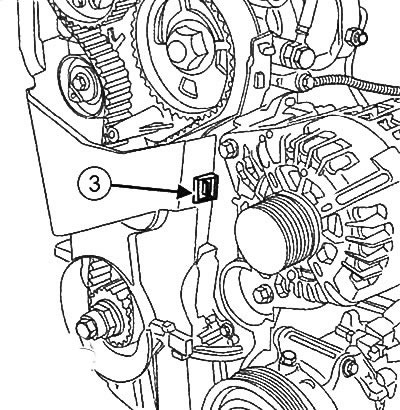
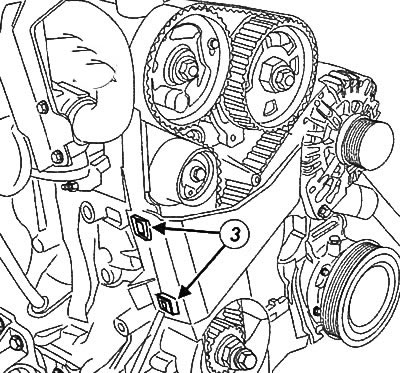
12. Remove the lower timing drive cover.
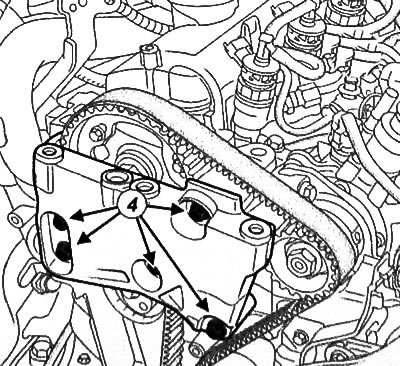
13. Loosen the bolts (4) securing the bracket of the right engine mounting support to the cylinder head and remove the support bracket.
14. Unscrew the plug (5) from the hole for installing the VMG mounting pin.
15. Install the old crankshaft bolt (6) with the spacer (7)
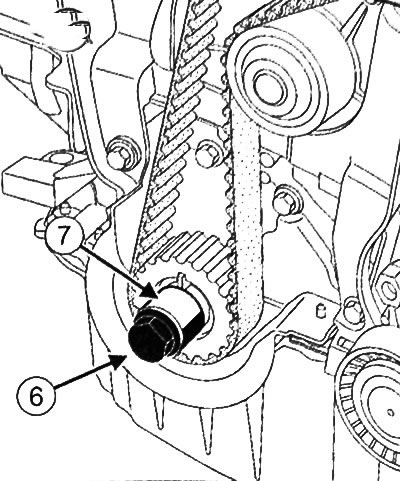
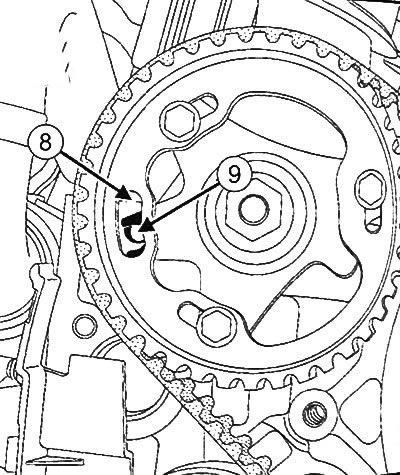
16. Turn the crankshaft clockwise (from the timing drive side) using an old crankshaft pulley bolt to position the hole (8) in the camshaft pulley opposite the hole (9) in the cylinder head.
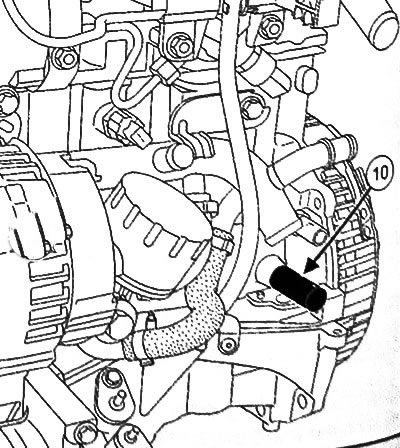
17. Screw the TDC setting pin (Mot. 1489) (10) into the cylinder block.
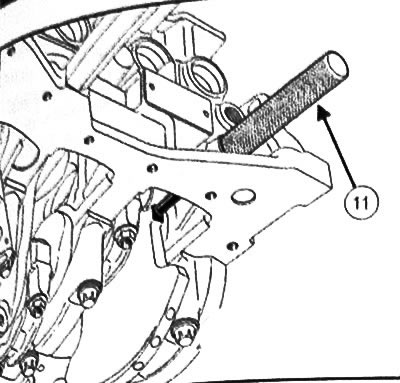
18. Slowly turn the crankshaft clockwise (from the timing drive side) for the old crankshaft pulley bolt so that the crankshaft rests against the TDC setting pulley (11).
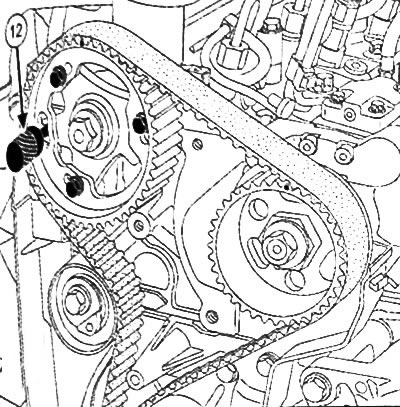
19. Insert the pin from the camshaft and crankshaft pulley dowel pin kit (Mot. 1430) (12) into the holes in the camshaft pulley and cylinder head.
20. Loosen the bolt (13) of the toothed belt tension roller.
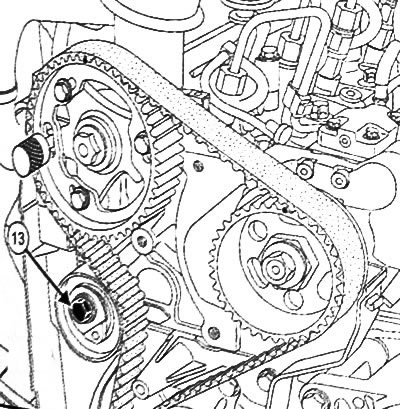
21. Loosen the timing belt tensioner roller by turning the eccentric cam with a 6 mm Allen key (hexagon).
22. Remove the timing belt, making sure that the crankshaft sprocket does not fall off.
23. Remove the timing belt tension roller.
[This note was copied from the resource: renaultbook]