



Contents: Removal 🠛 Installation 🠛
Removal
Place the vehicle on a two-post lift.
Caution: When performing this operation, it is necessary to secure the vehicle to the lift using a safety belt to prevent the vehicle from becoming unbalanced.
Remove the top engine covers.
Remove the front wheels.
Remove the left and right fender liners.
Remove the engine oil pan guard.
Drain the oil from the gearbox.
Drain the oil from the engine.
Disconnect the battery.
Drain the refrigerant from the refrigeration circuit using a filling station.
Remove the side subframe reinforcements and the front bumper.
Disconnect the hood lock drive cable.
Disconnect the windshield washer pipes.
Drain the fluid from the engine cooling system.
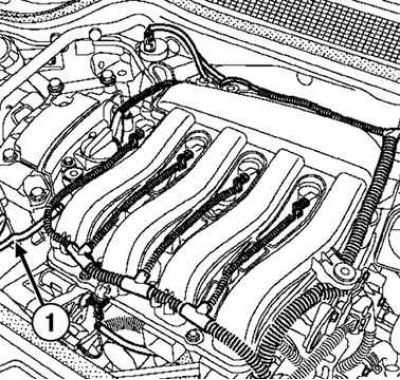
Fig. 2.81. Disconnecting the fuel supply line: 1 – fuel line
Disconnect the fuel supply line of the fuel distribution rail (Fig. 2.81).
Disconnect the wiring connectors from the electric fan of the engine cooling system.
Disconnect the engine cooling fan wiring harness.
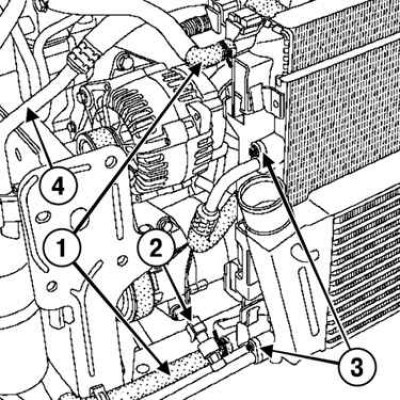
Fig. 2.82. Disconnecting the expansion tank hoses: 1 – hoses; 2 – pressure sensor wiring block; 3 – refrigeration circuit pipelines; 4 – refrigeration circuit pipeline between the air conditioner compressor and the receiver-dryer
Disconnect the expansion tank hoses from the engine cooling system radiator (Fig. 2.82).
Disconnect the wiring harness from the pressure sensor on the lower condenser pipe (see fig. 2.82).
Remove the refrigeration circuit pipes from the condenser (see fig. 2.82).
Remove the refrigeration circuit line between the air conditioner compressor and the receiver-dryer (see fig. 2.82).
Note: Be sure to seal the openings of the pipes and the reducer to prevent moisture from entering the system.
Remove the engine system radiator assembly with the condenser.
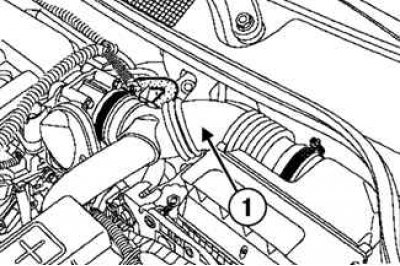
Fig. 2.83. Removing the air filter outlet air duct: 1 – air outlet duct
Remove the air filter outlet duct (Fig. 2.83).
Disconnect the ECU connectors.
Unscrew the battery shelf mounting bolts.
Remove the battery shelf and ECU bracket.
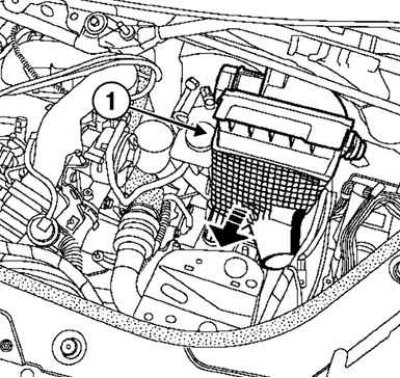
Fig. 2.84. Removing the air filter housing: 1 – filter housing
Remove the air filter housing (Fig. 2.84).
Disconnect the relay block wiring harness connectors.
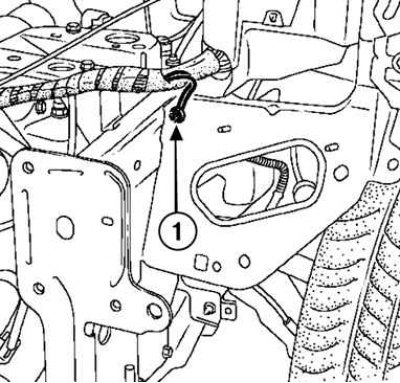
Fig. 2.85. Disconnecting the "mass" bus from the body: 1 – tire
Disconnect the ground bus from the body (Fig. 2.85).
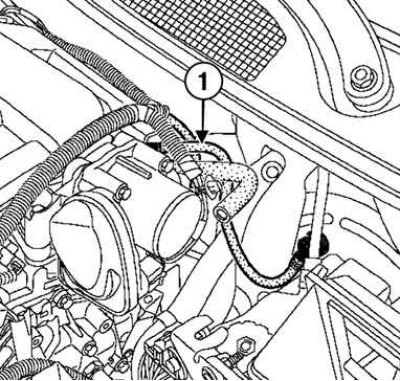
Fig. 2.86. Disconnecting the vacuum hose of the brake booster: 1 – hose
Remove the brake booster vacuum hose (Fig. 2.86).
Disconnect the hoses using the filling station (Mot. 1202-01 or Mot. 1202-02 or (Mot. 1448).
Disconnect the wiring harness from the lower oxygen sensor.
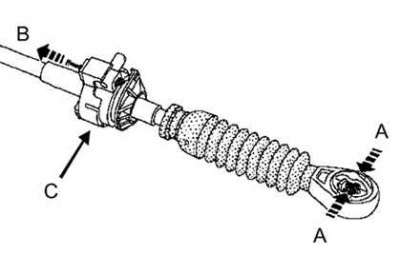
Fig. 2.87. Disconnecting the gearbox lever cable
Disconnect the cables from the levers on the gearbox by squeezing the cable end at points A, pull the lock in direction B and lift the cables at point C, as shown in Figure 2.87.
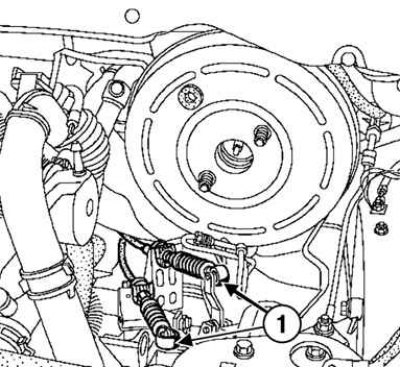
Fig. 2.88. Disconnecting the shift and gear selection cables: 1 – cables
Disconnect the shift and gear selection cables from the gearbox (Fig. 2.88).
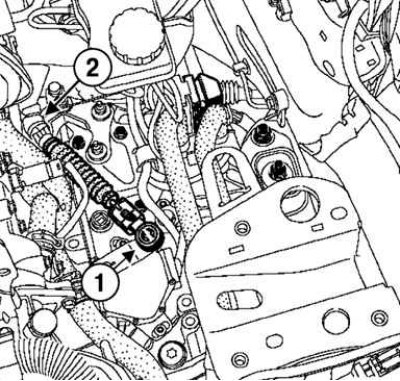
Fig. 2.89. Removing the ball end of the multifunction switch cable and the multifunction switch drive cable: 1 – cable tip; 2 – drive cable
Remove the ball end of the cable and the multifunction switch drive cable by releasing the cable sheath stopper (Fig. 2.89).
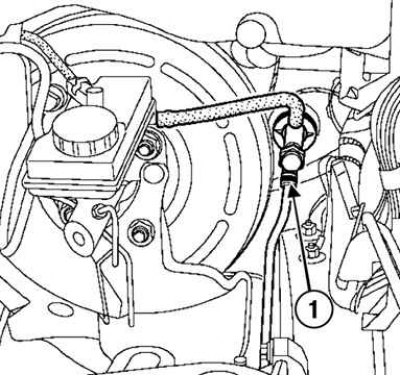
Fig. 2.90. Disconnecting the clutch hydraulic drive supply line: 1 – retainer
Pull the lock and disconnect the clutch hydraulic supply line (Fig. 2.90).
Note: Install a plug on the pipe to prevent liquid from leaking out.
Remove the left front wheel drive shaft.
Remove the right front wheel drive shaft.
[Text published on the website RenaultBook]
Remove the exhaust system inlet pipe mounting parts.
Remove the lower torque rod and subframe.
Install a hydraulic crane with a hoist or chain.
Mark the position of the engine pendulum mount support relative to the body.
Remove the engine mount.
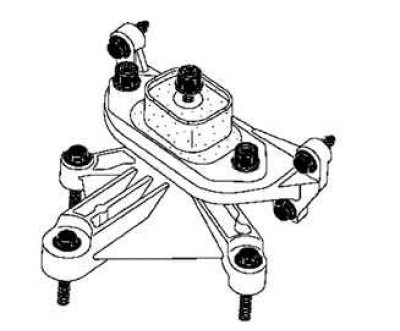
Fig. 2.91. Gearbox pendulum support
Remove the gearbox pendulum support (Fig. 2.91).
Remove the engine assembly with the gearbox by turning it.
Installation
Install the engine assembly with the gearbox on the vehicle.
Install:
- engine pendulum mount support;
- gearbox pendulum support;
- lower jet thrust;
- upper thrust;
- left front wheel drive shaft;
- right front wheel drive shaft.
The installation of the remaining components is carried out in the reverse order of removal.
Tighten to the specified torque:
- front body panel upper mounting bolts (21 Nm);
- front body panel lower mounting bolts (44 Nm);
- front subframe mounting bolt (105 Nm);
- rear subframe mounting bolt (21 Nm);
- wheel mounting bolts (110 Nm).
Add brake fluid to the reservoir.
Bleed the clutch hydraulic system.
Fill the gearbox with oil.
Fill the engine with oil.
Fill the cooling system with fluid.
Fill the refrigeration circuit with refrigerant using a filling station.
Note: Secure the brake hose and ABS speed sensor wires properly.
Note: Do not kink the brake hose.
Connect the battery.
Bleed the cooling system.
Tighten the battery cover mounting bolts to the specified torque (4 Nm).