



Contents: Removal 🠛 Installation 🠛
Removal
Place the vehicle on a two-post lift.
Drain the refrigerant from the refrigeration circuit.
Disconnect the battery.
Disconnect the wiring harness from the air conditioning compressor.
Disconnect the wiring harness from the refrigerant pressure sensor.
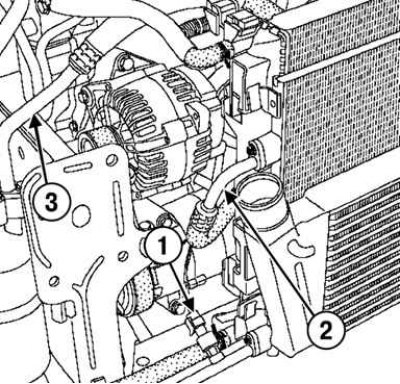
Fig. 2.36. Removing the air conditioner pipes: 1 – refrigerant pressure sensor wiring block; 2 – air conditioning compressor pipeline; 3 – air conditioning system pipeline
Disconnect the line from the air conditioning compressor and the air conditioning system line between the compressor and the receiver-dryer (Fig. 2.36).
Note: Be sure to plug the openings of the pipes and the reducer to prevent moisture from entering the system.
Remove the air conditioning compressor mounting bolts.
Remove the air conditioning compressor.
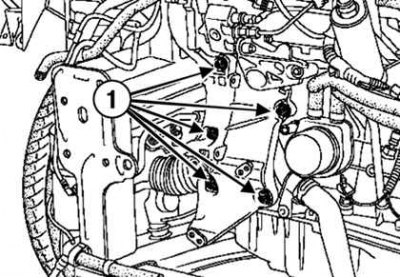
Fig. 2.37. Unscrewing the bolts securing the multifunctional bracket: 1 – mounting bolts
Unscrew the bolts securing the multifunctional bracket (Fig. 2.37).
Remove the multi-function bracket.
Installation
Install the multifunctional bracket.
Tighten the bolts and nuts to the required torque specified in Table 2.5.
Install the generator.
Install in the reverse order of removal.
Connect the battery.
Fill the refrigeration circuit with refrigerant.
Check the operation of the air conditioner.
Table 2.5. Tightening torques for the multifunctional bracket mounting bolts
| Element | Tightening torques. Nm |
| multifunctional bracket mounting bolts | 44 |
| air conditioner compressor mounting bolts | 25 |
| air conditioner compressor rack mounting bolts | 44 |
| battery cover mounting bolts | 4 |