
Removing
1. Place the vehicle on a two post lift.
2. Disconnect the negative battery terminal.
3. Remove the front right wheel from the vehicle.
4. Remove the timing belt.
5. Remove sprocket (toothed pulley) from the crankshaft.
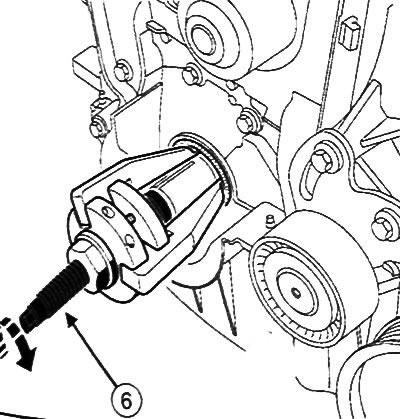
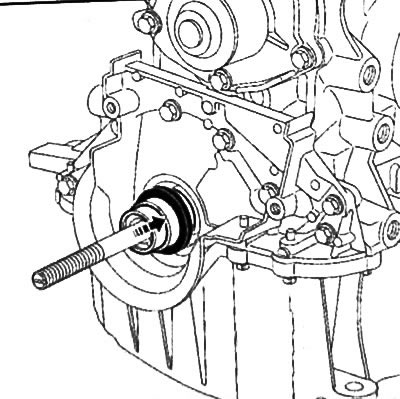
6. Insert tip (1) into the seal extractor (Mot. 1577) (2).
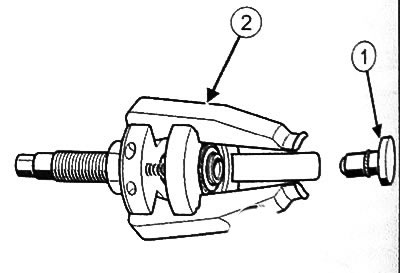
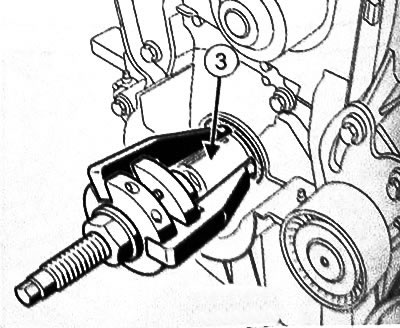
7. Place the puller stop (Mot 1577) on the crankshaft (3).
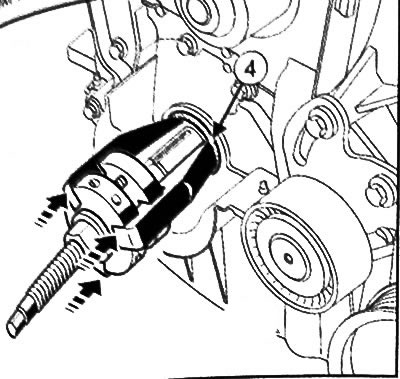
8. Press the oil seal extractor (Mot. 1577.) to the stop between the crankshaft and the oil seal (4).
9. Screwing the nut (5), spread the grips of the puller.
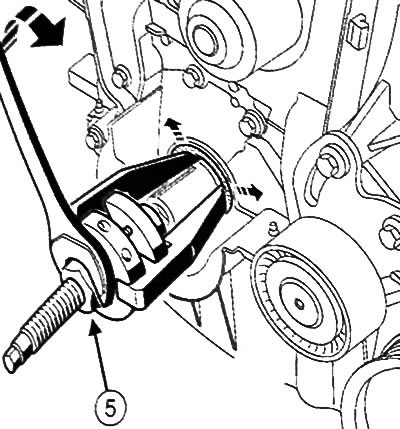
10.Twisting the threaded rod (6) puller (Mot. 1577), remove the crankshaft front oil seal.
Installation
Note: Be sure to replace the front crankshaft oil seal with a new one after each removal.
Attention: To ensure the required tightness, the contact surfaces must be clean, dry and free from grease (avoid any fingerprints).
1. Using a cleaning agent, clean and degrease the contact surfaces of the crankshaft with the front oil seal, as well as the socket for the front oil seal of the crankshaft.
Note:
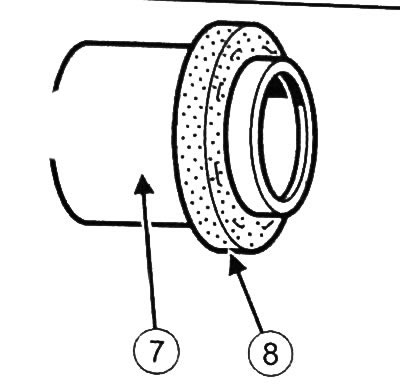
- This type of seal is very brittle, so a special tool must be used to install it.
- To prevent leakage after installation, when installing the stuffing box, only touch the protective element (7). It is strictly forbidden to touch the gland itself (8).
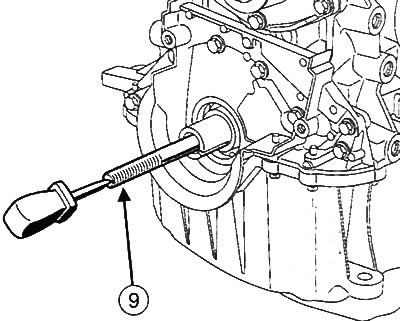
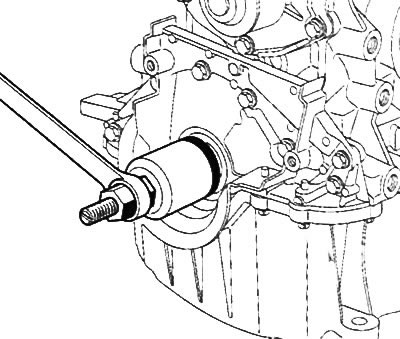
2. Insert threaded rod (9) stuffing box press tools (Mot. 1586) into the crankshaft.
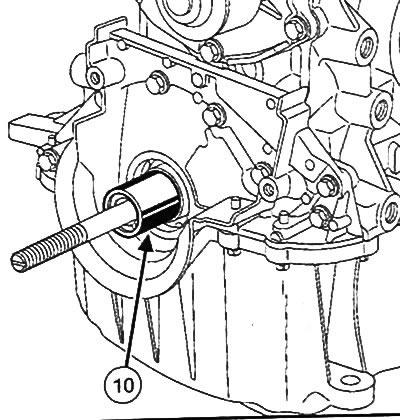
3. Install spacer (10) on the threaded rod of the fixture.
4. Install the protective element with the gland on the threaded rod of the device, taking care not to touch the gland.
5. Install the mandrel (11) with nut (12) (carving (13) nuts out) tools for pressing the front crankshaft oil seal (Mot. 1586).
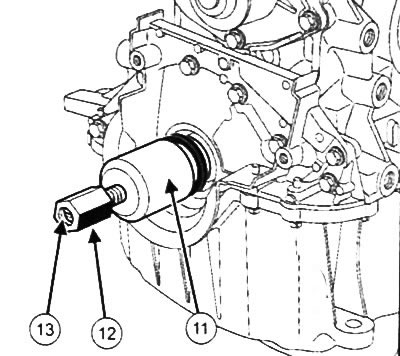
6. Screw in the nut until the mandrel contacts the spacer.
7. Unscrew the nut, remove the cover, the protective element and the threaded rod of the device.

8. Install the sprocket (toothed pulley) crankshaft.
9. Install the timing belt.
10. Install the front right wheel on the car.
11. Connect the battery.