
Removal of a back epiploon of a cranked shaft
1. Place the vehicle on a two post lift.
2. Disconnect the battery.
3. Remove the gearbox and clutch discs.
4. Remove the flywheel.
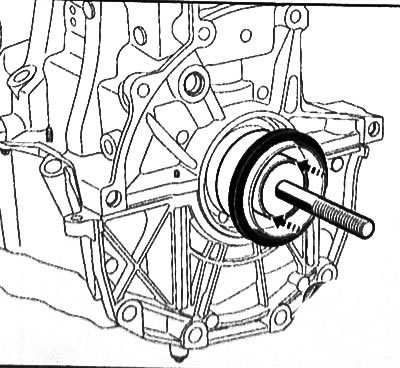
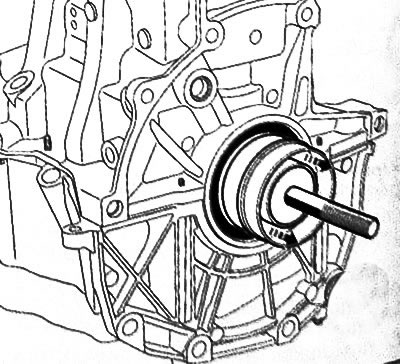
5. Install the oil seal extractor (Mot. 1579) on the crankshaft flange by adjusting the grips (1) according to the flange diameter using a knurled disc (2).
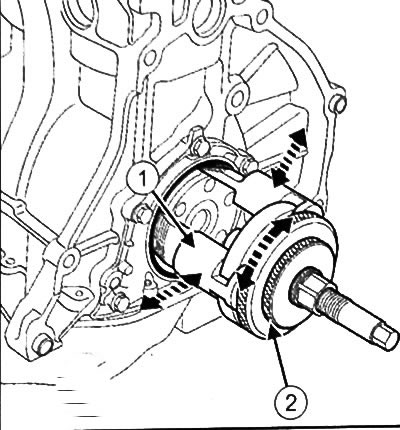
6. Screw in the knurled disc (4) all the way to the knurled disk (3) for fixing the clamps on the flange.

7. Push the jaws of the puller into the stuffing box using the hex nut (5).
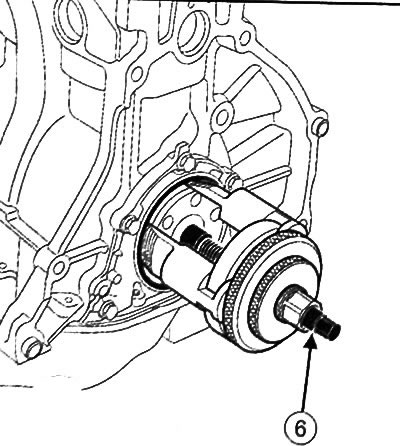
8. Remove the crankshaft oil seal from the gearbox side by screwing in the threaded rod (6).
Installation of a back epiploon of a cranked shaft
Note: Replace crankshaft rear oil seal with a new one after each removal.
Attention: To ensure the required tightness, the contact surfaces must be clean, dry and free from grease (avoid any fingerprints).
1. Using a cleaning agent, clean and degrease the contact surfaces of the crankshaft with the rear oil seal, as well as the socket for the crankshaft rear oil seal.
Note:
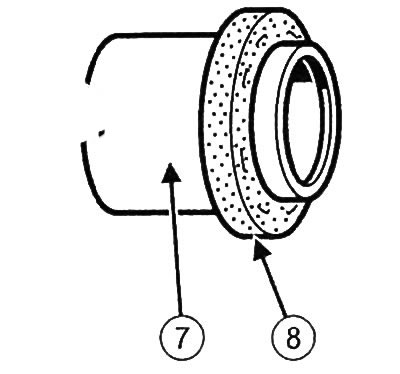
- This type of seal is very brittle, so a special tool must be used to install it.
- To prevent leakage after installation, when installing the stuffing box, only touch the protective element (7). It is strictly forbidden to touch the gland itself (8).
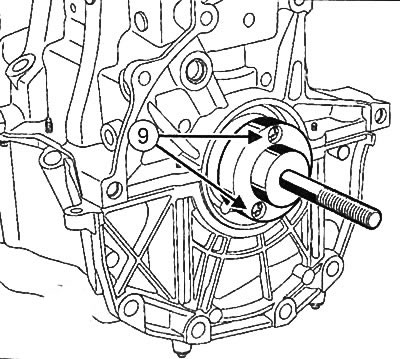
2. Install the crankshaft rear oil seal installer guide (Mot. 1585) on the crankshaft and fix with bolts (9).
3. Install the protective element with the gland on the threaded rod of the device, taking care not to touch the gland.
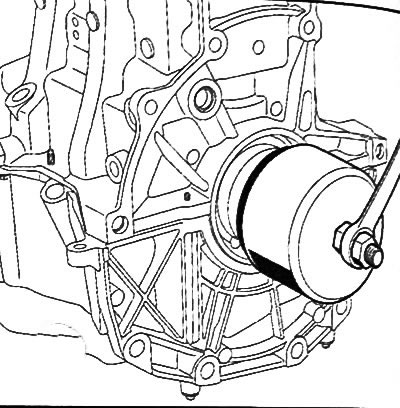
4. Install the cover (10) with nut (11) (carving (12) nuts out) crankshaft oil seal installer (Mot.1585).
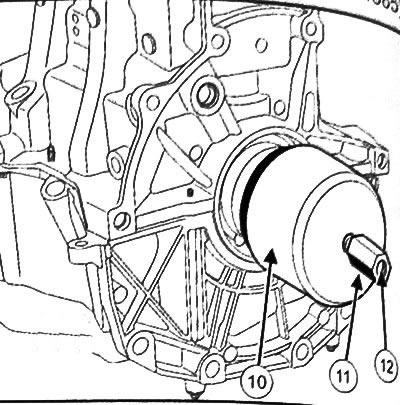
5. Tighten the tool nut so that the cover rests on the cylinder block.
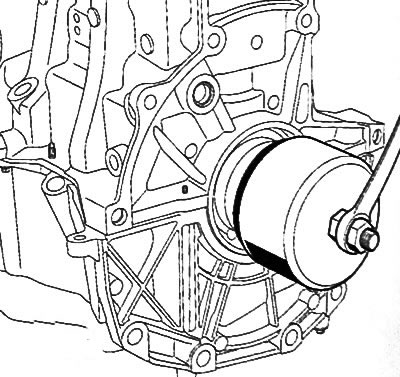
6. Unscrew the nut and remove the cover, protective element and guide from the crankshaft.
7. Install flywheel
8. Install clutch discs and gearbox.
9. Connect the battery.
10. Fill the gearbox with oil.
11. Bleed the clutch hydraulic system.