
Removal and installation of a shaft of a gear change
Removing the shift shaft
1. Remove the gearbox from the vehicle.
2. Place the gearbox on the assembly stand.
3. Remove the fifth gear housing (see relevant section earlier in this chapter).
4. Remove gears and fifth gear synchronizer.
5. Remove the gearbox housing:
- Loosen the gearbox housing bolts.
- With a special nozzle (Bvi. 1934) remove reverse switch (1).
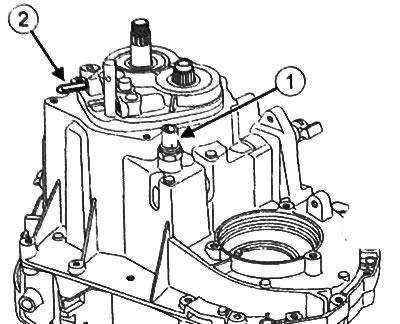
- If equipped, remove locking pin (2) reverse gear shaft.
- Engage third gear.
- Disconnect and remove the gearbox housing.
6. Remove gearbox shafts.
7. Remove differential.
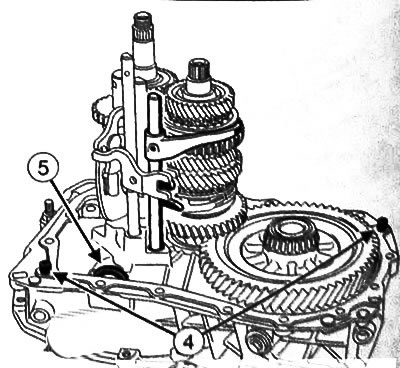
8. Remove selector finger (1).
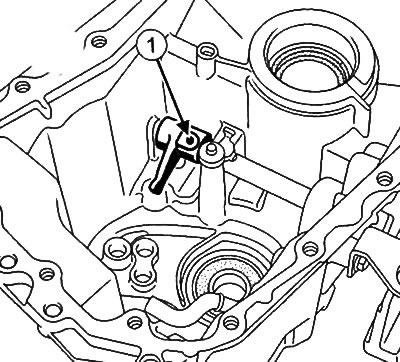
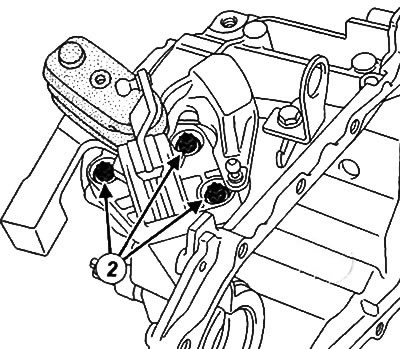
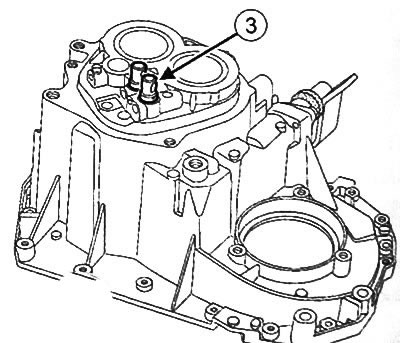
9. Remove the bolts (2) and remove the control mechanism.
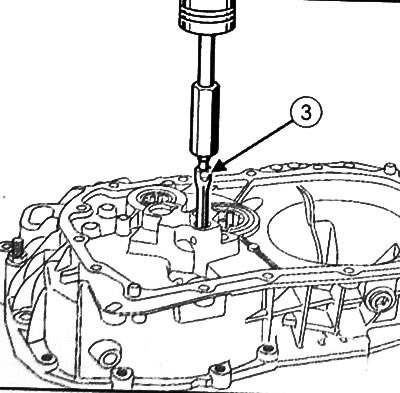
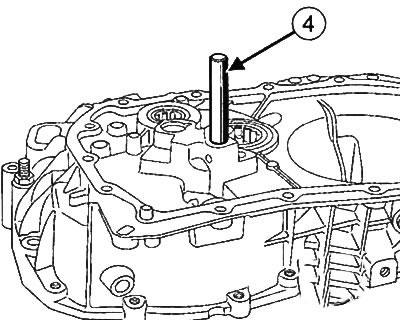
10. Remove the shift shaft rings using a sliding chipper (3).
Installing the shift shaft
Note:
Be sure to replace with new ones after each removal:
- gear shaft rings;
- oil seals;
- sealing rings;
- clutch thrust bearing guide;
- gear retaining rings;
- cylindrical pins;
- retaining rings for bearings of the primary and secondary shafts;
- spring pins of switching rods;
- clutch release cylinder (if equipped);
- magnet;
- retaining ring and differential nut.
1. Using a cleaning agent, clean the contact surfaces of the two shift shaft rings in the gearbox housing, the shafts, the shaft mounting surfaces, the differential, the gearbox housing and the clutch housing.
2. With tube (4) with a diameter of 14.5 mm, carefully install the shift shaft rings.
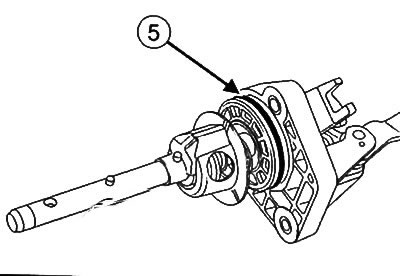
3. Install the control mechanism with new O-rings (5).
4. Insert and tighten the bolts of the torque control mechanism 21 Nm.
5. Insert the selector finger.
6. Install differential.
7. Install the gearbox shafts.
8. Install the gearbox housing:
- Clean the contact surfaces of the gearbox housing with a strong cleaning agent.
- Remove sealant residues from the contact surfaces with a plastic spatula.
- Sand the contact surfaces with fine sandpaper.
Attention:
- The sealing surfaces must be clean, dry and free from grease to ensure the required tightness (avoid any fingerprints).
- Excess applied sealant may be squeezed out when tightening threaded connections. Sealant entering the coolant may cause damage to some components (engine, radiator, etc.).
- Insert the 1st-2nd, 3rd-4th and 5th gear ball detent cartridges into the gearbox housing.
- Install detent springs and balls not fitted with cartridges.
- Fix the balls with a special tool (Bvi. 1570) (3).
- Make sure third gear is engaged.
- Check for dowel pins (4) and magnet (5).
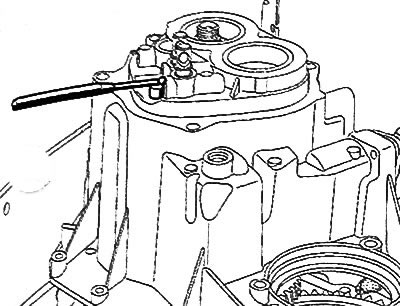
- Apply a bead of rubber sealant to the contact surfaces of the gearbox housing.
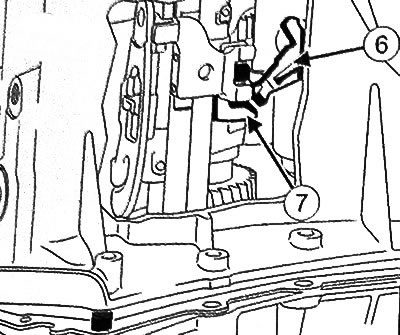
- Install the gearbox housing by pointing the shift pin (6) into the third gear (7).
- Insert the fixing ball of the fifth gear rod, not equipped with a cartridge.
- If equipped, insert locking pin (8) reverse gear shaft.
- Install the gearbox housing bolts.
- Rotate the input shaft to make sure the bearings are seated correctly.
- Tighten gearbox housing bolts to 25 Nm.
- With nozzle (Bvi. 1934) install reverse switch «tighten to 25 Nm.
9. Install gears and fifth gear synchronizer.
10.Install the fifth gear housing
11. Remove the gearbox from the assembly stand.
12.Install the gearbox on the car.