
Removing gears and fifth gear synchronizer
1. Place the vehicle on a two post lift.
2. Unscrew the fastening bolts and remove the engine protective tray.
3. Remove the front left wheel from the vehicle.
4. Remove the front left fender liner.
5. Remove the fifth gear housing (see above).
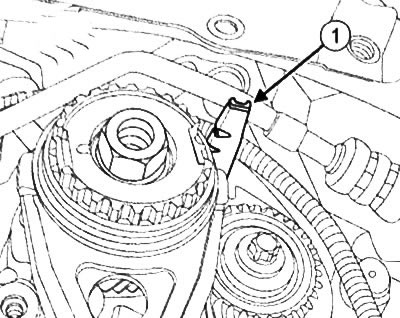
Note: Be careful not to damage the lubrication channel (1) in progress.
6. Hang the engine using a traverse (Mot. 1453) with screw bracket (Mot. 1453-01).
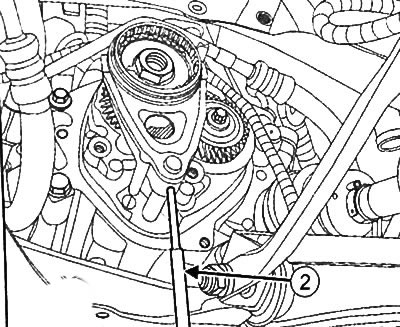
7. With a cylindrical punch (2) remove the pin from the fifth gear shift fork.
8. Using the shift lever, engage first gear.
9. Lower the engine using the traverse (Mot. 1453) with screw bracket (Mot. 1453-01).
Note: To prevent damage to the reverse switch, make sure it does not touch the subframe when lowering the engine.
10. Move the fifth gear fork to shift to fifth gear.
Note: The purpose of this operation is to block the gearbox shafts to make it easier to loosen the nut.
11. Loosen the bolt (3) secondary shaft.
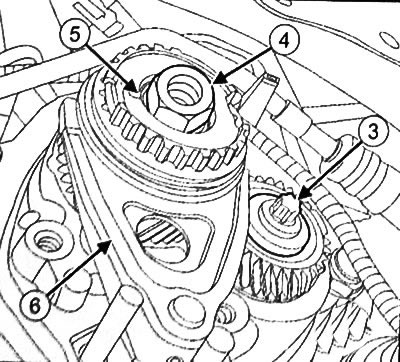
12. Loosen the nut (4) primary shaft.
13. Remove washer (5) main shaft nuts.
14. Remove the fifth gear fork with the stem (6).
15. Place a special tool (Bvi. 1170) (7) on the gear wheel of the fifth gear of the input shaft.
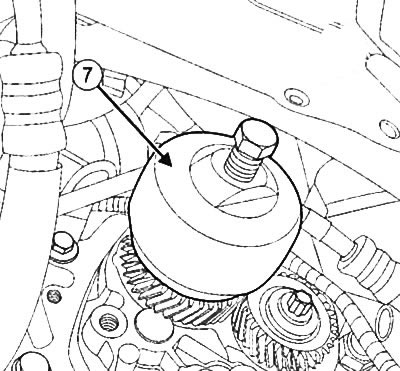
Note: Turning the special tool (Bvi. 1170), to position the tool splines against the gear hub.
16. Remove the 5th gear synchronizer hub with keys (8).
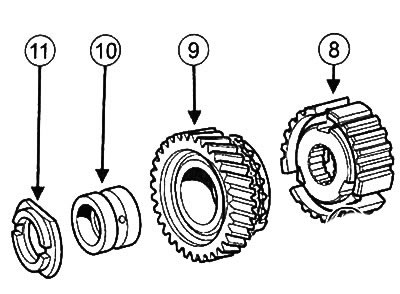
17. Remove the intermediate gear of the fifth gear with the synchronizer ring (9).
18. Remove intermediate gear support ring (10) and lock washer (11).
19. Fasten the output shaft bolt a few turns.
20. Place half of the fixed gear puller (Bvi. 1000-01) (12) under the 5th gear.
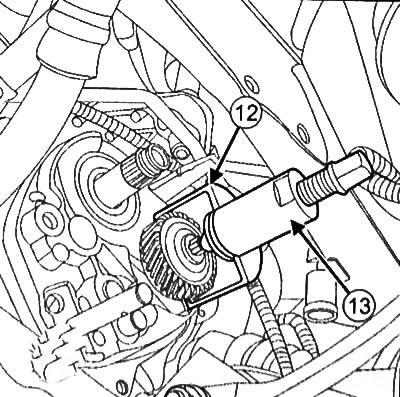
21. Place the bare puller (Bvi. 22-01) (13) half puller» (Bvi. 1000-01).
22. Place the other half of the puller and the ring (15) fixed gear puller (Bvi. 1000-01).
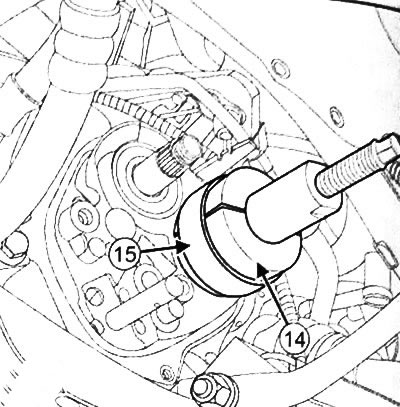
23. Remove the fifth gear.