
Attention:
- When working on the fuel tank or fuel lines, do not smoke or use open flames in the workplace.
- Be careful not to splash fuel when disconnecting the fuel connectors.
- Wear leak-resistant nitrile gloves and goggles with side protection when working.
- To prevent contaminants from entering the fuel system circuit, use plugs to plug the openings of the disconnected components.
- Measures must be taken to protect surfaces that may be exposed to escaping fuel to prevent corrosion or damage.
Checking the fuel supply
1. Loosen the oil filler screw.
2. Remove the oil filler neck from the engine.
3. Disconnect the fuel feed line connector from the fuel rail.
4. Install the T-piece for measuring the fuel pressure (Mot. 1311-08).
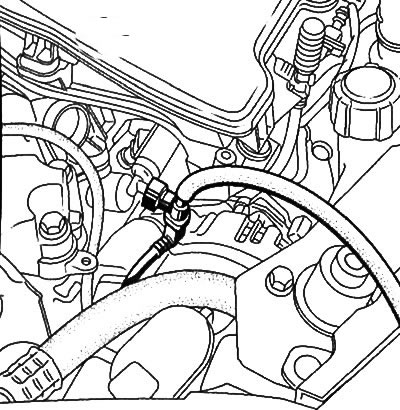
5. Attach a long enough hose to the T-piece to drain fuel from the pump into the reservoir.
6. Immerse the end of the hose into a graduated cylinder (2000 ml).
7. Remove the cover from the relay and fuse box in the engine compartment.
8. Remove the relay (1).
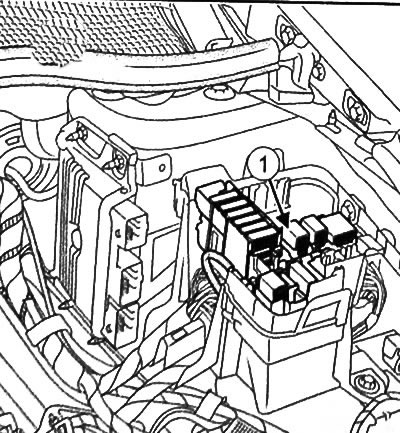
9. Close the circuit in parallel with the relay to energize the electric fuel pump.
Note: The fuel supply should be 80 - 120 l/h.
10. Install the fuel pump relay.
11. Install the cover on the relay and fuse box in the engine compartment.
12. Remove T-piece (Mot. 1311-08).
13. Connect the fuel feed line connector to the fuel rail.
14. Install the oil filler neck on the engine.
Fuel pressure check
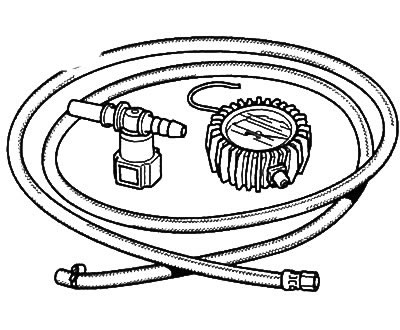
1. Prepare a fuel pressure gauge with an adapter (Mot. 1311-01) and T-piece (Mot. 1311-08).
2. Loosen the oil filler screw.
3. Remove the oil filler neck from the engine.
4. Disconnect the fuel feed line connector from the fuel rail.
5. Install the T-piece for measuring the fuel pressure (Mot. 1311-08) to the fuel supply line.
6. Connect the fuel gauge hose to the T-piece.
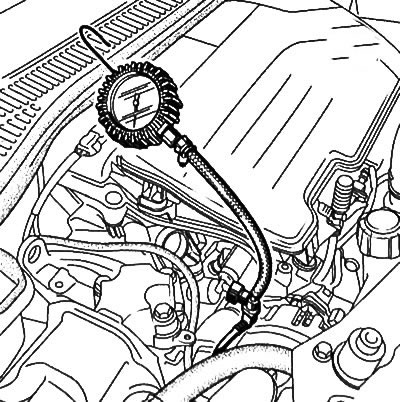
7. Connect the T-piece to the fuel rail.
8. Install the engine oil filler neck.
9. Start the engine.
10. Measure fuel pressure. It should be 3.5 bar and be constant.
Note: It takes a few seconds to get the correct fuel rail pressure
11. Turn off the engine.
12. Remove the oil filler neck again.
13. Remove the T-piece.
14. Connect the fuel feed line connector to the fuel rail.
15. Install the oil filler neck on the engine.
Removal and installation of the fuel rail with nozzles
Attention: It is forbidden to test fuel injectors with a direct voltage supply of 12V.
Note: Each component of the power system uses the appropriate plugs.
Removing the fuel rail with injectors
1. Disconnect the negative battery terminal.
2. Remove the air filter unit
3. Remove the intake manifold and place on a workbench.
4. Disconnect injection control wires.
5. Loosen the bolts (1) and remove the fuel rail assembly.
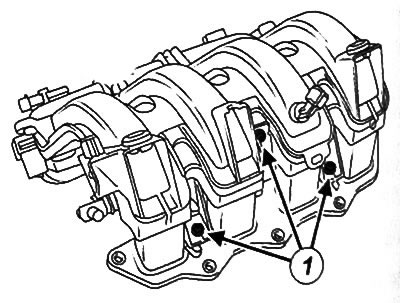
6. Disconnect injection control wiring.
7. Remove clips (2) and remove the fuel injectors (3).
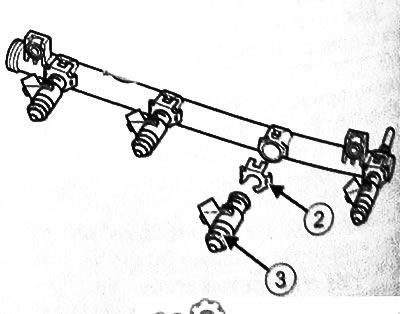
Installing a fuel rail with injectors
Note: Be sure to replace with new ones after each removal of the fuel injector seals and retaining clips.
1. Install the fuel injectors with clips on the fuel rail.
2. Install injection control wiring.
3. Install the fuel rail on the intake manifold.
4. Connect injection control wiring.
5. Further installation is carried out in the reverse order of removal.
6. Use a scan tool to calibrate and initialize the engine ECU and fuel injectors.