
Attention:
- When working on the fuel tank or fuel lines, do not smoke or use open flames in the workplace.
- Be careful not to splash fuel when disconnecting the fuel connectors.
- Wear leak-resistant nitrile gloves and goggles with side protection when working.
- To prevent contaminants from entering the fuel system circuit, use plugs to plug the openings of the disconnected components.
- Measures must be taken to protect surfaces that may be exposed to escaping fuel to prevent corrosion or damage
Checking the fuel supply
1. Put the car on a two-foot lift.
2. Turn off the ignition.
Version A
Disconnect the fuel pressure line connector (3).
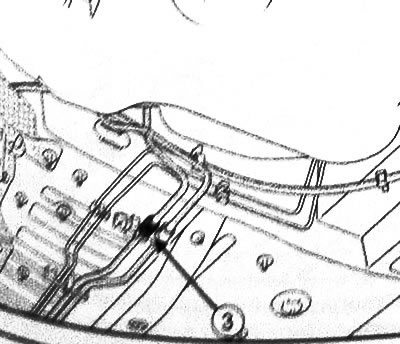
4. Connect the T-piece to check the fuel pressure (Mot. 1311-08) (6) to the fuel tank outlet.
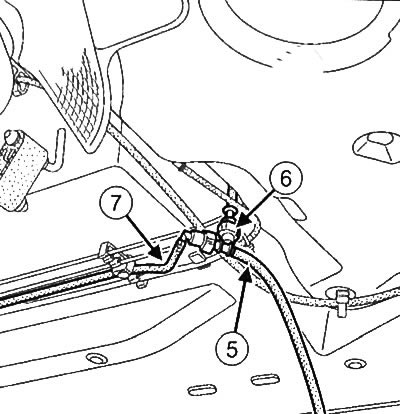
5. Connect hose (5) from the fuel gauge kit (Mot. 1311-01) to the T-shaped connecting element (6).
6. Connect the fuel supply line (7) to the T-shaped connecting element (6).
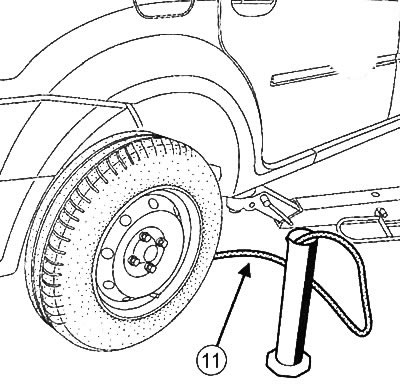
7. Insert the end of the hose (11) into a graduated cylinder (2000 ml).
8. Remove the cover of the relay and fuse box.
9. Remove the relay (12).
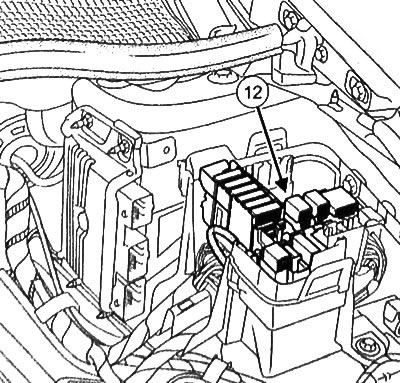
10. Close the circuit in parallel with the relay to energize the electric fuel pump.
Note: Fuel supply should be 75~95L/hour
eleven. Insert the fuel pump relay into the relay/fuse box.
12. Install the cover of the relay and fuse box.
Version B
13. Disconnect the pressure fuel line connector (4).
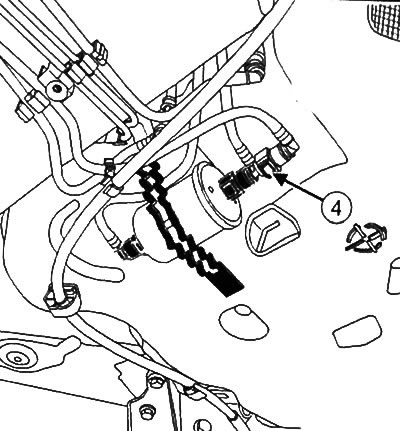
14.Connect the T-connector to check the fuel pressure (Mot. 1311-08) (8) to the fuel tank outlet.
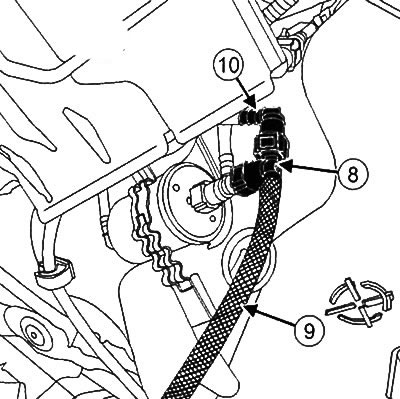
15. Connect the hose (9) from the fuel gauge kit (Mot. 1311-01) to the T-shaped connecting element (8).
16. Connect the fuel supply line (10) to the T-shaped connecting element (8).
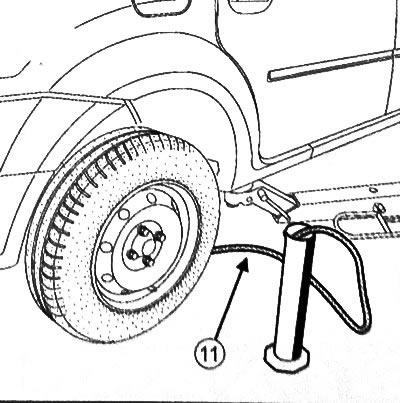
17. Insert the end of the hose (11) into a graduated cylinder (2000 ml).
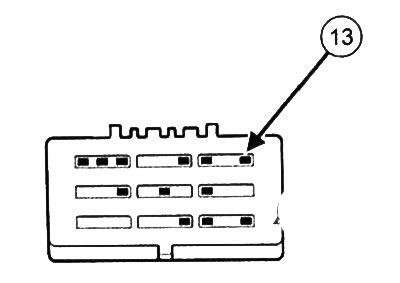
18.Disconnect connector (13) from the vehicle interior wiring harness.
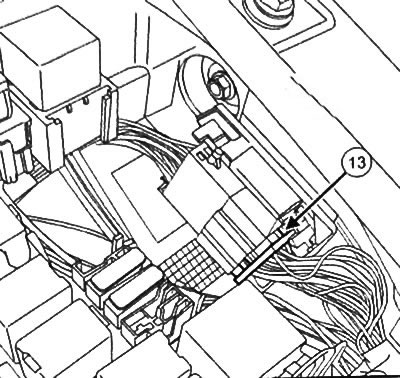
19. Connect the connector pin (13) to the positive battery terminal to turn on the fuel pump.
20. Record the time it takes for the measuring cylinder to fill up and calculate the amount of fuel supply.
Note: The fuel supply should be 75 - 95 l/h.
21. Disconnect the power supply from the connector pin (13).
Continuation for all versions
22.Disconnect the T-piece.
23. Connect the fuel supply line to the fuel tank outlet.
Fuel pressure check
1. Place the vehicle on a two post lift.
2. Turn off the ignition.
Version A
3. Disconnect the fuel pressure line connector (3).
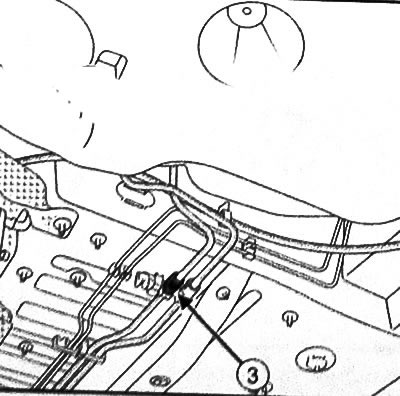
4. Connect the T-piece to check the fuel pressure (Mot. 1311-08) (6) to the fuel tank outlet.
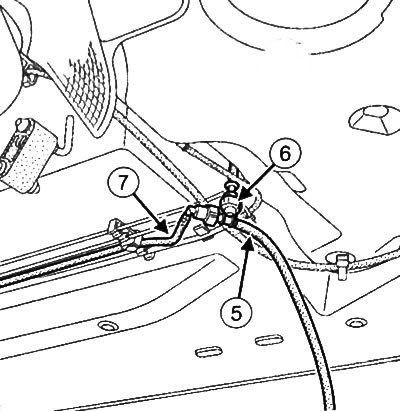
5. Connect pressure gauge with hose (Mot. 1311-01) (5) to the T-shaped connecting element (6).
6. Connect the fuel supply line (7) to the T-shaped connecting element (6).
Version B
7. Disconnect the pressure fuel line connector (4).
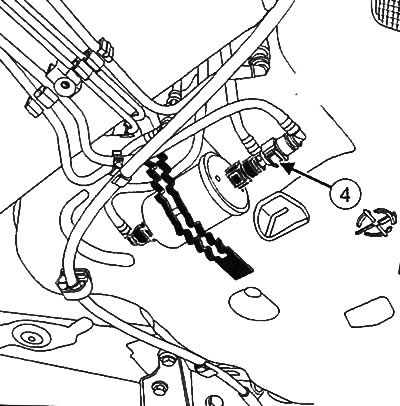
8. Connect T-piece for checking fuel pressure (Mot. 1311-08) (8) to the fuel tank outlet
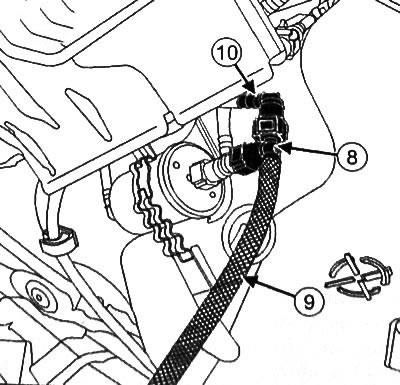
9. Connect pressure gauge with hose (Mot. 1311 01) (9) to the T-shaped connecting element (8).
10. Connect the fuel supply line (10) to the T-shaped connecting element (8).
Continuation for all versions
11. Start the engine to turn on the fuel pump.
12. Measure fuel pressure. It must be 3.5 bar±0.2 bar and be constant.
Note: It takes a few seconds to get the correct fuel rail pressure.
13. Disconnect the T-piece.
14. Connect the fuel supply line to the fuel tank outlet.