



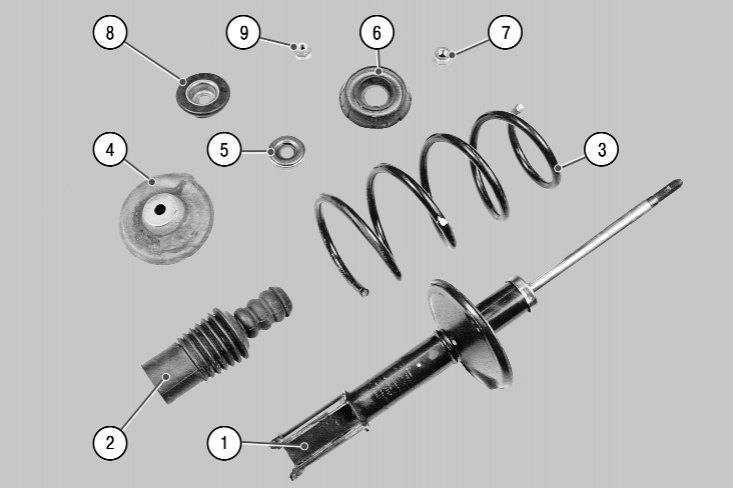
7.2. Shock absorber strut parts: 1 – shock absorber; 2 – compression buffer with protective cover; 3 – spring; 4 – upper spring plate; 5 – support bearing; 6 – upper support of the rack; 7 – shock absorber rod nut; 8 – thrust washer; 9 – shock absorber strut upper mounting nut
You will need: a 27 mm wrench, a 6 mm Allen key, and a spring compressor.
1. Remove the shock absorber strut (figure 7.2) from the vehicle (see "Removing and installing the shock absorber strut").
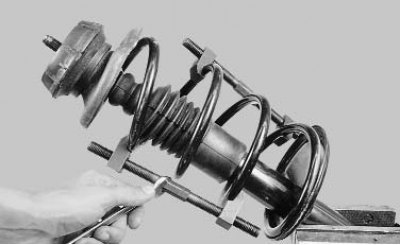
2. Install the spring compressor and compress the spring.
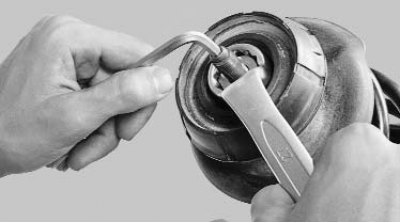
3. Unscrew the rod nut, holding the rod from turning with a second key...
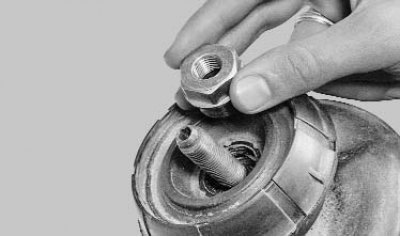
4. ...and take it off.
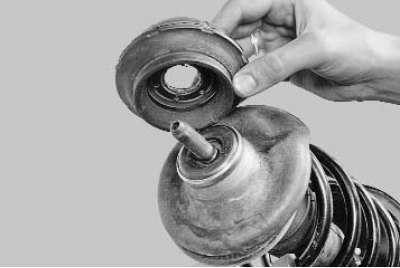
5. Remove the upper support...
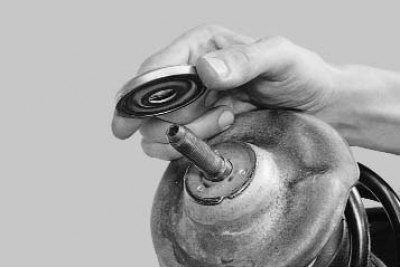
6. ... support bearing...
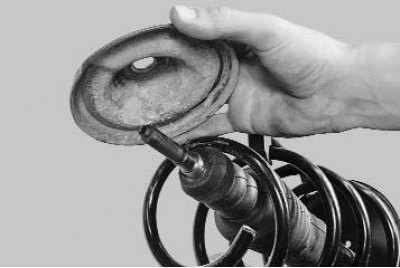
7. ...the upper cup of the spring...
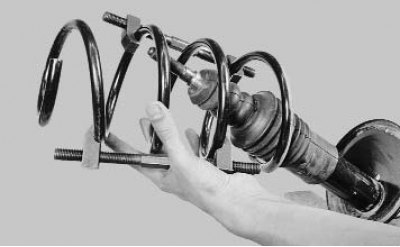
8. ...spring...
Note: Replace springs in pairs only (right and left at the same time).
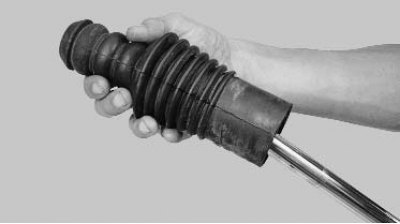
9. ...and a compression buffer with a protective cover.
10. Install the strut vertically and lower and raise the shock absorber rod several times until it stops. Make sure that the rod moves without any dips, jams or knocks. Otherwise, replace the strut. Also replace it if the threads at the top of the rod are damaged.
Caution! Replace shock absorbers in pairs only (right and left at the same time).
11. Replace the compression buffer if it or the protective boot is damaged.
12. Replace the upper support in case of severe deformation or local bulging of the rubber mass.
13. Replace the support bearing if it is corroded, has axial movement in the housing, or seizes when turning.
14. Install the parts in the reverse order of removal. The tightening torque of the shock absorber rod nut is 62 N·m (6.2 kgf·m).
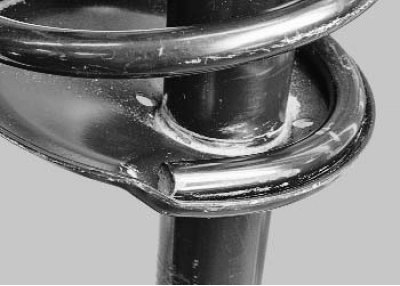
Note: When installing the spring, make sure that the end of the lower coil rests against the special protrusion of the lower spring cup.
15. Tighten the upper strut mount nut with the vehicle on the ground to a torque of 44 N·m (4.4 kgf·m). The tightening torque of the steering knuckle-to-strut mount bolts is 105 N·m (10.5 kgf·m).
Note: After replacing the front suspension shock absorber strut or its components, check and, if necessary, adjust the wheel alignment angles (see "Checking and adjusting wheel alignment angles"), especially if new parts have been installed. Use the services of workshops with special equipment.