
Attention! Regardless of the lifting equipment used, never use the rear suspension beam as a support.
When replacing one of the shock absorbers, the shock absorber on the opposite side must also be replaced.
Removing
Place the car on a two post lift.
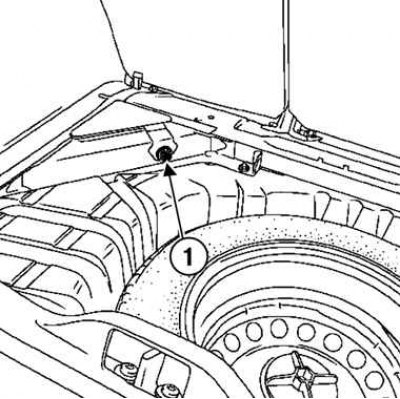
Pic. 4.40. Unscrewing the wheel arch nut: 1 - nut
Put the car on wheels, remove the wheel arch lining in the luggage compartment and unscrew the nut (pic. 4.40).
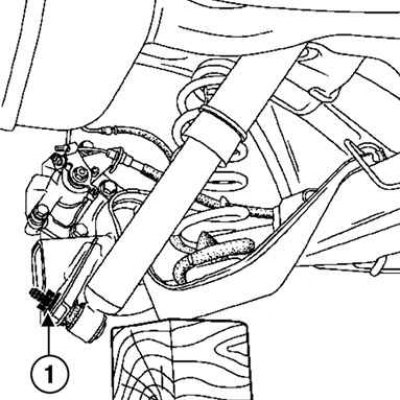
Pic. 4.41. Unscrewing the bolt of the lower end of the shock absorber: 1 - bolt
Raise the car and unscrew the bolt securing the lower end of the shock absorber (pic. 4.41).
Remove shock absorber.
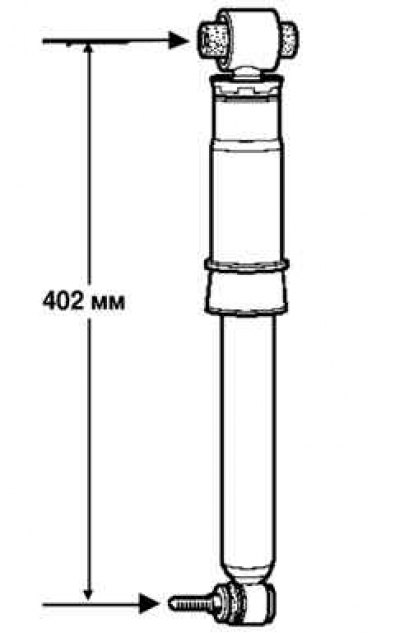
Pic. 4.42. Measuring the length of the rear shock absorber
Installation
Check up a course of the piston of the shock-absorber and measure its length in a free condition in the points shown in drawing 4.42.
Shock absorber length 402 mm.
If the length is less than specified, replace the shock absorber.
Installation is made in an order, the return to removal.
Pre-tighten the shock absorber lower mounting bolt.
Attention! The final tightening of the shock absorber mounting bolts is done when the car is on wheels.
Install the shock absorber head into the socket.
Lower the lift and put the car on wheels.
Align the shock absorber head with the hole in the luggage compartment.
Install the shock absorber upper end nut.
Tighten the top end nut of the shock absorber with pre-tightening.
Repeat the operation on the other side of the car.
Torque tighten:
- upper shock absorber nuts (140 Nm), while holding the bolt heads;
- lower shock absorber bolts (105 Nm);
- wheel bolts (105 Nm).
Install the wheel arch trim.