
Removing
1. Remove the cylinder head as described in Section Removal, inspection and installation of the cylinder head, and place it on the workbench.
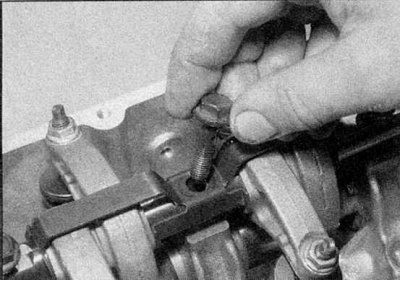
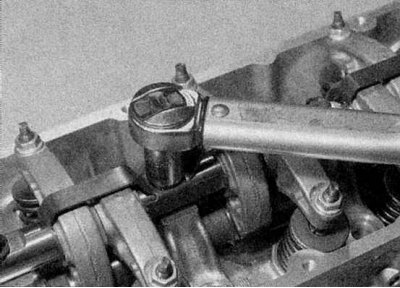
2a. Gradually turn away bolts of fastening of an axis of yokes and a fixing plate to a head of the block of cylinders.
2b. Get the shaft (refer to illustrations).
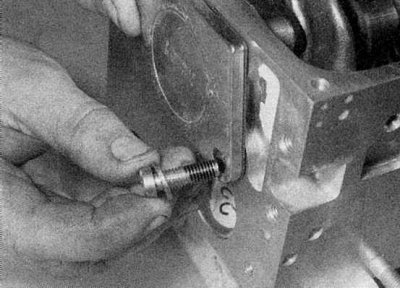
3. While holding the camshaft with a wrench installed on the special grooves on the camshaft, or a suitable tool inserted through the holes of the cogwheel, unscrew the bolt and remove the pulley.
4. On the E7J engine, using a socket wrench, unscrew the two bolts and remove the distributor. It is not necessary to mark the location of the distributor, since it is impossible to adjust its position.
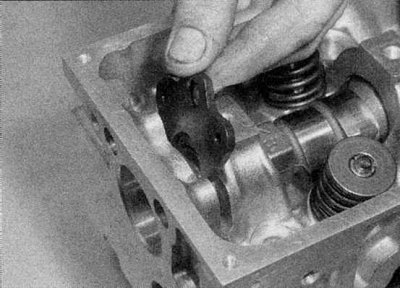
5a. On the K7M engine, remove the bolts.
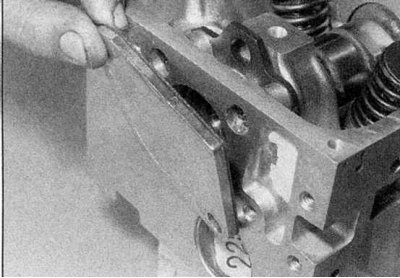
5b. Remove the cover and remove the gasket from the left end of the cylinder head (refer to illustrations).
6. Using a micrometer, measure the camshaft end play, and compare it with that shown in Specifications. In this way, the wear of the base plate can be determined.
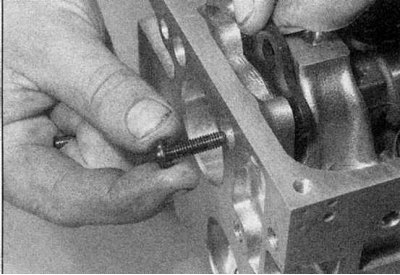
7a. Remove two bolts.
7b. Remove the base plate from the groove in the camshaft (refer to illustrations).
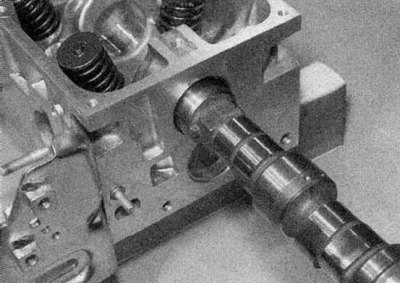
8. Remove the camshaft from the cylinder head from the pulley side, being careful not to damage the working surfaces (refer to accompanying illustration).
Inspection
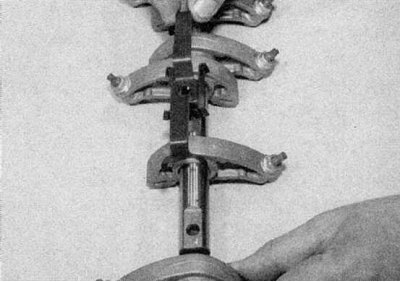
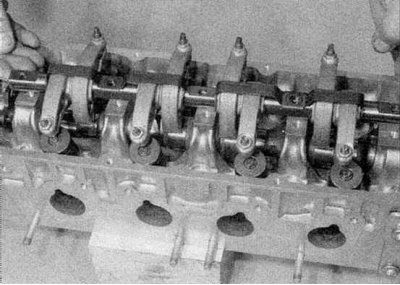
1. Inspect the running surfaces of the camshaft bearings and running surfaces of the cams for gouges and scratches. Also inspect the rocker shaft for signs of wear. If necessary, the axle can be dismantled for inspection (refer to accompanying illustration). Replace worn components as needed.
2. Check up a condition of working surfaces on a cam-shaft and in a head of the block of cylinders. If the working surfaces in the head are excessively worn, a new head will be required.
Installation
1. Lubricate the bearing surfaces in the cylinder head and the camshaft cams, then insert the camshaft into the head.
2. Install the base plate, then insert and tighten the bolts.
3. Measure the end play as described in paragraph 6 and check that it is within the limits given in Specifications. Excessive axial clearance can only be due to wear on the base plate or camshaft.
4. On the E7J engine, install the distributor and tighten the two bolts using a socket wrench.
5. On the K7M engine, install the end cap with a new gasket and tighten the bolts.
6. Replace the oil seal (Chapter Camshaft oil seal replacement), then install the camshaft sprocket, making sure the key fits into the slot on the end of the camshaft. Block the camshaft, then insert and tighten the bolt to the Specifications effort.
7. Install the rocker shaft and mounting plate, then insert the bolts into their original places and tighten them as shown in Specifications effort (refer to accompanying illustration). Please note that the bolt threads and contract surfaces of the head must be lubricated with oil. Hollow bolts are installed at each end and in the middle.
9. Install the cylinder head (refer to section Removal, inspection and installation of the cylinder head).