
Tightening torques (in Nm) engine/automatic transmission brackets
Inspection
1. Apply the handbrake, then jack up the front of the vehicle and place it on axle stands. Where available, remove the bottom shield of the engine compartment.
2. Visually inspect the rubber pads on the two front and one rear engine/transmission mounts for cracks and contamination.
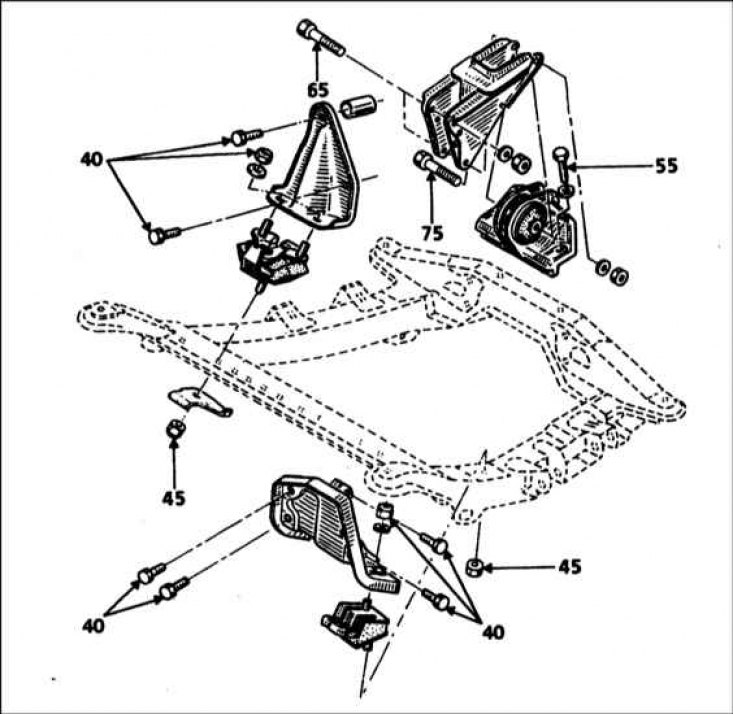
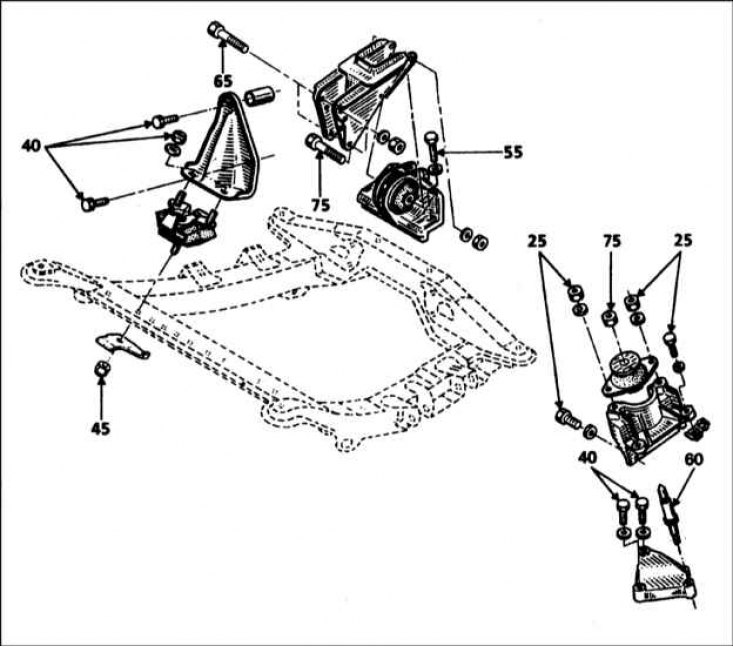
Right front mount
1. Apply the handbrake, then jack up the front of the vehicle and place it on axle stands.
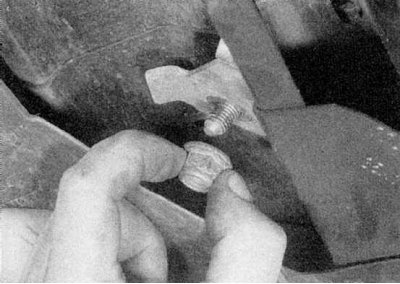
2. Remove the nut that secures the lower leg of the support to the subframe and remove the connecting plate (refer to accompanying illustration).
3. Remove the two top nuts securing the support to the bracket.
4. Using a winch or jack and a piece of wood, raise the right end of the engine just enough to remove the support.
5. If necessary, the bracket can be unscrewed from the cylinder block. On the E7J engine, remove the spacer from the top bolt. On models with power steering, the power steering pump must be removed before removing the bracket.
6. Install the new support in the reverse order of removal, tighten the nuts/bolts to the specified torque specifications (refer to illustrations).
Left front mount
1. Apply the handbrake, then jack up the front of the vehicle and place it on axle stands.

2. Loosen and remove the lower nut securing the support to the subframe. Make sure that the nut does not fall out inside the subframe (refer to accompanying illustration).
3. Loosen and remove the top nut securing the mount to the transmission bracket.
4. Using a winch or jack and block of wood, raise the left end of the engine/transmission just enough to remove the support.
5. If necessary, unscrew the bracket from the transmission.
6. Install the new support in the reverse order of removal, tighten the nuts/bolts as shown in Specifications effort.
Rear support
1. To improve access, engage the handbrake, then jack up the front of the vehicle and place it on axle stands.
2. On the K7M engine, remove the air filter assembly as described in Chapter Power systems, release.
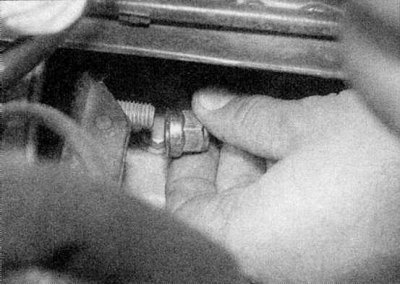
3. Working in the engine compartment, on the lower left side of the engine, remove the nuts from the bolts securing the rear support bracket to the transmission (refer to accompanying illustration).
4. Using a winch or jack and a block of wood, slightly raise the engine.
5. Remove the bolts and separate the bracket from the transmission.

6. Turn away bolts and remove a support from a stretcher (refer to accompanying illustration).
7. Install a new support, acting in the reverse order of removal, tighten the bolts given in Specifications effort.