
Vehicles with a 113 hp petrol engine. and with diesel engine
1. Unscrew the bolts securing the cylinder head cover and remove it together with the gasket (see illustration).
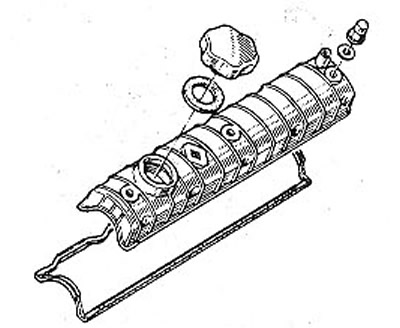
7.1 Unscrew the bolts of the cylinder head cover and remove it together with the gasket
2. Turn the crankshaft and set the No. 1 cylinder piston to TDC.
Attention! After that, the position of the crankshaft must not be changed.
3. Loosen the tension of the toothed belt and remove it only from the camshaft gear.
4. Stop the camshaft gear with a 10 mm socket, and then unscrew the mounting bolt and remove the gear (see illustration). If necessary, knock the gear off the shaft with light blows from a rubber mallet.
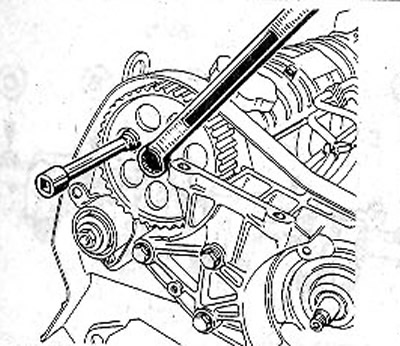
7.4 Stop the camshaft gear with a 10 mm socket, and then unscrew the mounting bolt and remove the gear
5. Remove the key that secures the gear to the camshaft.
6. Vehicles with a diesel engine. Remove the vacuum pump.
7. Mark the position and sequence of all camshaft bearing caps (see illustration).
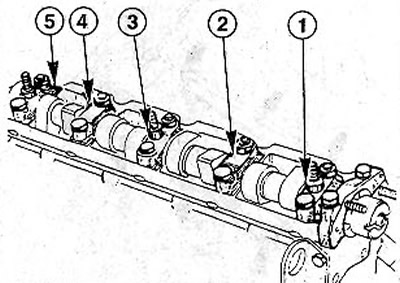
7.7 Mark the position and sequence of all camshaft bearing caps
8. Remove covers 5, 1 and 3 first, then remove covers 2 and 4 in a criss-cross pattern. (see illustration 7.7).
9. Remove the camshaft.
Attention! If it is necessary to remove the poppet pushers, they should be marked so that they can be installed in their original places during assembly (see illustration).
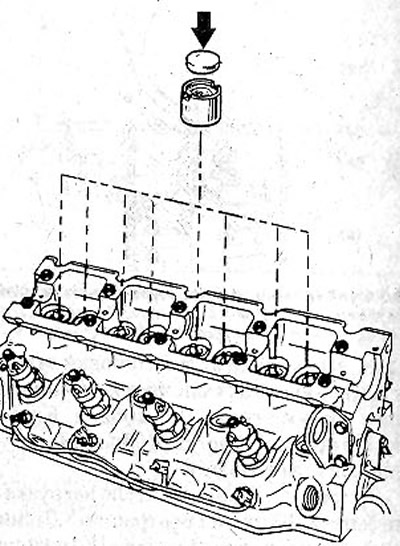
7.9 Mark the poppets before removal
Installation
10. Check in the workshop, if necessary, the axial runout of the camshaft.
11. Install a new camshaft oil seal, having previously lubricated its sealing ledge and outer edge with a small amount of oil.
12. Replace the poppets if they were removed. Lubricate the tappets with a thin layer of oil and do not skew during installation.
Attention! Replacement of poppet pushers in places is not allowed.
13. Lubricate the camshaft with engine oil and install in the cylinder head.
Attention! In this case, the cams of cylinder No. 1 should be turned up. Cylinder number 1 is located near the flywheel.
14. Make sure that the centering pins of the bearing caps are in place. Replace them if necessary (see bottom arrow in illustration).
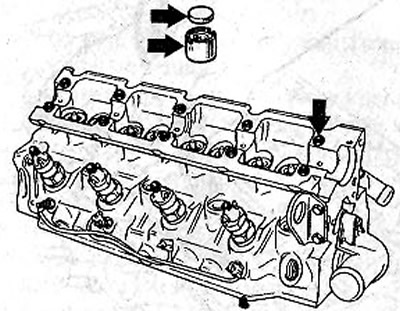
7.14 Check that the centering pins of the bearing caps are in place. Replace them if necessary (see bottom arrow)
15. Put the camshaft bearing caps in their places, guided by the marks applied before removal.
Attention! On the shaded areas of the bearing caps 1 and 5, put a little sealant, for example, CAF 4/60 THIXO from RENAULT or CURIL (see illustration).
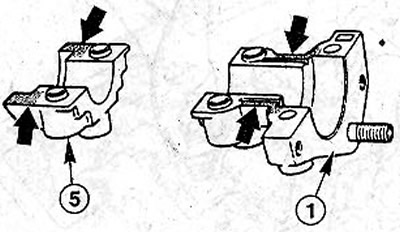
7.15 On the shaded areas of the bearing caps 1 and 5, put a little sealant, for example, CAF4 / 60THIXO from RENAULT or CURIL
16. Lubricate the threads of the bearing cap bolts with a small amount of sealant to prevent oil from escaping through the bolt threads. Loctite Frenetanch can be used for this.
17. Tighten the bearing cap bolts with a torque wrench. The tightening torque depends on the thread diameter. Bolts with a diameter of: mm are tightened with a force of 10 Nm, and bolts with a diameter of 8 mm are tightened with 20 Nm.
18. Insert the locking key into the groove on the camshaft, put on the toothed belt gear and secure it with a bolt with a tightening torque of 50 Nm, holding the gear from turning with a pin or punch.
19. Lay on a gear wheel of a camshaft a gear belt.
Attention! Before doing this, make sure that the crankshaft is in the same position. For diesel engines, it is also necessary to look at the position of the injection pump.
20. Tighten the toothed belt.
21. Cars with a diesel engine. Reinstall the vacuum pump, see relevant chapter.
22. Check up backlashes of valves if it is necessary, see the corresponding chapter.
23. Reinstall the cylinder head cover together with the gasket and carefully tighten the mounting bolts with a force of 10 Nm. If the cylinder head cover gasket has become porous or flattened, replace it with a new one.
24. Reinstall the toothed belt guard.