
Removing
1. Remove the cylinder head.
2. Unscrew the cylinder head cover (see illustration).
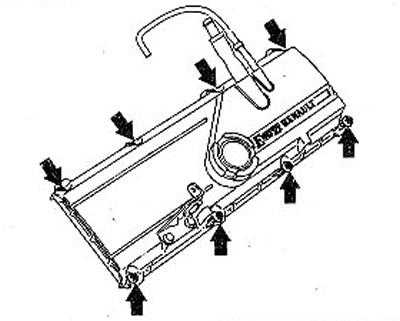
9.2 Unscrew the cylinder head cover
Attention! During the subsequent installation of the valve drive parts, they should be installed in their original places. To prevent the parts from mixing, they must be placed on a special shelf, which is recommended to be made separately.
3. Remove rocker. Before removing, mark the position of the mounting bolts in order to install them in their original places during assembly. The B bolts are solid and painted yellow, while the B bolts are black and hollow and are oil passages (see illustration).
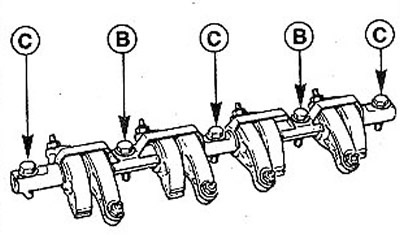
9.3 Bolts B are solid and painted yellow, while bolts B are black and hollow and are oil passages
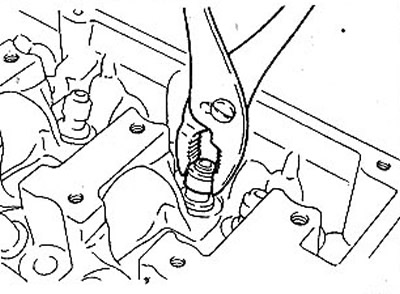
4. Remove valve springs. For this purpose, workshops use the FACOM U43L tool (see illustration). You can also use regular pliers to remove the valve springs. In this case, crackers are removed, and with them the valves with springs.
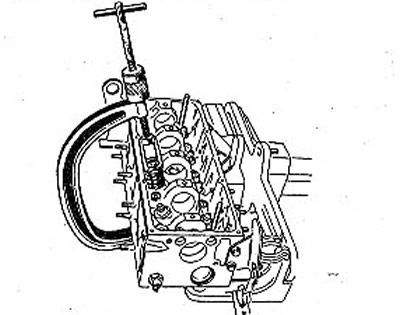
9.4 Remove the valve springs. For this purpose, workshops use the FACOM U43L tool
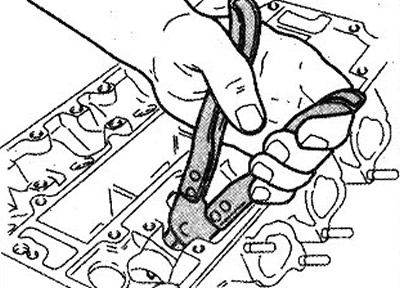
5. Compress the spring and remove the crackers. Then remove the upper valve spring seat and the valve spring itself (see illustration).
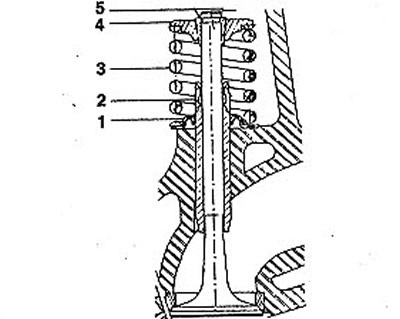
9.5 Compress the spring and remove the crackers: 1 - lower support cup of the valve spring; 2 - oil scraper cap; 3 - valve spring; 4 - upper support cup of the valve spring; 5 - crackers
6. Remove the valve.
7. Remove the oil scraper ring (see illustration).
9.7 Remove the oil seal
8. 1.9-/2.0 liter engines. Remove valve stem seals using special pliers, e.g. HAZET 791-2 (see illustration).
9.8 Remove the valve stem seals using special pliers, eg HAZET 791-2. 1.9-/2.0 liter engines
9. Remove lower valve spring seat
Installation
10. Lubricate the valve stems with a thin layer of oil and install each valve in its original place. When installing new valves, lap them in place with grinding paste.
11. Clean all parts, and lubricate their friction points with engine oil.
12. Paste the valve stems 2 in the places where the crackers are installed with smooth adhesive tape to avoid damaging them when installing the oil seals 1 (see illustration). After installing the caps, remove the adhesive tape.
9.12 Paste the valve stems 2 in the places where the crackers are installed with smooth adhesive tape to avoid damaging them when installing the valve stem seals 1
13. Be sure to replace the old oil seals with new ones. New slinger caps should be installed using an 11 mm tubular wrench (1.4-/1.6-liter petrol engines E7J/K7M) or 12 mm (2.0 liter petrol engines and 1.9 liter diesel engines),ranNervus (see illustration).
9.13 New slinger seals should be installed with an 11 mm tubular wrench (1.4-/1.6 liter petrol engines E7J/K7M) or 12 mm (2.0 liter petrol engines and 1.9 liter diesel engines), type Nervus
14. Replace valves.
15. Place the lower spring seat on the valves.
16. Put the springs and upper support cups on the valves.
17. Compress the valve springs with pliers and insert the crackers so that they lock into the grooves on the valve stems. The intake and exhaust valve stems are the same.
18. Replace the rocker and screw in both yellow bolts B, and then three black bolts C and tighten them with a force of 25 Nm (see illustration).
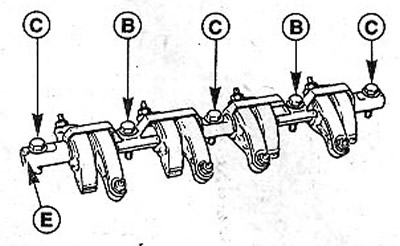
9.18 Replace the rocker and screw in both yellow bolts B and then the three black bolts C and tighten them to 25 Nm
19. Be convinced that adjusting bolts of a yoke adjoin to cores of valves.
Attention! Please note that the rocker should only be installed in one position. The end of the rocker arm, marked with the letter E, must face the toothed belt.
20. Replace the cylinder head gasket and install the cylinder head.
21. Adjust the valve clearance.
Only vehicles with a 113 hp petrol engine. and diesel engines
22. Remove the camshaft.
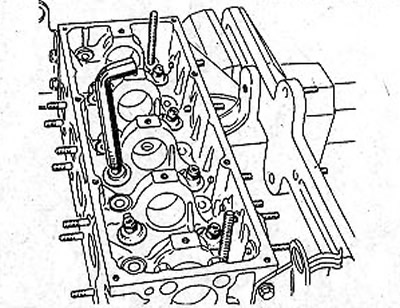
23. Designate poppet pushers and remove them (see illustration).
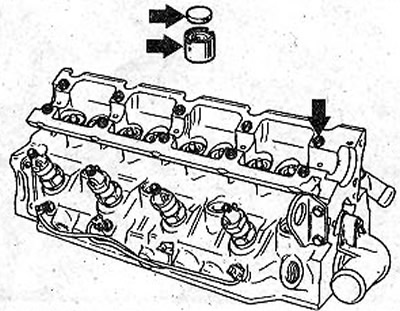
9.23 Mark the poppets and remove them
24. After installing the valves, put the poppet pushers in their original places, guided by the marked marks, and lay the appropriate shims. Before this, lubricate the hole for the pushers in the cylinder head, pushers inside and out, as well as shims on both sides, lubricate with engine oil.
25. Reinstall the camshaft.
Only vehicles with a 150 hp petrol engine.
26. Remove the hydraulic poppets with a rubber suction cup from the holes in the cylinder head.
Attention! Place the removed hydraulic poppets upside down so that no oil flows out of them.
After installing the valves, lubricate the hydraulic tappets with engine oil and insert into place in the cylinder head.
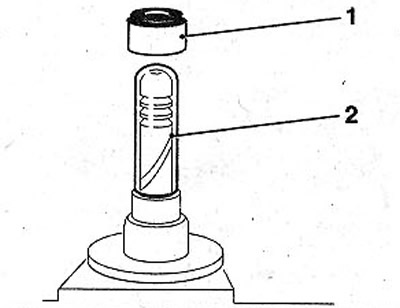
Attention! If oil has leaked from the hydraulic poppet, be sure to fill it with engine oil before installing it. To do this, lower the pusher into a container with clean engine oil (see illustration).
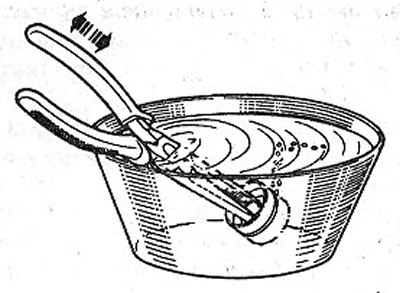
9.26 Lower the tappet into a container of clean engine oil
27. Install the pusher with the hole up using pliers and slide the pusher from side to side several times in the oil container. This will help to remove the air accumulated in the pusher.