English Русский
Български
Беларускі
Український
Српски
Hrvatski
Română
Polski
Slovenský
Magyar
Bookmark Contacts Articles Sitemap
Company vehicles Peugeot Company vehicles Opel Company vehicles Skoda Company vehicles Land Rover Company vehicles Mitsubishi Company vehicles Volkswagen Company vehicles Honda
RenaultBook.ru


Duster   Fluence   Kangoo   Laguna   Logan   Megane   Sandero   Scenic   Symbol   Clio   Other
Logan 1 (2004-2012, petrol) Logan 2 (2012-2020)

Checking the wheels (Renault Logan 1)

  • Main
  • Logan
  • Logan 1 (2004-2012, petrol)
  • General information
  • Daily maintenance
  • Checking the wheels
0
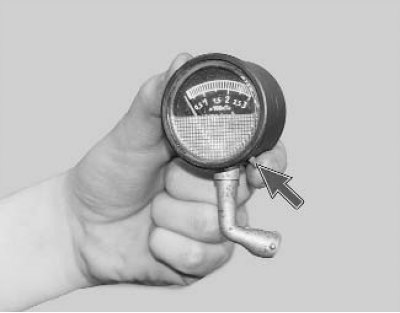
You will need: a pressure gauge, a pump, and a caliper.

Note: Check the air pressure in your tires periodically (Table 4.2). High or low pressure leads to premature tire wear, and the vehicle's handling and stability deteriorate.

Note: Check the air pressure in your tires periodically (Table 4.2). High or low pressure leads to…


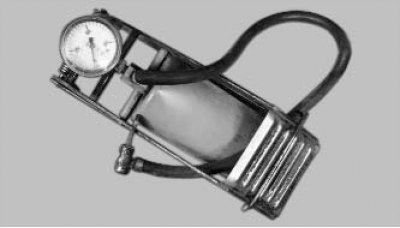
We recommend using a foot pump with a built-in pressure gauge.
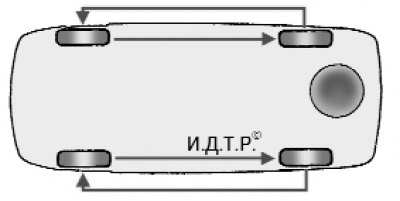
4.1. Wheel rotation diagram

4.1. Wheel rotation diagram


To ensure that the tires wear evenly, rotate the wheels every 15,000 km as shown in Figure 4.1.

In addition, balance the wheels and check the front wheel alignment angles every 15,000 km. To do this, contact a specialized workshop.

Table 4.2. Tire air pressure*, kPa



Table 4.2. Tire air pressure*, kPa

* The pressure indicated is for cold tires. If it is not possible to measure the pressure when the tires are cold, add 20–30 kPa to the values given in the table.


Warning! All wheel repair work should be carried out in specialized workshops. Check that the wheel is balanced after repair. Using tires with worn treads can lead to an accident.

Warning! All wheel repair work should be carried out in specialized workshops. Check that the wheel…


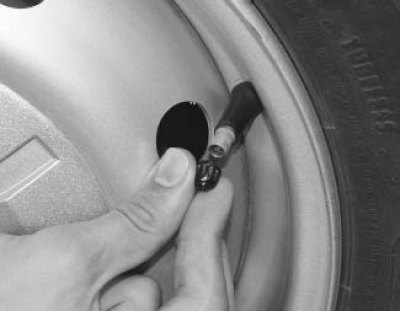
1. Unscrew the cap from the valve.

1. Unscrew the cap from the valve.


2. Check the air pressure in the tire. To do this, reset the pressure gauge readings to zero by pressing the special button on the pressure gauge body...
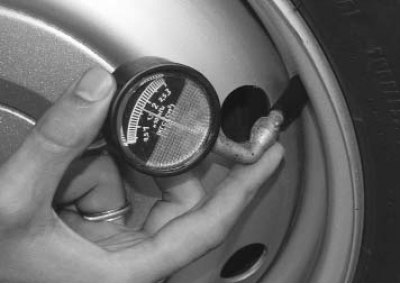
2. Check the air pressure in the tire. To do this, reset the pressure gauge readings to zero by…


3. ...connect the pressure gauge to the valve and press the valve with the tip of the pressure gauge.
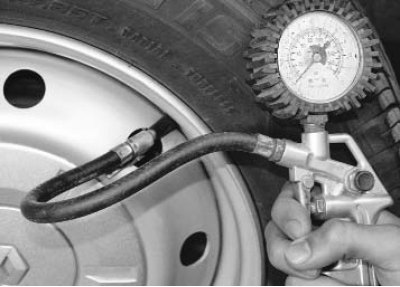


3. ...connect the pressure gauge to the valve and press the valve with the tip of the pressure…


4. If the pressure is less than required, connect the hose tip to the valve and pump air, monitoring the pressure on the pressure gauge.
4. If the pressure is less than required, connect the hose tip to the valve and pump air,…


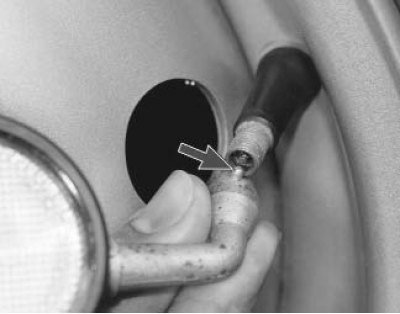
5. If the pressure is higher than required, press the special protrusion of the pressure gauge on the valve tip and release air from the tire. Measure the pressure with the pressure gauge. Repeat these operations until the pressure reaches the norm.
5. If the pressure is higher than required, press the special protrusion of the pressure gauge on…


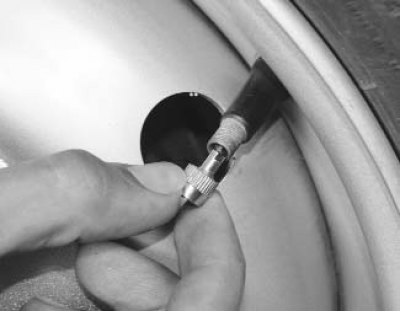
6. If you notice that the air pressure in your tires is constantly dropping, try tightening the valve core more tightly using the cap and key.
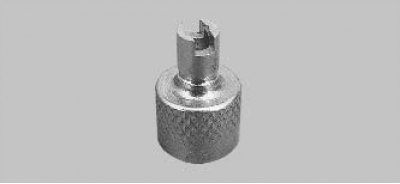


6. If you notice that the air pressure in your tires is constantly dropping, try tightening the…


Note: This is what the protective cap looks like with the key for tightening the valve core.


Caution! To avoid contamination of the valve stems, do not operate the vehicle without protective caps. If the caps have been lost, be sure to install new ones.


7. To check the valve for leaks, wet the valve opening. If bubbles of escaping air appear...
7. To check the valve for leaks, wet the valve opening. If bubbles of escaping air appear...


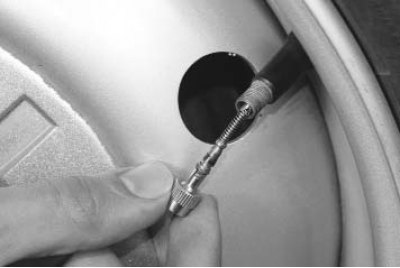
8. ...replace the valve core by unscrewing the faulty one using a cap with a key.
8. ...replace the valve core by unscrewing the faulty one using a cap with a key.


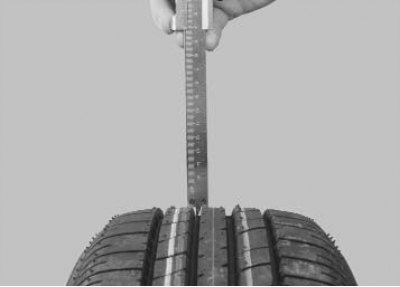
9. Measure the remaining tread depth with a caliper. If the tread depth is 1.6 mm or less, replace the tire.


9. Measure the remaining tread depth with a caliper. If the tread depth is 1.6 mm or less, replace…


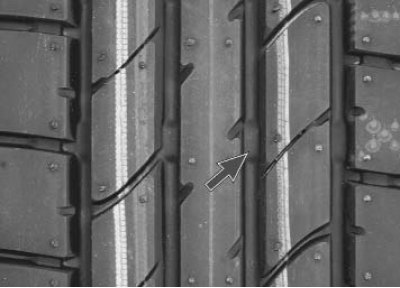
10. If you don't have a caliper at hand, you can check the tread depth visually using the tire wear indicators in the form of solid transverse stripes on the tread.
10. If you don't have a caliper at hand, you can check the tread depth visually using the tire wear…


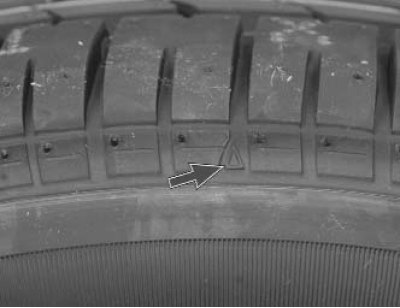
Note: The locations of the indicators are marked on the sidewall of the tire with a triangle or the letters "TWI" (depending on which designation system the tire manufacturer uses).

Note: The locations of the indicators are marked on the sidewall of the tire with a triangle or the…


(Information is located on the website Renaultbook.ru)

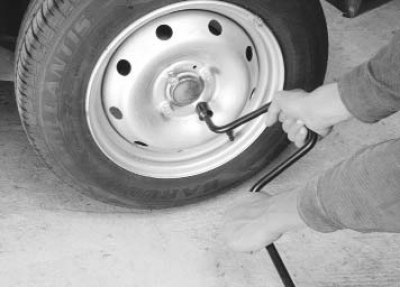
11. Check the tightness of the wheel mounting bolts and, if necessary, tighten them to a torque of 105 N·m.
This article is available on: russian, bulgarian, belarusian, ukrainian, serbian, croatian, romanian, polish, slovak, hungarian
Article has been reviewed by editor: Podkrepilov Maxim
Share with friends:
Previous
Logan 1: Daily maintenance
Next

Safety rules for maintenance
Vehicle maintenance regulations
Checking the level and adding oil to the lubrication system
Checking the level and adding coolant
Checking the level and adding brake fluid to the master cylinder…
Checking the level and adding working fluid to the power steering…
Checking the level and adding fluid to the washer reservoir
Other articles on other Renault models

➽ Checking the wheels Renault Sandero 1 (2007-2012, petrol)
➽ Checking oil pressure Renault Duster 1 (2009-2017)
➽ Wheels and tires Renault Fluence 1 (2009-2020, petrol)
➽ Checking the engine oil level Renault Kangoo 1 (1997-2007)
➽ Checking, draining and filling oil Renault Laguna 2 (2001-2007)
Link to this article in different formats
Reviews and comments of visitors
No comments yet


Add two numbers 10 + 12


Logan 2 (2012-2020) 
  • General information
  • Faults en route
  • Daily checks
  • Governing bodies
  • Maintenance
  • Power unit
  • Petrol engines 1.2 l
  • Petrol engines 1.6 l
  • Diesel engines 1.5 l
  • Cooling system
  • Lubrication system
  • Power and control system
  • Intake and exhaust system
  • Engine electrical equipment
  • Transmission
  • Clutch
  • Car gearbox
  • Drive shafts
  • Chassis, running gear
  • Suspension and wheels
  • Brake system
  • Steering
  • Body and interior
  • Exterior (external elements)
  • Interior (internal elements)
  • Safety system
  • Heating and air conditioning
  • Electrical equipment
  • Equipment and devices
  • Wiring diagrams (sedan)
  • Wiring diagrams (wagon)
Logan 1 (2004-2012, petrol) 
  • General information
  • Vehicle device
  • User manual
  • Faults en route
  • Daily maintenance
  • First maintenance
  • Second maintenance
  • Driver tips
  • Power unit
  • Engine repair
  • Lubrication system
  • Cooling system
  • Power and exhaust system
  • Transmission
  • Clutch
  • Car gearbox
  • Drive shafts
  • Chassis, running gear
  • Front suspension
  • Rear suspension
  • Steering
  • Brake system
  • Wheels and tires
  • Body and interior
  • Exterior (external elements)
  • Interior (internal elements)
  • Doors, locks and windows
  • Body Care
  • Electrical equipment
  • Equipment and devices
  • Headlights and lighting
  • Power devices
  • Electrical circuits
RenaultBook.ru © 2018–2026 | Mobile version | News and articles | Sitemap: EN BG BY UA RS HR RO PL SK HU | Administration | Site search | Bookmark
Duster 1 (2009-2017) | Fluence 1 (2009-2020, petrol) | Kangoo 1 (1997-2007) | Laguna 2 (2001-2007) | Logan 1 (2004-2012, petrol) | Logan 2 (2012-2020) | Megane 1 (1995-2002) | Megan 2 (2002-2009, petrol) | Sandero 1 (2007-2012, petrol) | Scenic 1 (1996-2003) | Symbol 1 (1999-2008, petrol) | Symbol 2 (2008-2013, petrol) | Renault 19 (1988-1996) | Espace I and II (1984-1996) | Espace III (1996-2002) | Clio 1 (1990-1998) |
We want your visit to be comfortable 😌 and use cookies 🍪 to do so.