
English Русский
Български
Беларускі
Український
Српски
Hrvatski
Română
Polski
Slovenský
Magyar
Bookmark Contacts Articles Sitemap
Company vehicles Peugeot Company vehicles Opel Company vehicles Skoda Company vehicles Land Rover Company vehicles Mitsubishi Company vehicles Volkswagen Company vehicles Honda
RenaultBook.ru


Duster   Fluence   Kangoo   Laguna   Logan   Megane   Sandero   Scenic   Symbol   Clio   Other
Megane 1 (1995-2002) Megan 2 (2002-2009, petrol)

Removal and installation the throttle body (Renault Megane 1)

  • Main
  • Megane
  • Megane 1 (1995-2002)
  • Power unit
  • Fuel system (petrol)
  • Removal and installation the throttle body
0
Contents: Removal 🠛 Installation 🠛

Removal


1. Depressurize the fuel system, refer to Section Fuel injection system leak.

2. Disconnect the ground cable from the battery (refer to Chapter Engine electrical equipment for Scenic models), and then proceed as described in the relevant subsection.

Warning: If the car radio in your car is coded, make sure you know the code before disconnecting the battery.


E7J Engines


1. Remove the air cleaner assembly as described in Section Removal and installation - air filter assembly and air intake ducts.
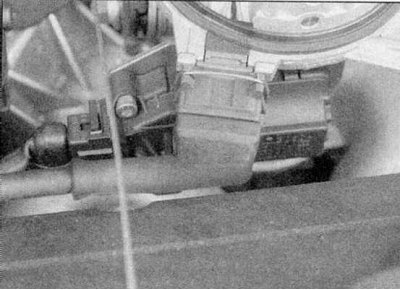
1. Remove the air cleaner assembly as described in Section Removal and installation - air filter…


2a. Tighten the mounting bolts and disconnect the electrical connectors from the air temperature sensor.
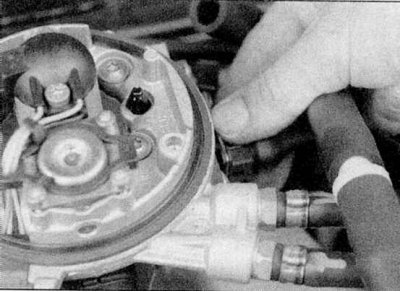
2a. Tighten the mounting bolts and disconnect the electrical connectors from the air temperature…


2b. Tighten the mounting bolts and disconnect the wiring connectors from the throttle potentiometer and idle speed control stepper motor (refer to the illustrations).


3. Loosen the clamps and disconnect the fuel feed and return hoses to prevent leakage and entry of dust and dirt.

4. Disconnect the gas pedal cable from the throttle sector.

5. Loosen and remove the bolts securing the throttle body assembly to the intake manifold, then remove the assembly and gasket. Discard the gasket - it must be replaced.

K7M and F3R engines


1. Unscrew the reinforcing rod between the domes of the front suspension struts.

2. Remove the air duct between the throttle body and the air filter, refer to Section Removal and installation - air filter assembly and air intake ducts.

3. Disconnect the accelerator pedal cable from the throttle sector. On models with automatic transmission, also disconnect the reverse shift sensor wiring. Disconnect the accelerator pedal cable from the bracket, but make sure the adjustment bracket remains in the groove.
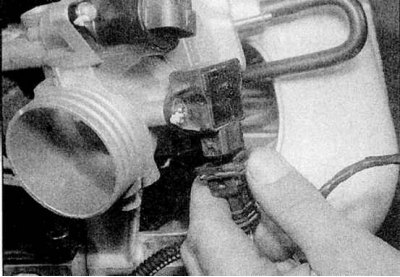
3. Disconnect the accelerator pedal cable from the throttle sector. On models with automatic…


4a. Disconnect the wiring from the throttle potentiometer.
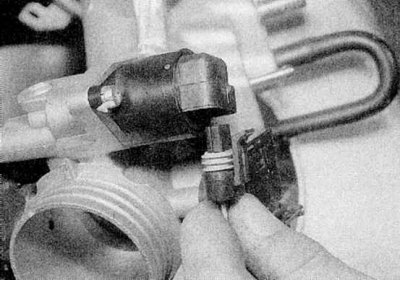
4a. Disconnect the wiring from the throttle potentiometer.


4b. Disconnect the wiring from the idle speed control stepper motor (refer to the illustrations). Where applicable, disconnect the EGR valve vacuum hose.


5. On F3R models, release and remove the plastic harness cover from the top of the intake manifold. Disconnect the wiring connectors from the injectors and move the harness away from the throttle body.

6. Loosen the mounting bolts and remove the throttle body from the intake manifold. Discard the gasket - it must be replaced.

All engines


1. Remove the air cleaner assembly as described in Section Removal and installation - air filter assembly and air intake ducts.

2. Compress the retaining clips and disconnect the electrical connectors from the air temperature sensor, throttle potentiometer and idle speed control stepper motor.

3. Disconnect the gas pedal cable from the throttle sector.

4. Disconnect the crankcase ventilation hose from the throttle body.

5. Using suitable clamps, pinch the two coolant hoses at the throttle body, then disconnect them. Alternatively, drain the coolant system as described in Chapter Maintenance.

6. Remove the bolts securing the throttle body assembly to the intake manifold, then remove the assembly along with the gasket. Discard the gasket - it must be replaced.

Installation


E7J Engines


1. Clean the mating surfaces of the throttle body and intake manifold.

2. Install in reverse order, use a new gasket and check the adjustment of the accelerator pedal cable, refer to Section Removal, installation and adjusting the gas pedal cable. On models with F7R engine, if necessary, fill the cooling system as described in Chapter Maintenance.
This article is available on: russian, bulgarian, belarusian, ukrainian, serbian, croatian, romanian, polish, slovak, hungarian
Article has been reviewed by editor: Fedoseev Denis
Share with friends:
Previous
Megane 1: Fuel system (petrol)
Next

Removal and installation the fuel tank
Removal and installation the fuel level sensor
Removal and installation the fuel pump
Fuel injection system leak
General description of the fuel injection system
Checking and adjusting the fuel injection system
Removal and installation of central injection system components
Removal and installation of distributed injection system components
Removal and installation the intake manifold and exhaust manifold
Removal and installation of the exhaust system
Other articles on other Renault models

➽ Throttle body Renault Duster 1 (2009-2017)
➽ Throttle body Renault Fluence 1 (2009-2020, petrol)
➽ Throttle body Renault Kangoo 1 (1997-2007)
➽ Throttle body with servo drive (K4M and F4P) Renault Laguna 2 (2001-2007)
➽ Throttle body — removal and installation Renault Scenic 1 (1996-2003)
Link to this article in different formats
Reviews and comments of visitors
No comments yet


Add two numbers 16 + 39


Megan 2 (2002-2009, petrol) 
  • User manual
  • Introduction to manual
  • Controls and instruments
  • Salon equipment
  • Operation and driving
  • Maintenance and care
  • Power unit
  • Engine repair
  • Fuel system
  • Injection system
  • Intake and exhaust system
  • Starting and charging system
  • Cooling system
  • Decreased toxicity
  • Transmission
  • Clutch
  • Mechanical gearbox
  • Automatic gearbox
  • Wheel drive mechanism
  • Chassis, running gear
  • Suspension and wheels
  • Steering
  • Brake system
  • Body and interior
  • Exterior (external elements)
  • Interior (internal elements)
  • Doors, locks and windows
  • Heating and air conditioning
  • Electrical equipment
  • Equipment and devices
  • Headlights and lighting
  • Electrical circuits
Megane 1 (1995-2002) 
  • General information
  • User manual
  • Maintenance
  • Power unit
  • Petrol engines 1.4/1.6 l
  • Petrol engines 2.0 l
  • Diesel engines 1.9 l
  • Overhaul of engines
  • Cooling system
  • Fuel system (petrol)
  • Fuel system (diesel)
  • Decreased toxicity
  • Charge and launch systems
  • Ignition system (petrol)
  • Preheat system (diesel)
  • Transmission
  • Clutch
  • Mechanical gearbox
  • Automatic gearbox
  • Drive shafts
  • Chassis, running gear
  • Brake system
  • Car suspension
  • Steering
  • Body and interior
  • Exterior (external elements)
  • Interior (internal elements)
  • Doors, locks and windows
  • Electrical equipment
  • Equipment and devices
  • Electrical circuits
RenaultBook.ru © 2018–2026 | Mobile version | News and articles | Sitemap: EN BG BY UA RS HR RO PL SK HU | Administration | Site search | Bookmark
Duster 1 (2009-2017) | Fluence 1 (2009-2020, petrol) | Kangoo 1 (1997-2007) | Laguna 2 (2001-2007) | Logan 1 (2004-2012, petrol) | Logan 2 (2012-2020) | Megane 1 (1995-2002) | Megan 2 (2002-2009, petrol) | Sandero 1 (2007-2012, petrol) | Scenic 1 (1996-2003) | Symbol 1 (1999-2008, petrol) | Symbol 2 (2008-2013, petrol) | Renault 19 (1988-1996) | Espace I and II (1984-1996) | Espace III (1996-2002) | Clio 1 (1990-1998) |
We want your visit to be comfortable 😌 and use cookies 🍪 to do so.