
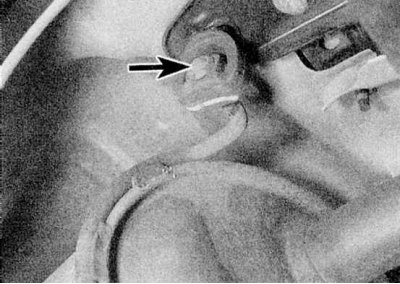
The rear part of the exhaust system is located above the rear suspension, however, the intermediate part and the rear pipe with a silencer can be replaced separately by sawing them off with a hacksaw. The entire length of the system is supported by rubber hangers (refer to accompanying illustration).
To remove part of the system, first jack up the front or rear of the vehicle and place it on axle stands. Alternatively, park the vehicle in a viewing hole. Where available, remove the lower engine cover.
Downpipe and catalytic converter
Removing
1. Trace the wiring from the Lambda sensor and disconnect it. Release the electrical wiring from the mounting brackets so that the sensor can be removed along with the downpipe.
2. Where applicable, unscrew downpipe from bracket on transmission.
3. Loosen and remove the nuts/bolts securing the downpipe flange connection to the manifold and remove the gasket. On models with an F7R engine, the factory bolts must be replaced with studs and special nuts.
4. Loosen and remove the clamp or flange bolts and disconnect the downpipe and catalytic converter from the rear. Remove the pipe from under the car.
Intermediate pipe and silencer
Removing
1. Open and remove the clamp or flange bolts securing the downpipe and catalytic converter to the rear. Remove gasket where applicable.
2. If a factory back is installed, it must be sawn off. The cut should be approximately halfway between the center and rear muffler.
3. Having cut off a pipe, get an intermediate part of final system from under the car.
Rear pipe and muffler
Removing
1. If a factory back is fitted, follow the instructions above.
2. If the rear part consists of two halves, unscrew the bolt and pull the clamping sleeve forward to the intermediate part, then unhook the rubber hangers and remove the rear pipe and muffler from under the car.
Thermal insulation boards
Removing
1. Heat shields are attached to the bottom with various nuts and bolts. Each shield can only be removed after the corresponding part of the exhaust system has been removed. If the shield is removed to gain access to the component behind it, then in some cases it is sufficient to unscrew the fixing nuts and/or bolts and simply lower the shield without disturbing the exhaust system. Otherwise, remove part of the exhaust system as described earlier.
Installation
1. Install each part in the reverse order of removal, paying attention to the following:
- a) Make sure that all traces of corrosion have been removed from the flanges, replace all necessary gaskets.
- b) Inspect rubber hangers for signs of damage or contamination, replace as needed.
- With) When connecting the intermediate and rear parts, apply a small amount of exhaust system sealing paste (Renault recommends Sodicam) on the inner surface of the sleeve to ensure a tight seal. Position the sleeve clamp bolt vertically on the left side of the pipe, and tighten the nut securely until you hear a click; clamping bolt has a groove to ensure proper tightening of the nut (tightening torque approx. 25 Nm)
- d) Before tightening the exhaust system connections, make sure that all rubber hangers are correctly positioned and that there is an acceptable gap between the bottom of the vehicle and the exhaust system.