
English Русский
Български
Беларускі
Український
Српски
Hrvatski
Română
Polski
Slovenský
Magyar
Bookmark Contacts Articles Sitemap
Company vehicles Peugeot Company vehicles Opel Company vehicles Skoda Company vehicles Land Rover Company vehicles Mitsubishi Company vehicles Volkswagen Company vehicles Honda
RenaultBook.ru


Duster   Fluence   Kangoo   Laguna   Logan   Megane   Sandero   Scenic   Symbol   Clio   Other
Megane 1 (1995-2002) Megan 2 (2002-2009, petrol)

Removal and installation the fuel pump (Renault Megane 1)

  • Main
  • Megane
  • Megane 1 (1995-2002)
  • Power unit
  • Fuel system (petrol)
  • Removal and installation the fuel pump
0
Contents: Removal 🠛 Installation 🠛
Warning! Before you begin, see the warning in Section Fuel and exhaust system - petrol models.


Removal


1. Disconnect the ground cable from the battery (refer to Chapter Engine electrical equipment for Scenic models).

Warning: If the car radio in your car is coded, make sure you know the code before disconnecting the battery.


[Original publication on the website RenaultBook.ru]

2. Remove the rear seat or rear seat cushion as described in Chapter Body, to gain access to the fuel lift pump cover.
2. Remove the rear seat or rear seat cushion as described in Chapter Body, to gain access to the…


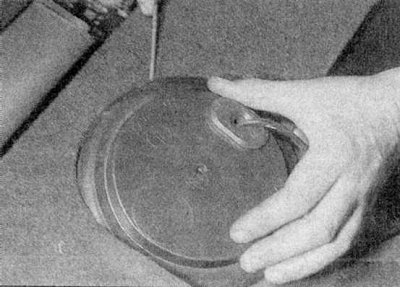
3. Using a screwdriver, remove the plastic cover from the floor to gain access to the pump (refer to the accompanying illustration).
3. Using a screwdriver, remove the plastic cover from the floor to gain access to the pump (refer…


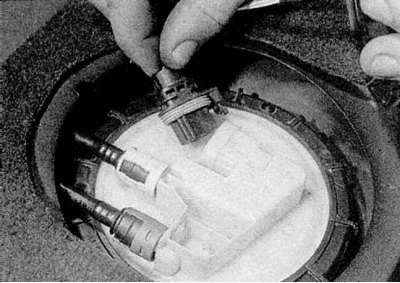
4. Disconnect the electrical connector from the fuel pump and secure the connector to the vehicle body to prevent it from falling behind the tank (refer to the accompanying illustration).


4. Disconnect the electrical connector from the fuel pump and secure the connector to the vehicle…


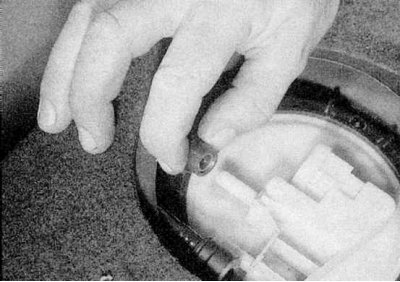
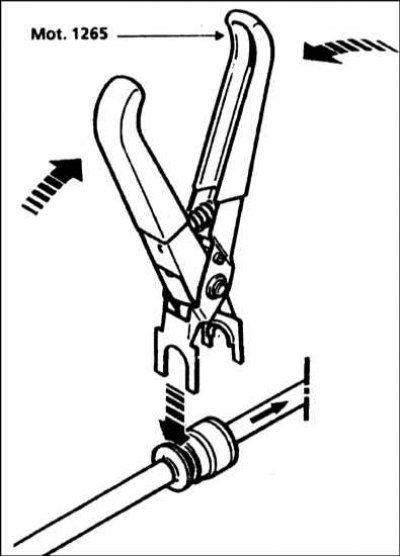
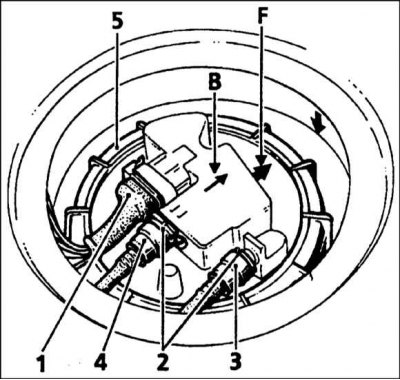
5a. Mark the location of the fuel hoses; the green hose on the left side is the fuel supply to the engine compartment, and the red hose next to the wiring connector is the fuel return (arrows on the top of the pump indicate the direction of flow). Disconnect both hoses from the top of the pump, then plug the ends of the hoses to minimize fuel loss (refer to the illustrations).
5a. Mark the location of the fuel hoses; the green hose on the left side is the fuel supply to the…


5b. Renault special tool for disconnecting the fuel hose.
5b. Renault special tool for disconnecting the fuel hose.


5c. Fuel lift pump connections:


  • 1 - Electrical wiring connector;
  • 2 - Fixators;
  • 3 — Fuel supply hose;
  • 4 — Fuel return hose;
  • 5 - Blocking ring;
  • B - Arrow indicates fuel return flow;
  • F — The arrow must point backwards and be parallel to the longitudinal axis of the vehicle.
F — The arrow must point backwards and be parallel to the longitudinal axis of the vehicle.


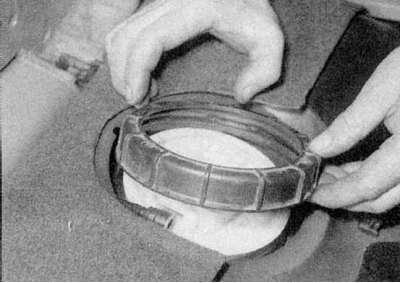
6a. Unscrew the locking ring and remove it from the tank (refer to the illustrations).
6a. Unscrew the locking ring and remove it from the tank (refer to the illustrations).


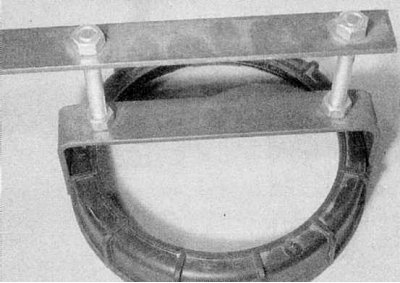
6b. Homemade tool for removing the fuel pump locking ring.
6b. Homemade tool for removing the fuel pump locking ring.


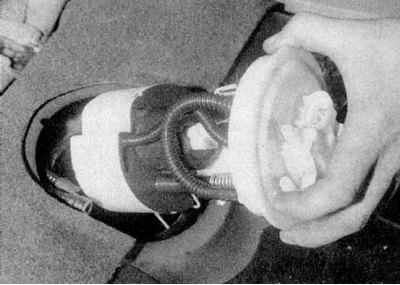
7a. Carefully remove the fuel lift pump assembly from the fuel tank, being careful not to damage the fuel gauge sender arm.
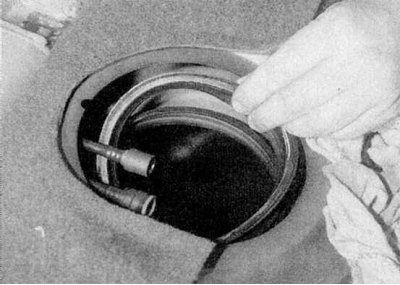


7a. Carefully remove the fuel lift pump assembly from the fuel tank, being careful not to damage…


7b. Remove the rubber sealing ring and check its condition. If the sealing ring is not suitable for use, purchase a new one (refer to the illustrations).

8. Please note that the fuel gauge/prime pump sensor is only available as a complete assembly - individual components are not sold.

Installation


1. Make sure the fuel pump inlet pipe filter is not clogged. Install the sealing ring on the top of the fuel tank.

2. Carefully insert the pump assembly into the fuel tank.

3. Align the arrow on the fuel pump cover with the arrow on the fuel tank (the arrow should point towards the rear of the car), then install the locking ring. Tighten the locking ring securely, then recheck that the marks on the pump cover and tank remain aligned.

Note: If a suitable socket is available, tighten the locking ring to the torque shown Specifications effort.


4. Connect the feed and return hoses to the top of the fuel lift pump.

5. Connect the electrical wiring

6. Connect the battery and start the engine. Check the fuel pump feed and return hoses for leaks.

7. Install the plastic cover into the rear seat cushion.
This article is available on: russian, bulgarian, belarusian, ukrainian, serbian, croatian, romanian, polish, slovak, hungarian
Article has been reviewed by editor: Fedoseev Denis
Share with friends:
Previous
Megane 1: Fuel system (petrol)
Next

Fuel injection system leak
General description of the fuel injection system
General description and use of unleaded gasoline
Removal and installation the accelerator pedal
Removal, installation and adjusting the gas pedal cable
Removal and installation the fuel level sensor
Removal and installation the fuel tank
Removal and installation the throttle body
Checking and adjusting the fuel injection system
Removal and installation of central injection system components
Other articles on other Renault models

➽ Manual fuel priming pump (K9K engine) Renault Duster 1 (2009-2017)
➽ Checking the electric fuel pump (all engines) Renault Fluence 1 (2009-2020, petrol)
➽ Fuel pump assembly with fuel level sensor Renault Kangoo 1 (1997-2007)
➽ Checking fuel pump performance (all engines) Renault Laguna 2 (2001-2007)
➽ Scheme 2. Fuel pump and fuel level sensor Renault Logan 1 (2004-2012, petrol)
Link to this article in different formats
Reviews and comments of visitors
No comments yet


Add two numbers 47 + 25


Megan 2 (2002-2009, petrol) 
  • User manual
  • Introduction to manual
  • Controls and instruments
  • Salon equipment
  • Operation and driving
  • Maintenance and care
  • Power unit
  • Engine repair
  • Fuel system
  • Injection system
  • Intake and exhaust system
  • Starting and charging system
  • Cooling system
  • Decreased toxicity
  • Transmission
  • Clutch
  • Mechanical gearbox
  • Automatic gearbox
  • Wheel drive mechanism
  • Chassis, running gear
  • Suspension and wheels
  • Steering
  • Brake system
  • Body and interior
  • Exterior (external elements)
  • Interior (internal elements)
  • Doors, locks and windows
  • Heating and air conditioning
  • Electrical equipment
  • Equipment and devices
  • Headlights and lighting
  • Electrical circuits
Megane 1 (1995-2002) 
  • General information
  • User manual
  • Maintenance
  • Power unit
  • Petrol engines 1.4/1.6 l
  • Petrol engines 2.0 l
  • Diesel engines 1.9 l
  • Overhaul of engines
  • Cooling system
  • Fuel system (petrol)
  • Fuel system (diesel)
  • Decreased toxicity
  • Charge and launch systems
  • Ignition system (petrol)
  • Preheat system (diesel)
  • Transmission
  • Clutch
  • Mechanical gearbox
  • Automatic gearbox
  • Drive shafts
  • Chassis, running gear
  • Brake system
  • Car suspension
  • Steering
  • Body and interior
  • Exterior (external elements)
  • Interior (internal elements)
  • Doors, locks and windows
  • Electrical equipment
  • Equipment and devices
  • Electrical circuits
RenaultBook.ru © 2018–2026 | Mobile version | News and articles | Sitemap: EN BG BY UA RS HR RO PL SK HU | Administration | Site search | Bookmark
Duster 1 (2009-2017) | Fluence 1 (2009-2020, petrol) | Kangoo 1 (1997-2007) | Laguna 2 (2001-2007) | Logan 1 (2004-2012, petrol) | Logan 2 (2012-2020) | Megane 1 (1995-2002) | Megan 2 (2002-2009, petrol) | Sandero 1 (2007-2012, petrol) | Scenic 1 (1996-2003) | Symbol 1 (1999-2008, petrol) | Symbol 2 (2008-2013, petrol) | Renault 19 (1988-1996) | Espace I and II (1984-1996) | Espace III (1996-2002) | Clio 1 (1990-1998) |
We want your visit to be comfortable 😌 and use cookies 🍪 to do so.