
Note. Installation will require new axle mounting bolt nuts.
Removing
1. Block the front wheels and select reverse (or position "R"). Jack up the rear of the car and place it on axle stands. Remove both rear wheels.
2. Acting as described in Chapter Brake system, do the following:
- a) Separate both handbrake cables from the lever and release them from the mountings on the bottom so that they can be removed with the axle.
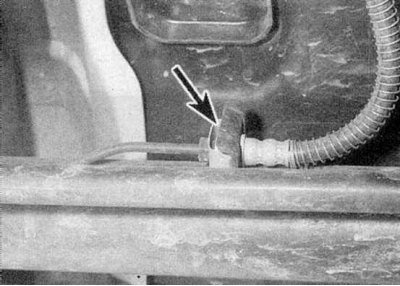
- b) Trace the brake pipes / hoses from the working brake cylinders to their couplings near the rear axle (refer to accompanying illustration). Disconnect both couplings and cap the ends of the hoses/tubes to minimize fluid loss and prevent dirt from entering the system. Remove the mounting bracket and release the hose from the mounting bracket. On models with ABS, before disconnecting the hose coupling, disconnect the ground cable from the battery (see Warnings in Chapter Brake system).
- With) Detach the pressure control valve link from the rear axle.
- d) On models with ABS, trace the wiring from the rear wheel sensors and disconnect its connectors. Release the electrical wiring from all brackets so that it can be removed with the axle.
3. Support the axle with a jack.
4. Loosen and remove the lower mounting bolts of both shock absorbers.
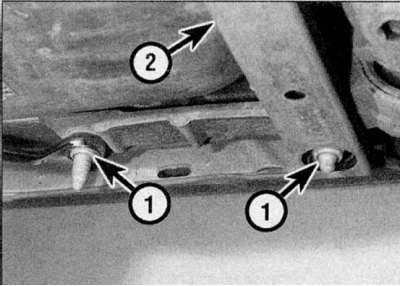
5. Unscrew the nuts securing the axle and remove the tie bar mounted on the axle mounting bolts (refer to accompanying illustration). Throw away the nuts - they must be replaced.
6. Make sure that the cables/wiring associated with the axle are released from all brackets and ties, then carefully lower the axle assembly and remove it from under the vehicle.
7. To access the axle mounting bolts, remove the rear seat cushion and sill trim panel (contact the head Body). Loosen the mounting plate bolt, then remove the plate and remove the mounting bolts.
Installation
1. Where necessary, install the axle mounting bolts and the mounting plate into position. Tighten the plate bolt securely.
2. Bring the axle assembly into position by aligning its holes with the mounting bolts. Install the tie plate over the axle bolts, then screw new mounting nuts onto them and tighten from the instructions given in Specifications effort. Where necessary, install trim panel and seat cushion.
3. Apply a small amount of multipurpose grease to the lower shock absorber mounting bolts (Renault recommends Molykote BR2). Align the shock absorbers with the trailing arms, install the mounting bolts and tighten them by hand.
4. Acting as described in the Chapter Brake system, do the following:
- a) Connect the rear brake lines/hoses and tighten the union nuts to Specifications effort. Attach hoses with clips.
- b) On models with ABS, connect the wheel speed sensor harness connectors and secure the harness with clips.
- With) Connect the handbrake cables and adjust their length.
- d) Attach pressure control valve linkage to operating position.
5. Install the wheels, then lower the vehicle to the ground and tighten the wheel bolts to Specifications effort.
6. Rock the vehicle to adjust the position of the rear axle components, then tighten the lower shock absorber mounting bolts to Specifications effort.
7. Completely pump the brake hydraulic system (contact the head Brake system).