
Warning! You will need a suitable spring extractor, preferably adjustable. Attempting to disassemble the rack without this tool will result in component damage or personal injury.
Note. You will need a new top plate nut. The following procedures apply to all models except the 2.0L 16-Valve Coupe, where the A-pillars are attached differently; the components are in the following order: top mounting plate, bearing, top bearing, cover and spring.
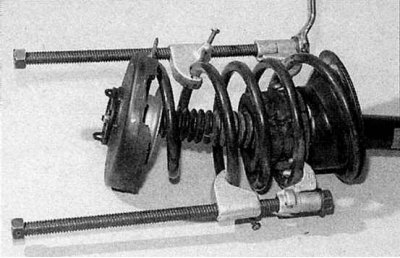
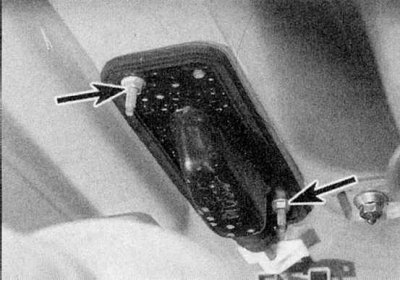
1. Scrape outside dirt off the rack, then tighten it vertically in a vise. Install the puller and compress the spring so that its pressure is removed from the supports (refer to accompanying illustration).
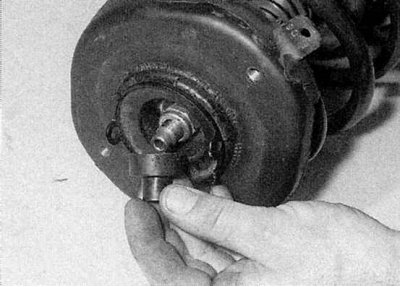
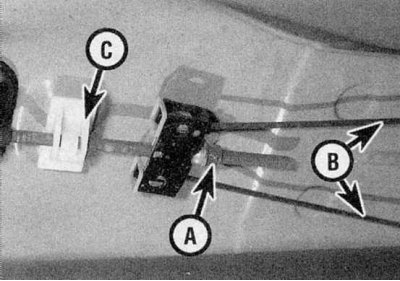
2. Remove the cap from the top mount plate nut, then loosen the nut by blocking the shock piston rod with a suitable Allen wrench (refer to accompanying illustration).
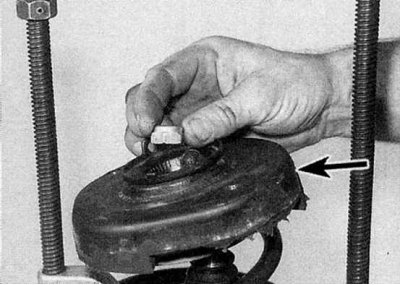
3. Loosen the nut and remove the top mounting plate (refer to accompanying illustration).
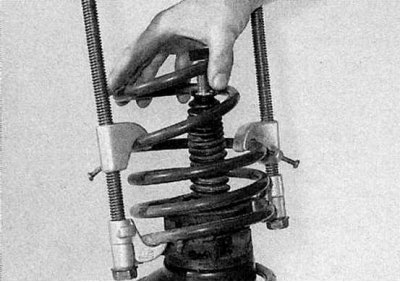
4a. Remove the spring.
4b. Remove its bottom support.
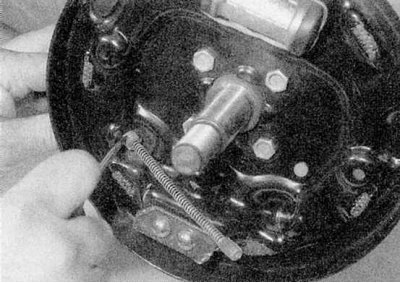
4c. Remove the bearing, then remove the dust cover from the piston (refer to illustrations).
5. Inspect the shock absorber for leaks. Check piston rod for pitting and shock body for damage. Hold the shock absorber upright and check its operation by moving the piston several times, first a full stroke and then a shorter distance (50-100 mm). In both cases, the resistance should be even and the same. If the piston jerks or the damper springs changed during the test, or if there is any visible sign of wear, replace the strut.
6. Inspect other components for damage, paying particular attention to the bearing, and replace as needed.
7. Install the dust cover on the piston.
8. Install the bearing and then the lower spring seat assembly.
9. Install the spring so that its former end rests against the stop on the support.
10. Install the top mounting plate, aligning its stopper with the end of the spring, then screw on the new nut (refer to accompanying illustration). Block the shock piston rod and tighten the mounting plate nut to Specifications effort. Install the cap on the nut.
11. Slowly release and remove the spring extractor, being careful not to dislodge the ends of the spring.
12. Establish a rack on the car as it is described in Section Removal and installation of a forward rack.