
1. Drain the liquid from the cooling system (see «Coolant replacement»).
2. Remove the bottom overlay of the panel of devices (see «Removal and installation of the instrument panel»).
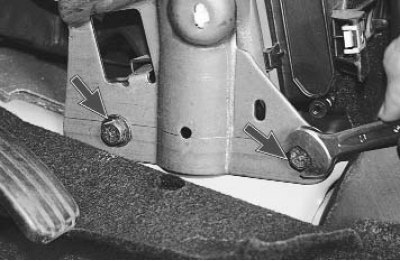
3. Under the instrument panel, bend the edge of the floor mat and unscrew the two bolts securing the panel cross member reinforcement to the body base.
4. Remove the instrument cluster (see «Removal and installation of a combination of devices»).
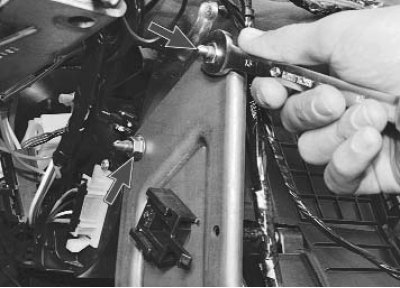
5. Through the window in the instrument panel, which opened after removing the instrument cluster, unscrew the two nuts of the upper fastening of the amplifier of the instrument panel cross member...
Note. For clarity, the operation is shown with the instrument panel removed.
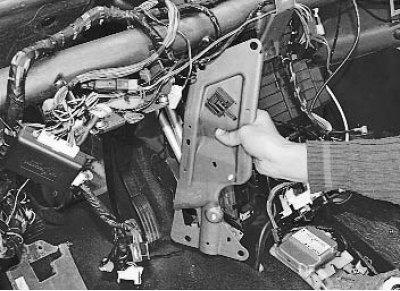
6.... and remove the amplifier.
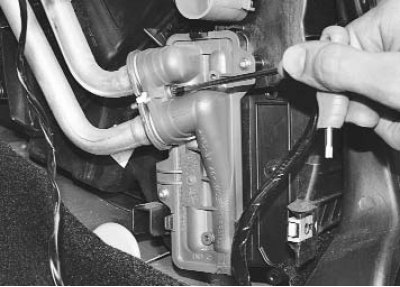
7. Remove the screw securing the pressure plate of the pipes for supplying liquid to the heater radiator and draining from it...
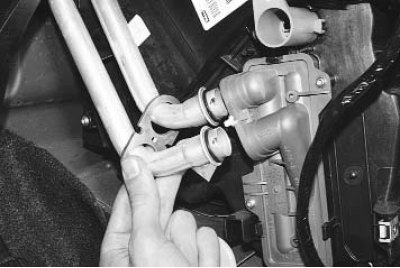
8.... and disconnect the pipes from the radiator.
Note. Remaining coolant may leak from the pipes and radiator. Take steps to prevent it from contaminating the floor mat.
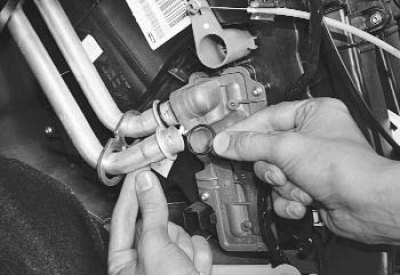
Please note that the pipes are sealed with rubber rings. Replace severely compressed, hardened or torn rings.
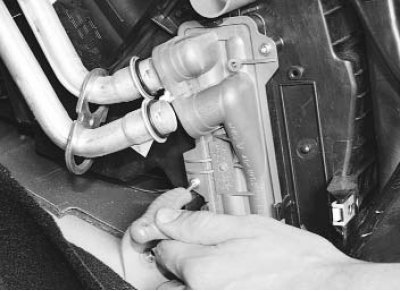
9. Remove the screw securing the radiator to the heater housing, wring out one plastic radiator retainer on top and two on the sides below...
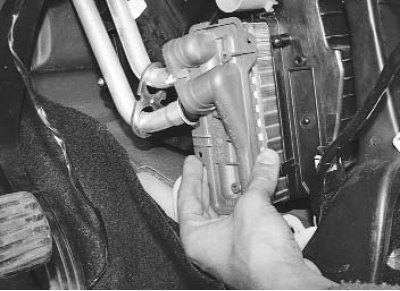
10....then remove the heatsink from the case.
11. Establish a heater radiator and all removed details in an order, the return to removal.
12. Fill in coolant.