
Note. There are two ways to set the valve timing.
The first procedure is used to replace all elements, if it is necessary to remove the fastening parts for the exhaust camshaft sprocket and the intake camshaft dephaser.
During this operation, be sure to replace:
- nut of fastening of a gear pulley of a camshaft of final valves;
- a bolt of fastening of a phase regulator of a camshaft of inlet valves;
- sealing collar of the camshaft phase regulator;
- sealing cuff of the phase regulator plug.
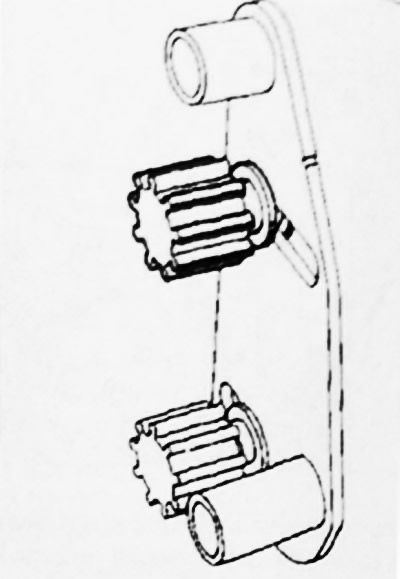
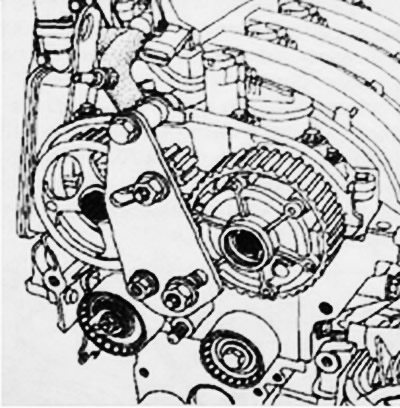
The method of removing the fastening parts of the gear pulley of the exhaust camshaft and the phase regulator of the intake camshaft.
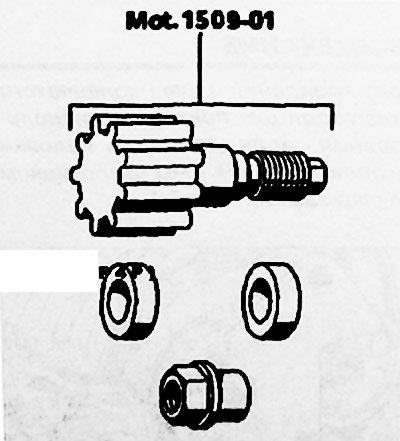
The operation is carried out with tools Mot. 1509 and Mot. 1509-01.
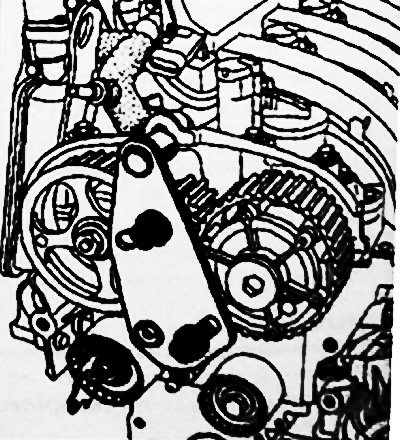
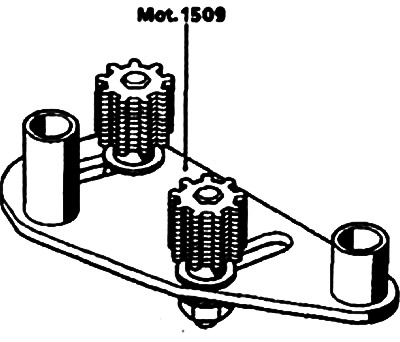 |  |
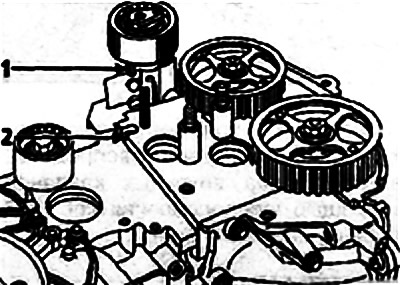
Remove the top gear from the bracket.
Fit spacer 1 of tool Mot. 1509-01 on pin 2.
Tool Mot 1509 as shown in the picture below.
 | 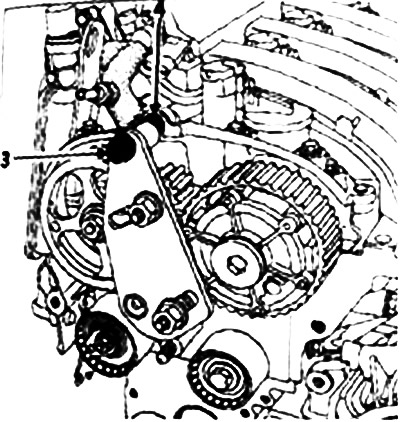 |
Install the top bolt 3 by placing the spacer 4 with tool Mot. 1509-01 between tool and camshaft bearing cap (do not overtighten the bolt).
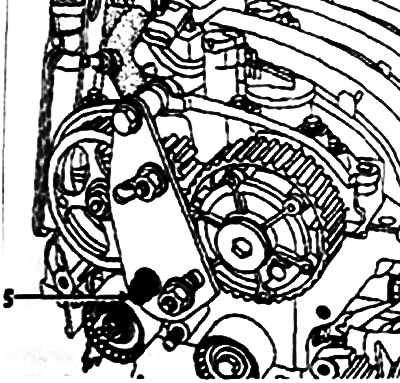
Install collar nut 5 of tool Mot. 1509-01.
Tighten collar nut 6 and bolt 7, then engage tool Mot. 1509 with camshaft pulleys, tightening nuts 8 to 80 Nm.
 |  |
Remove:
- plug of the inlet camshaft dephaser with a 14 mm hex wrench;
- exhaust camshaft pulley fastening nut, intake camshaft dephaser sprinkling bolt.
Replacement of a sealing cuff of the phase regulator of a camshaft of inlet valves
Press in the inlet camshaft dephaser seal using tool Mot. 1517 using the old bolt 2.
Note. To use tool Mot. 1517 it is necessary to expand the hole for a diameter of 13 mm.
Setting the valve timing
Attention! Be sure to degrease the end of the crankshaft (from the timing drive). bore and bearing surfaces of the crankshaft sprocket. support surfaces of the accessory drive pulley. as well as the ends of the exhaust camshaft and the intake camshaft dephaser. to avoid slipping of the toothed belt between the crankshaft sprocket, exhaust camshaft pulley and intake camshaft dephaser, which can lead to engine failure.
Note. To facilitate the installation of grooves in a horizontal position. install the toothed pulley and the phase regulator. tighten the old pulley nut and the old phase regulator bolt to a torque of no more than 1.5 Nm. Make sure. that the pistons are at half stroke (to avoid contact between valves and pistons).
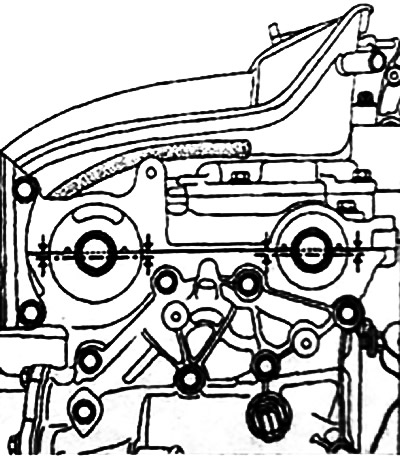
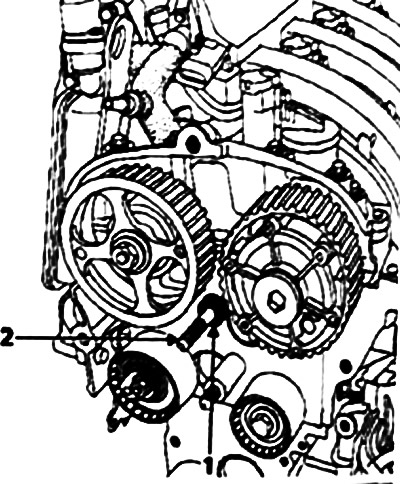
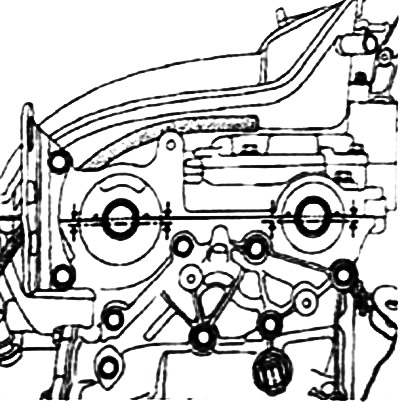
Position the camshaft grooves horizontally as shown in the figure (if necessary, turn the camshafts using tool Mot. 799-01).
Check that the gear ring of the inlet camshaft dephaser is securely fixed (crown does not rotate to the left or to the right).
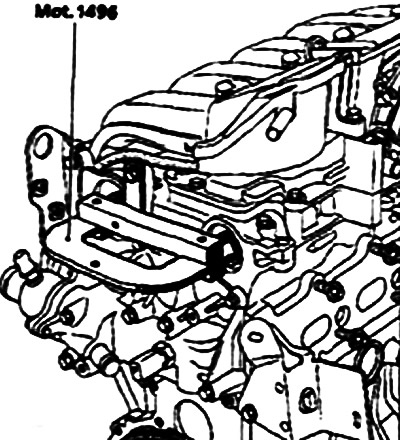
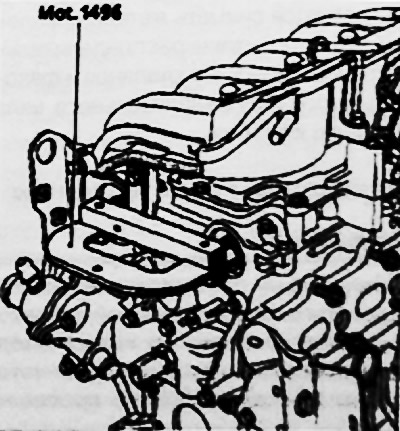
Install tool Mot. 1496 at the ends of the camshafts.
Remove the old toothed pulley fastening nut, the old phase regulator fastening bolt and replace them with new ones (the clearance between the nut or bolt and the camshaft pulleys must be
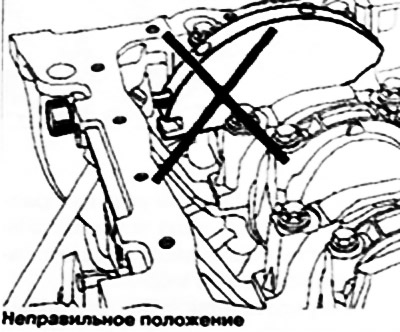
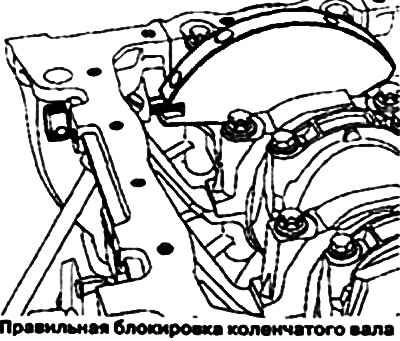
Make sure the crankshaft is locked at top dead center and the lock is in the balance hole (groove 5 of the crankshaft must point upwards).
 |  |
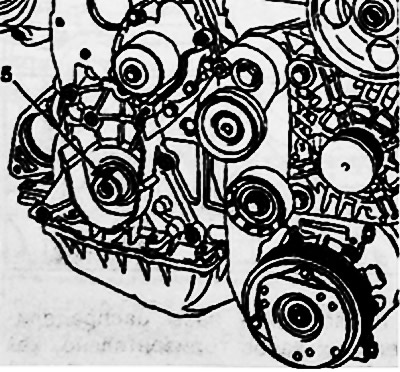
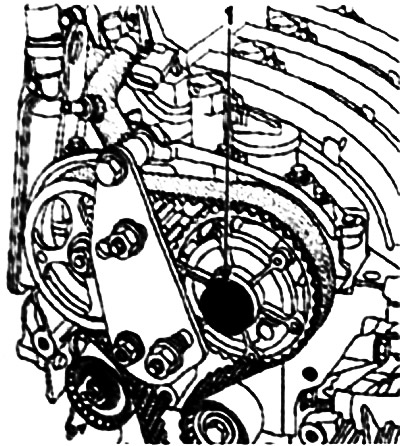
When installing the timing belt, be sure to replace the timing idler and bypass rollers.
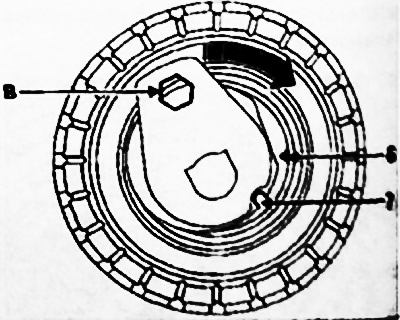
Then make sure that the protrusion 1 of the tension roller correctly enters the groove 2.
Install:
- timing belt;
- bypass roller 3, tightening the fixing bolt with a torque of 45 Nm;
- crankshaft pulley pre-tightening bolt (but tighten the bolt completely, the gap between the bolt and the pulley should be 2-3 mm).
Note. Crankshaft Pulley Sprinkling Bolt for reuse. if the length to the head but exceeds 49.1 mm (otherwise replace the bolt).
But lubricate the new bolt with engine oil. On the other hand, the threads and underside of the head of a reused bolt must always be lubricated with engine oil.
Belt tension
Make sure there is clearance between the nut. bolt and camshaft pulleys has not changed and is 0.5-1 mm.
Note. Do not rotate the tensioner counterclockwise.
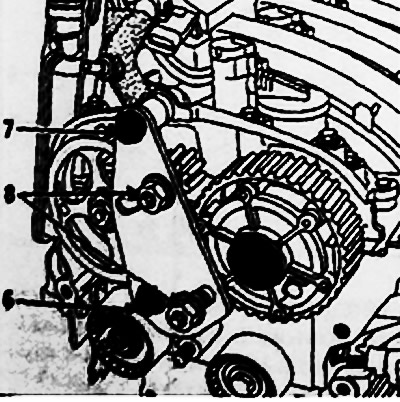
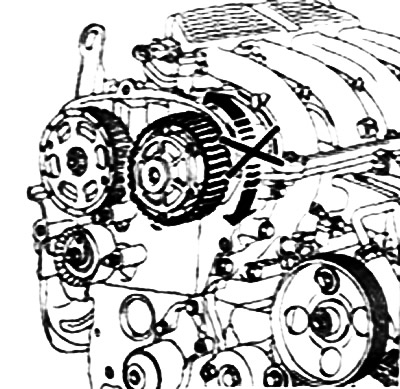
Align marks 6 and 7 on the idler pulley with a 6mm hex wrench inserted in hole B.
Pre-tighten the tensioner axle nut to 7 Nm.
Rotate the timing gear six turns (from the gas distribution mechanism) behind the exhaust camshaft sprocket using tool Mot 799-01.
Note. Make sure that the nut and bolt of the camshaft pulleys do not come into contact with the corresponding pulleys. To do this, press the toothed pulleys against the camshafts from time to time.
Align marks 6 and 7 if necessary by loosening the idler axle nut more than one turn while holding the idler with a 6mm hex wrench. Then finally tighten the nut to 2.8 Nm, Tighten the crankshaft pulley bolt to 2 Nm (while the crankshaft must be locked with a top dead center lock).
Mark with a pencil C Motov camshaft pulleys and camshaft bearing caps.
Remove the top dead center pin.
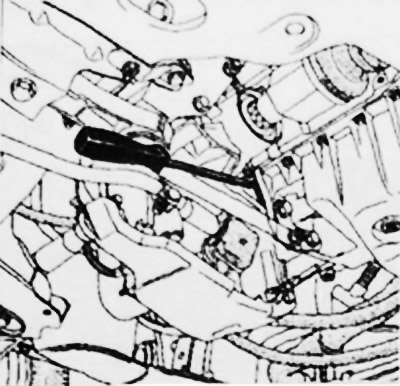
Block the flywheel with a powerful screwdriver, then tighten the crankshaft pulley bolt 115±15°.
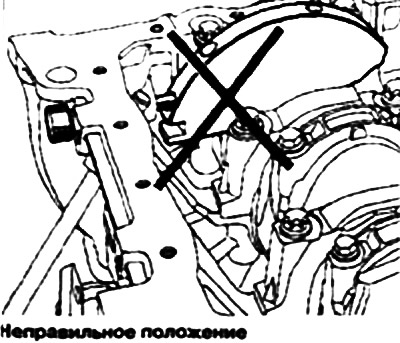 | 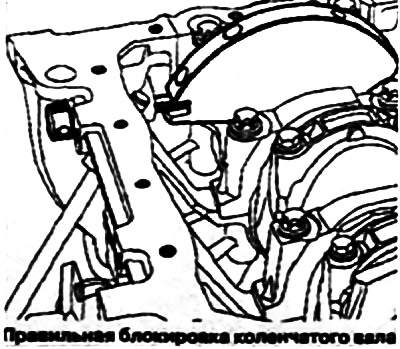 |
Block the crankshaft by first aligning the marks made earlier between the camshaft toothed pulleys and the camshaft bearing cap. These labels must be aligned, as this allows you to make sure that the retainer is in the hole intended for it, and not in the balance hole of the crankshaft.
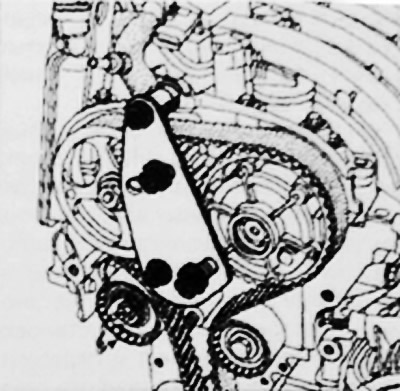
Fit the camshaft pulley locking tool Mot. 1509 equipped with an additional tool Mot. 1509-01.
Follow the same procedure as for removal.
Checking the installation of the valve timing
 |  |
Before checking the installation of the valve timing, make sure that the tension roller marks are aligned.
Install the top dead center clamp (make sure that the previously made marks on the camshaft pulleys are aligned).
Install (without making an effort) tool Mot. 1496 for fixing camshafts (the grooves of the camshafts must be in a horizontal position and offset from the axis down). If the tool cannot be installed, re-install the timing and adjust the tension of the timing belt.
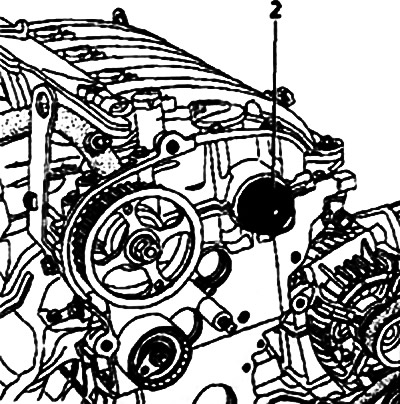
Install plug 1 (with new seal) phase regulator and tighten it to 2.5 Nm.